Budget Decorating: Styling An Ikea Etagere

I regularly receive emails from folks asking about budget decorating, especially how to  take an inexpensive piece of furniture and making it look fabulous. To address those questions, I decided to do a little segment every once in a while on my blog called “Budget Decorating” where I will highlight some projects done on a tight budget.

I have to admit that Ikea was never a place that I have shopped in the past for my clients, but I have found that one or two pieces placed in the context of a well designed room works just as well as a pricier piece.

I myself, have used a couple of their pieces to fill some space and add some function in my new work-in-progress design studio.

The office area (formerly the only bedroom in this old Victorian) is currently set up as a place to sit with my clients and discuss the numbers part of their design projects, review and sign contracts etc, and where I will be doing paperwork. I wanted it to be comfortable, light and airy and a clutter-free zone. I will be showing the finished space in a future blog post, but for now I wanted to focus on how I addressed a dead space that is the walkway to the other rooms in the space.

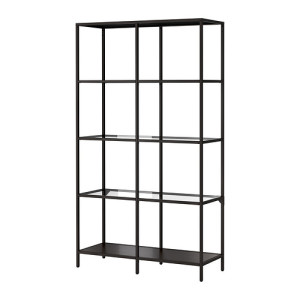
Since I am on a really tight budget I decided to bring in an inexpensive Ikea etagere to fill the area without visually or physically taking up space. I chose the etagere because it was open, with very clean lines and had glass shelves that helped to give it a less obtrusive appearance.

Ikea Vittsjo Shelving

Ikea Vittsjo Shelving

The etagere started out as a box of parts, and I am eternally grateful to my friend Courtney for helping me put it together. He was able to assemble it in about half an hour. The cost for this run of the mill metal shelving was $70.00

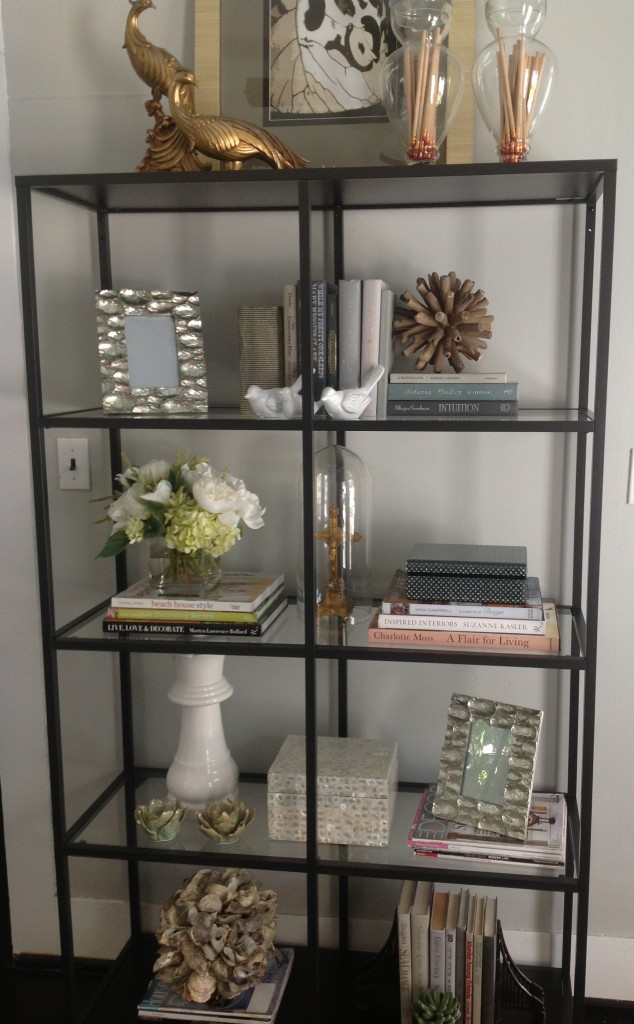
Here’s what it looks like now

After Styling of teh Ikea Vittsjo Shelving

After Styling of teh Ikea Vittsjo Shelving

I now call it an etagere because that sounds a bit more fancy than shelving. :-)

For about $120.00 I was able to solve the issue of the dead space in the walkway with something beautiful and functional. Most of the tcotchkes you see here, are just left overs from long ago projects or things laying around my garage from my recent move. I did purchase the new picture frames (pictures of the kids will be added :-) ) and rosette candle holders from ZGallerie. The etagere provided a great place to display a few of my design books and magazines.

The key to styling a bookcase, etagere or shelving is to mix up the textures, layering, adding various heights and levels, adding softness with florals, keeping the colors fairly consistent or complementary, and using things that have special meaning to you. I displayed a few of my favorite design books & magazines, and my 1920′s peacocks are a favorite treasure – I love peacocks and birds in general :-)

Other items that you can use are baskets or storage boxes on the bottom shelves to add some visual weight and ground the whole unit. I chose not to because I wanted to keep it open and airy.

This etagere can be used in any room of your home really – In a kitchen as extra storage for cook books, wine bottles or dishes. In a bedroom closet as a place for shoes or sweaters. In a game room or kids’ play area for storing games and toys. In a laundry room for storing detergent and cleaning supplies. In a garage to get things up off the floor (if you’re anything like me :-) ), and even in the pantry for storing cereal boxes and canned goods. You can even ”bunch” two or three or more side by side to fill a large wall space and add tons of storage in a room.

Where would you use this Ikea etagere and what are some favorite items you would display? Leave me a comment below

One more thing before I go. If you like Ikea prices but not necessarily the look of some of their pieces, this website has tons of products and ideas that you can use to add some fabulousness to a plain piece. Check out O’Verlays Decorative Fretwork Panels to see what I mean

I hope you have been inspired by my budget decorating! Now go forth and decorate! :-)

Please share this post and contact me here if you have any questions about my design services. You can also connect with me on social media through the same link.

Visit my online store to purchase designer bedding, pillows, rugs and the recently added doggy styles (dog fashion, beds and carriers).

Have a very blessed Monday!

Be Inspired!
Check out the new DOGGY STYLES category on our online store

Check out the new DOGGY STYLES category on our online store


What’s Wrong With This Picture?

What's Wrong With This Picture?


So I am still knee deep in the wonderful world of moving, and boy is it hard work! I guess it’s like everything else in life worth looking forward to….you have to go through the valleys to get to the mountain top!

So no valuable tips or information in my post today….but instead we will be playing a silly little game. Don’t you just love playing games? :-)

But before I get to that, I’d like you to meet Floyd and Everette…….

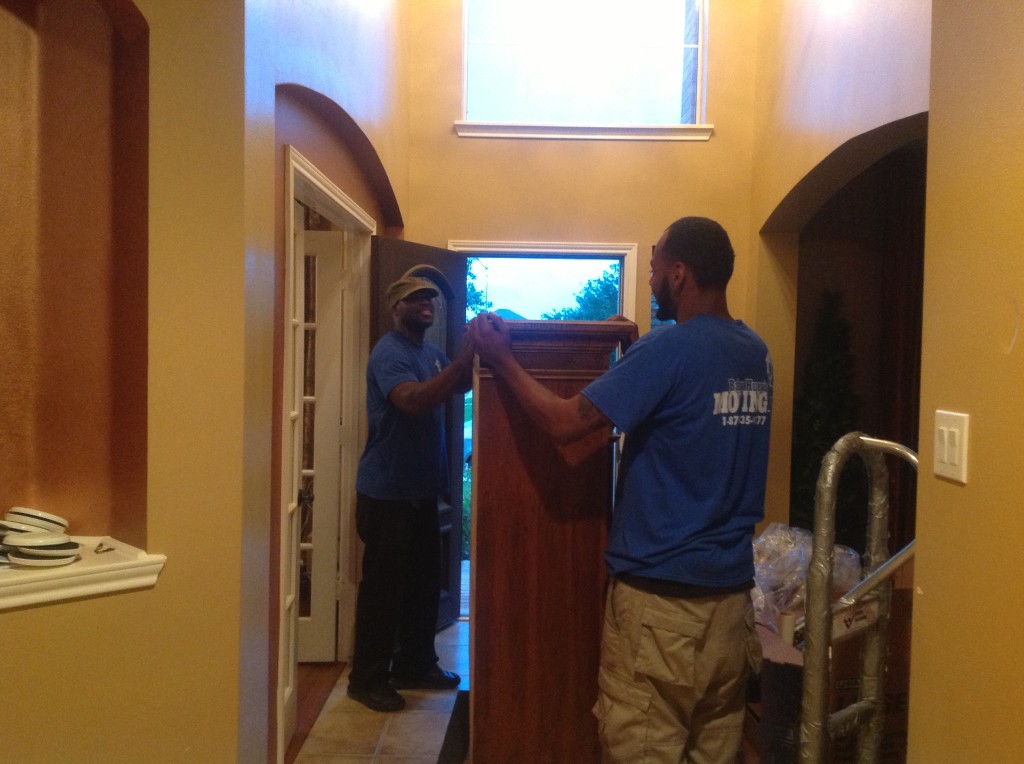
Floyd and Everette - The Strong Men Helping Me Move

Floyd and Everette – The Strong Men Helping Me Move


These are the two very strong, highly efficient and very courteous gentlemen helping me with my move. If you ever need movers, I would highly recommend these guys. There is absolutely nothing wrong with this picture :-)

The first picture above is what my front yard looks like as we speak. The containers have been delivered and ready to be loaded with all my worldly possessions. It is going to take several hours to get it done, but I know it will be done right.

Ok so without further ado, here goes the game.

Look closely at the first picture above and tell me “What’s Wrong With This Picture?”

If you correctly guess what’s wrong with this picture by leaving a comment below, you could win a fabulous prize! :-)

What is the fabulous prize you ask? You’re in for a treat! :-)

But first, there is one more thing you must do before you can win the fabulous prize. You must like both my Facebook pages if you haven’t already done so. Here’s my About.Me profile containing all my contact information and social plugins. From there you can also follow me on Twitter, Pinterest, Google+ and other social media sites (Although not a requirement to win the fabulous prize). Click here to like my No Naked Windows and Casa Vilora Interiors pages.

Ok, back to the fabulous prize!!! Drum Roll please……….. :-)

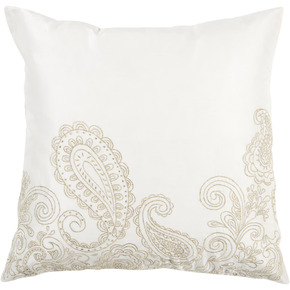
It is this wonderful pair of 18×18 pillows from Surya.

amco603


This gorgeous 100% polyester cover pillow with poly filler has a white background and a metallic gold paisley detail on the bottom half. Perfect as accents for your bedding or in a sofa or pair of occasional chairs.

The winner will be chosen at random and announced in my blog post for Tuesday May 28th. Good luck and have fun guessing “What’s Wrong With This Picture?”

Before I bid you adieu for today, I’d like to take this opportunity to thank the wonderful and brave men and women who so selflessly serve our great nation. We honor and respect the sacrifice you make everyday to protect our freedom. We will always remember the ultimate sacrifice of the fallen.

Please don’t forget to comment and share so others can join in the fun too! :-)

Have a wonderful Memorial Day Weekend!

Be Inspired!

Veronica Solomon

Memorial-Day-Comments_066


A Library As A Family Hang Out

tgif3

Let’s do the TGIF happy dance!! :-)

I am really happy this hectic week is coming to an end. I can put my feet up at least for the weekend until reality hits again on Monday. Don’t get me wrong, I love what I do, but relaxing is great too! :-)

Ok, so here’s another snippet of a room I completed last year.

Library


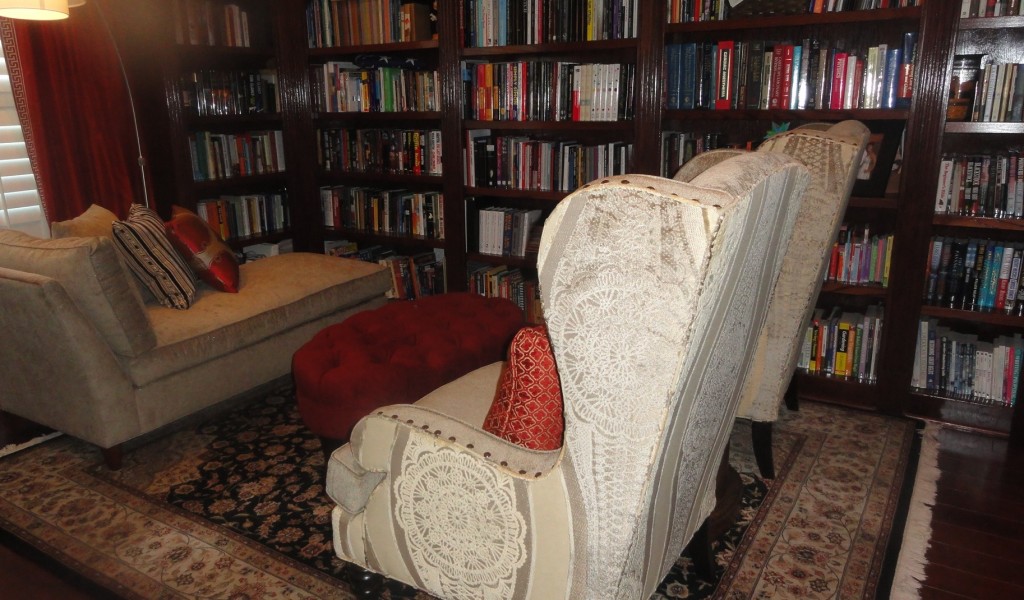
This room is actually a very large library, that is jam packed with books. My client loves books and has them proudly displayed in wall to wall bookshelves throughout the room. This is a really close knit family, and they all hang out in this room, although they have several other family areas in the home (let’s see, there’s mom and dad, 4 at home, one on the way, one in college and two grown up and on their own….I think I’ve got everyone covered :-))

This is the same family I have worked with on multiple projects. When it came time to do this room, their requirements were:

  1. A seating area (she was thinking just two chairs)
  2. Keep all the books!

When styling bookshelves I like to mix books with other objects, but in this instance, I kept the books exactly the way they were in the room….because they do get used.

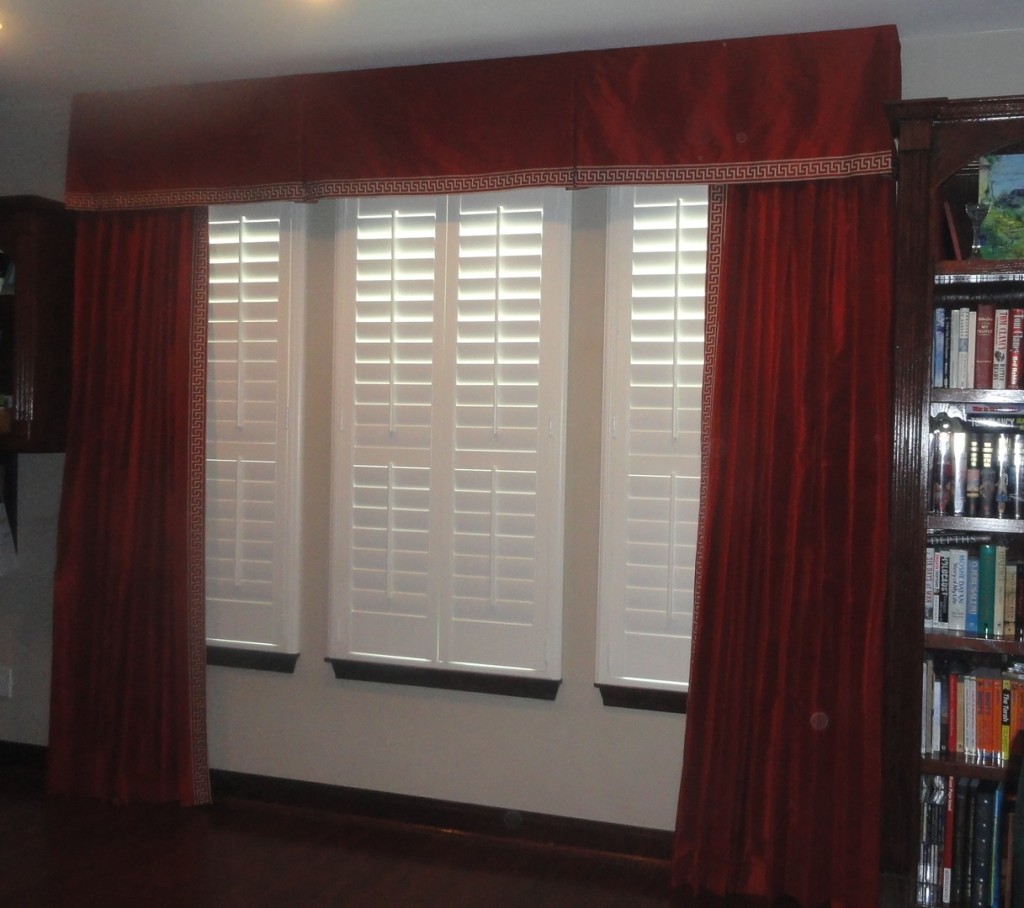
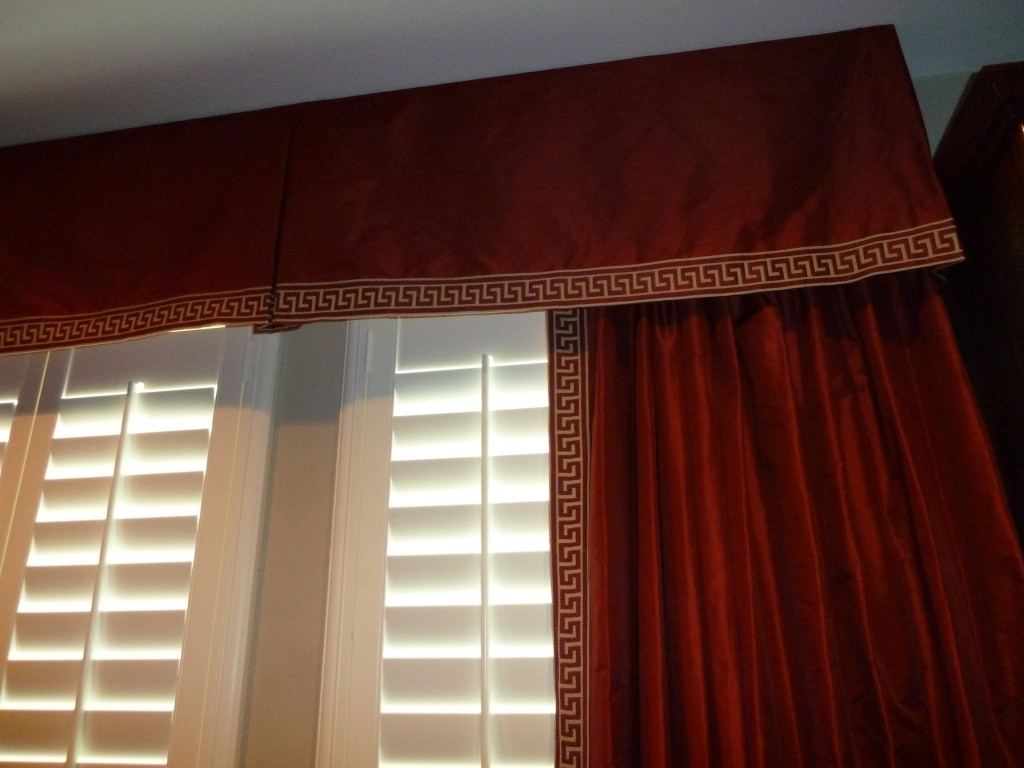
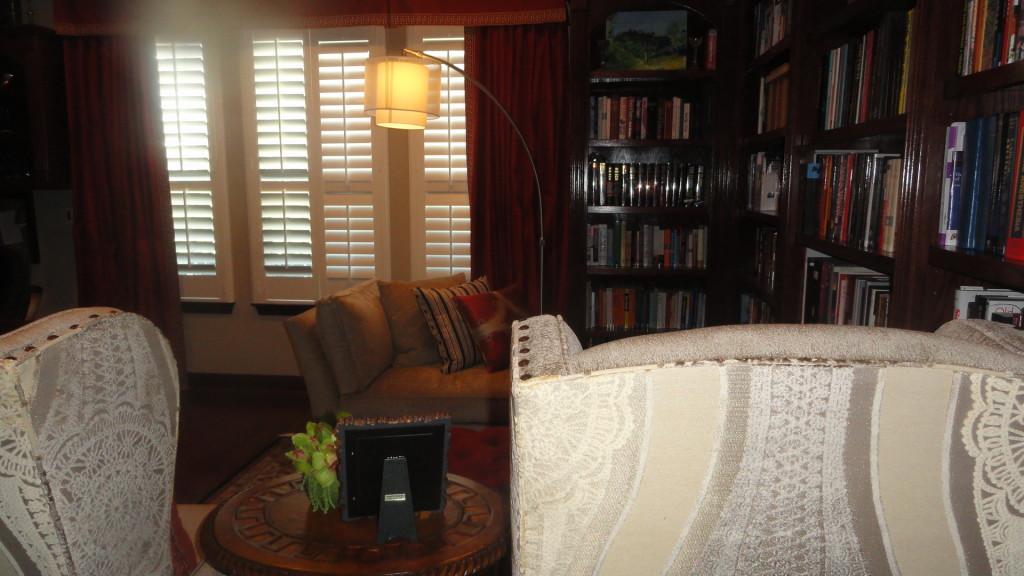
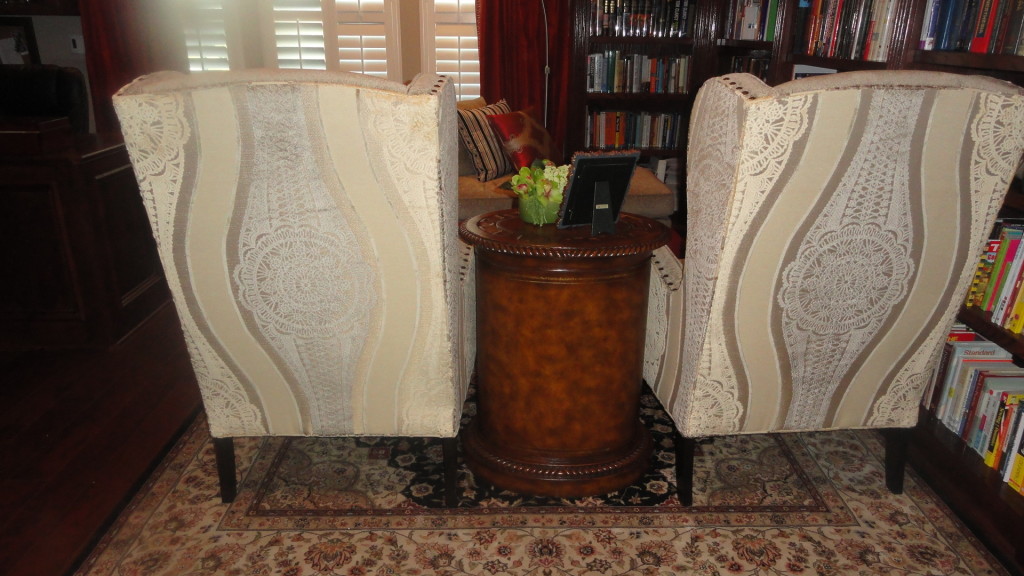
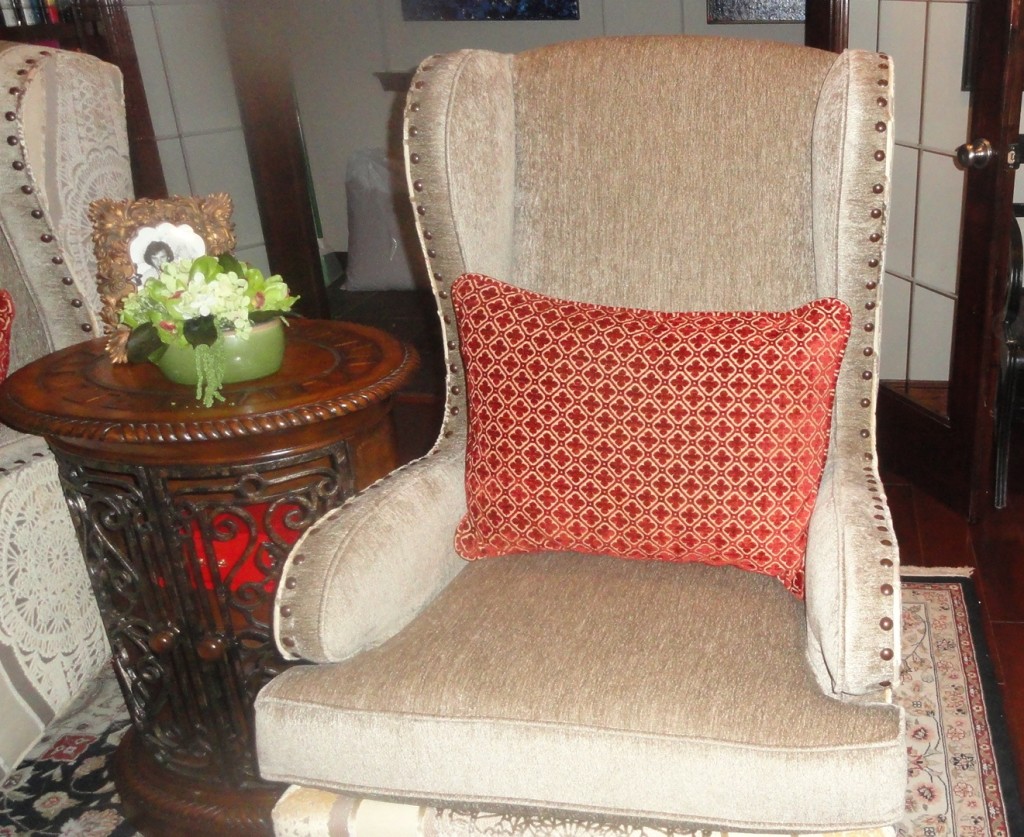
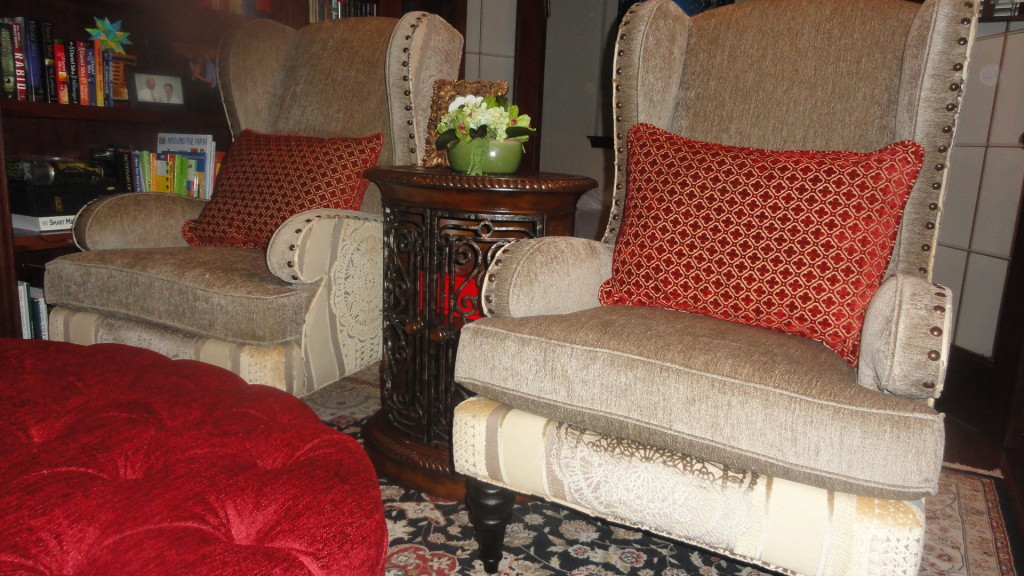
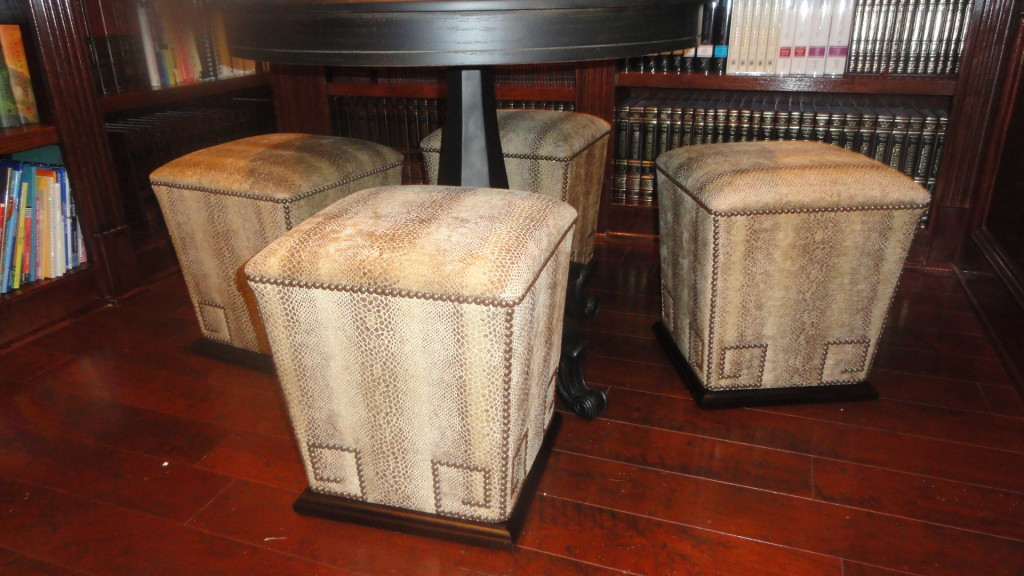
I completed the seating area with a small library table with wrought iron detail, custom chaise lounge, custom upholstered occasional chairs (notice the fabulous two toned fabrics?), a custom upholstered ottoman that doubles as a cocktail table and on the other side of the room, a round table and 4 cube ottomans where the kids can do their artwork and play board games. Of course, no room is complete without some pillows and accessories. My clients already owned the area rug, so that dictated our color scheme. I custom designed and had the gorgeous red silk draperies fabricated (notice the wonderful greek key trim detail?) Just amazing!

Custom Silk Drapery Panels With Inverted Box Pleat Valance And Greek Key Trim Detail

Custom Silk Drapery Panels With Inverted Box Pleat Valance And Greek Key Trim Detail

Here’s a close up shot of the greek key trim detail

P1040331

Here are some other views of the room.

DSC05629

Notice the beautiful cut velvet fabric on the backside of the chairs and the rich and luxurious chenille on the front of the chairs. My clients love these custom touches, and I love to give it to them.These fabrics were very high-end but also made to last.

DSC05632

DSC05633 cropped

DSC05616

And check out these fun ottomans for the kids. They are custom upholstered in a beautiful faux leather python print. Notice the greek key detail is repeated on the nailhead trim?…..yep, it’s all in the details

DSC05634

Ok I have to admit that I don’t have pictures of the full view of the room. Why? At the time of install, hubby wasn’t home to clean his desk and we didn’t want to touch anything that he might be working on :-)  He is a doctor, so a life could depend on that decision :-)

So from this large library, I created two wonderful seating areas where the whole family can hang out, plus a desk area that can accommodate two users, and of course tons of storage for the beautiful books. This library/family hang-out can now comfortably seat around 9 or 10 people! That is awesome!

If you need help getting multiple uses out of one space, whether small or large, feel free to contact me here

Wishing you all a fabulous Friday and a fantastic weekend! :-)

Be Inspired!

Veronica Solomon

Veronica Solomon


Throw Back Thursday: A Wide Open Family Room

A Family Room Done Over 8 Years Ago

A Family Room Done Over 8 Years Ago

Hello All! Happy Throw Back Thursday! Well that would only make sense if you use Instagram. I do, and you can follow me here! :-)

Throw Back Thursday or #TBT is an Instagram community hashtag where users post older pictures of themselves or something that’s dear to them – A blast from the past if you will.

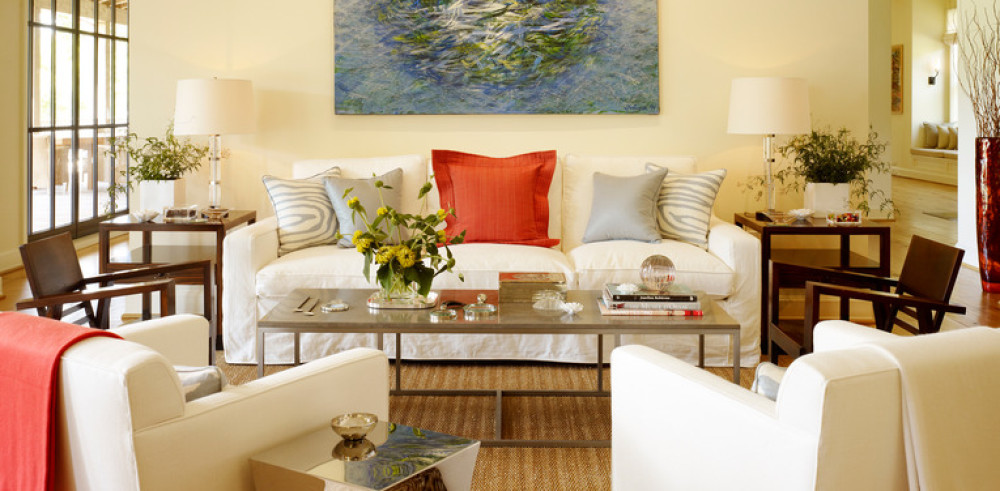
Ok, so here’s my throw back aka blast from the past! :-) The room pictured above is a family room that I did over 8 years ago. This client is very near and dear to my heart…..well actually that client is ME :-)

This is actually the family room in my current home (The 4300sf one that I am downsizing from, if you’ve been following my recent posts). Most of the furniture pieces here are from a previous smaller home I owned and I had to make them work in this home with wide open spaces and volumnous ceilings. Everything seemed so small in the room, so I got creative and brought in color! First I painted the room in a warm neutral from Behr Paints. I decided to use red as the accent color to cozy up and ground the space a bit. I brought in a beautiful large area rug and added pillows and accessories repeating the red throughout the space. The formal living room, formal dining, study, kitchen and breakfast room are all basically somewhat open to each other, so I repeated the red in smaller doses in the adjoining rooms.

Here is another view of the room

Family Room


This picture was taken right after we moved in and alot changed in this room over the years…. a sleeker TV set for one, taller (20′) drapery panels, larger area rug and taller wing back occasional chairs. I was just starting out in my business, money was tight and I had to make do with what I had and be creative. For example, the drapery panels were actually oversized rectangular tablecloths that I simply hung unlined. You know I don’t like naked windows :-). I needed a larger area rug and so I saved up and purchased a beautiful oriental rug (not shown), that pulled together all the colors in the room.

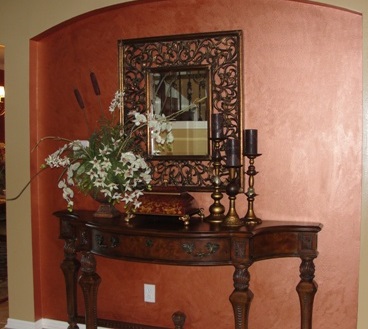
Website Pics 005I created this vignette to break up the long hallway from the foyer to the family room. I did that red accent wall myself using a Behr metallic paint.

As you can see, my style back then leaned heavily towards traditional. With all the trends I follow, design magazines I read, courses I take, market events, and showrooms that I visit frequently, my taste has definitely changed and developed over the years. You will get to see much of my new design aesthetic in future blogs and videos about the new home. Stay tuned for that.

Ok, that’s all I have for you today! It was great going through old photos and seeing just how my design style has developed over the years.

What about you? what is your throw back memory for today?

Please don’t forget to comment and share, and of course, if you need help with your decor, contact me here

Be Inspired!

Veronica Solomon, Circa 2008?

Veronica Solomon, Circa 2008?

What A Difference Draperies Make!

Custom Drapery

Hello friends!  Lots of packing remains on the agenda for this week, but as promised from yesterday’s post, here is the other side of the room where the mural was done above the fireplace.

These pictures were taken using my iPhone, so the lighting is not great :-(

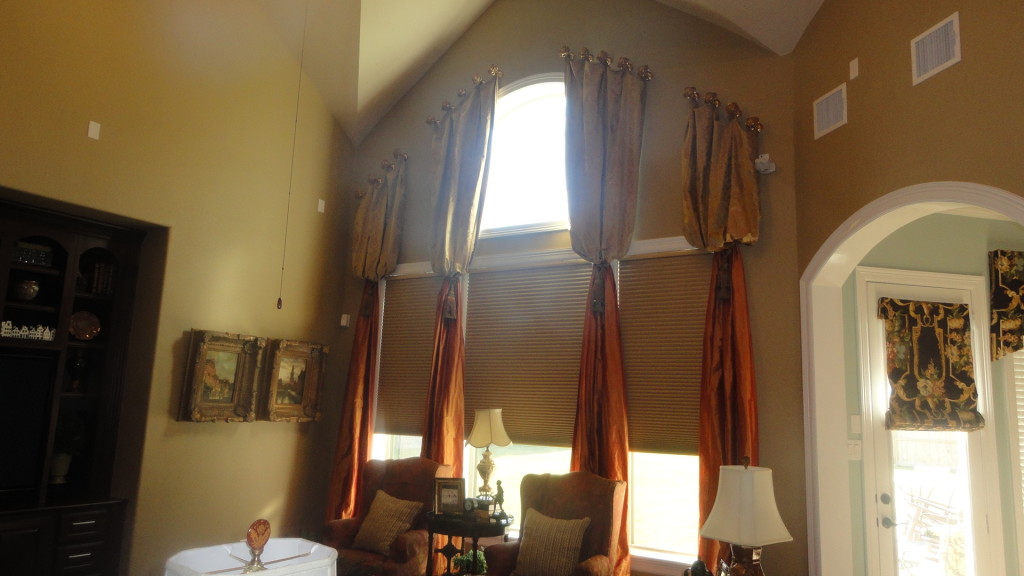
Custom Drapery

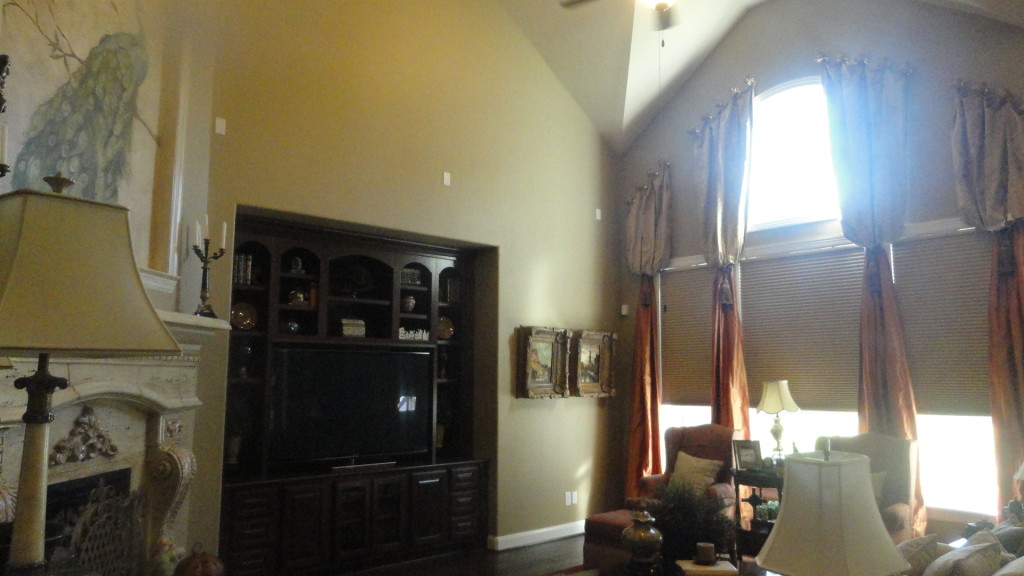
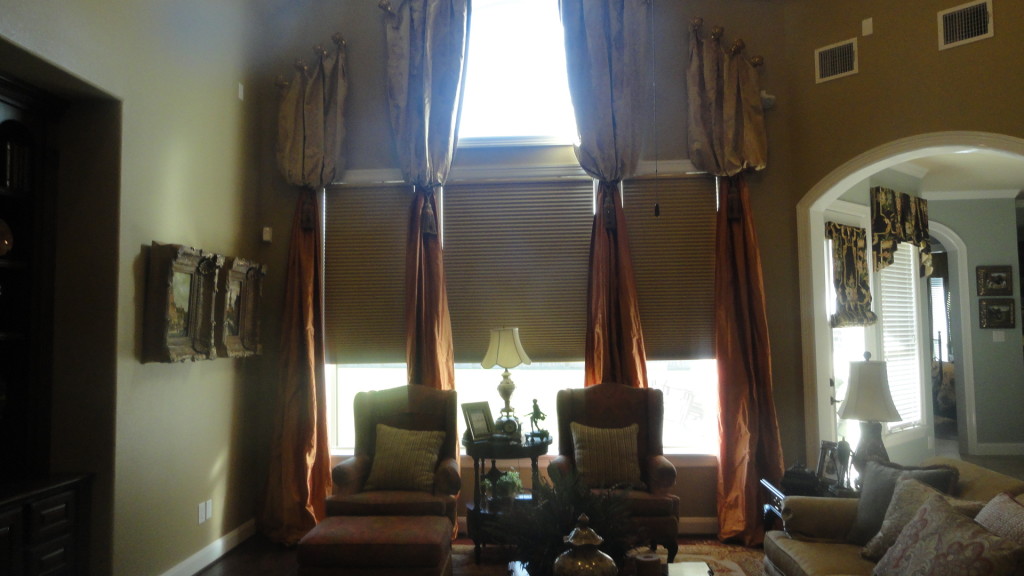
We started out with a plain room. The walls were builder beige flat paint and standard white 2″ faux wood blinds for window treatments. My client already owned most of the furniture pieces and art, and just needed help pulling it all together. In her previous home, gold was the dominant color, and although the accents of her furniture were mostly gold, she wanted to try some color this time. She was also very concerned about the high ceilings and wanted to cozy up the room just a bit.

Her beautiful aubusson area rug (hard to see from this picture) became the inspiration for our color scheme. Her rug had beautiful golds, corals, greens, creams and blues, so we had plenty of options for the new color scheme.

For the wall color, I chose a beautiful green from Benjamin Moore called Huntington Beige (HC-21), and that completely warmed up the space. For the windows, I chose battery operated honeycomb shades in a soft gold fabric for the rectangular windows, and for the arched window, I custom designed a motorized arched roman shade in a gold fabric matching the honeycomb shades, that fit perfectly inside the window opening. (Roman shade not shown here). I also designed these lush silk drapery panels  in two beautiful high-end silk fabrics and mounted them on medallions instead of a rod and rings. The Medallions are a beautiful hand painted gold finish, and are like jewelry in the room. I also added plenty of cozy throw pillows  and accessories to tie it all together.

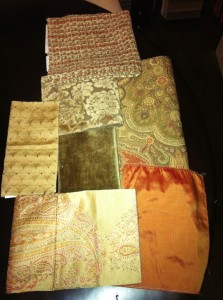
Fabrics Used Throughout The Room

Fabrics Used Throughout The Room

These are the beautiful fabrics that were used in the room – A beautiful solid silk in coral – a paisley silk in gold, green and coral – silk velvet – tweed – cut velvet damask, another rich paisley pattern and a diamond mini print. Notice that the fabrics are various textures and the patterns are a different scale, but they all work together using a complementary color scheme

Custom Drapery

One last view of the room. Notice the breakfast area beyond? The kitchen and breakfast room also got a makeover, the dining room, foyer, study, master bedroom, master bathroom, and upstairs loft all got the Casa Vilora Interiors treatment :-D. Who knows, you may see some of those rooms in future posts :-)

This was indeed a fun project! I must add, that my client and her wonderful family were so great to work with. She has a wonderful sense of style and very hands-on (she hung all the art herself!). Just a beautiful person inside and out.

If you have questions about our design services, you can reach me here

Please don’t forget to comment and share :-)

Be Inspired!

Veronica Solomon

Veronica Solomon

Murals Instead Of Art

Hello All! Happy Monday! :-)

This week will be spent packing up my 4300 square foot home, deciding what to take with me to the much “cozier” home, what to donate to Katy Christian Ministries, and what to trash. I am being pretty ruthless with the trash pile. I’d say if there are any dumpster divers in my neighborhood, they are going to score big time!

My posts this week will probably be pretty short snippets; but short and sweet is good…right? ;-)

Please enjoy the before and after shots of the fireplace wall of a wonderful client I had the honor of working with late last year.

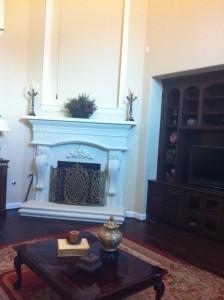
Before Shot Of Fireplace

Before Shot Of Fireplace

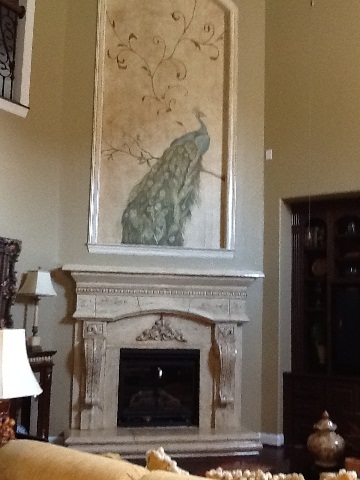
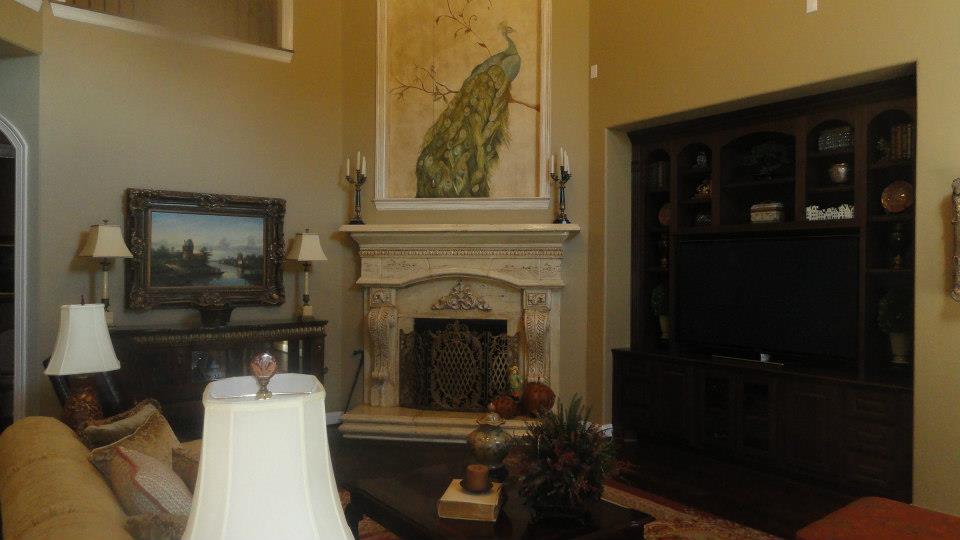
My clients just moved to Houston  and purchased a beautiful home with some great architectural features, but they were just a bit too plain for her as well as for me. She is an avid art collector with some very spectacular pieces that she had collected over the years. It is quite an impressive collection of beautiful framed oils of landscapes and architecture! She wanted the fireplace to be a focal point in the room while complementing the rest of the space. The fireplace is a cast stone, so it was much too blah for me, and with such high ceilings and the fact that the alcove was pretty much defined above the mantle, I didn’t think that a piece of art would be the best option. Besides we already had quite a few pieces of art in the room. I suggested we do a mural above the mantle and faux paint the fireplace surround to look like travertine or limestone….something more natural looking. She loved that idea!

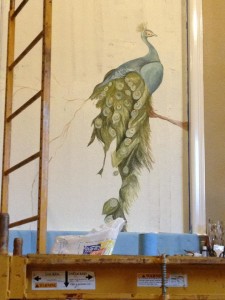
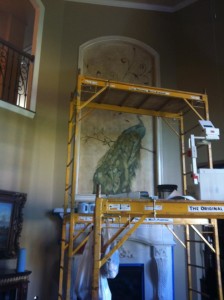
After showing her a few ideas for the subject, we both fell in love with the beautiful peacock perched on a branch. My faux painter and muralist were very excited about this project, and so we set to work creating a masterpiece. I wanted the colors to be subtle and almost have an aged appearance, as if the mural was there for centuries – but still being very elegant and complementary to the updated traditional look of the rest of the space.

During

During

During

During

As you can see from the during shots, it was quite a big job that required scaffolding. My client later admitted to me that her husband would come home each evening and look at the unfinished work in progress, and was a bit nervous about the colors. Of course, she shared my vision from the very beginning, and did a great job of assuring him to just hang in there for the finished product.


After Shot Of The Fireplace

After Shot Of The Fireplace


Another After Shot Of Fireplace

Another After Shot Of Fireplace

Voila! This is the finished fireplace! You may notice that the actual fireplace surround was given a glaze treatment to age it just a bit (very subtle but a huge difference). We also added a glaze to the moldings that surround the art niche above the fireplace to make them blend in a bit more. It took a little less than 2 weeks to complete and is simply gorgeous…..expecially when seen in person! My client (husband included) were quite pleased  and very excited with the finished product. The entire room came together beautifully. Stay tuned for pictures of the rest of the room in future posts.

I guess this post isn’t so short after all ;-) but hope you enjoyed it!

If you would like a custom mural or paint treatment, or any help with your decor, you can contact me here.

Feel free to leave me a comment with your thoughts on the finished fireplace.

Be inspired!

Veronica Solomon

Veronica Solomon

Have A Restful Sunday.

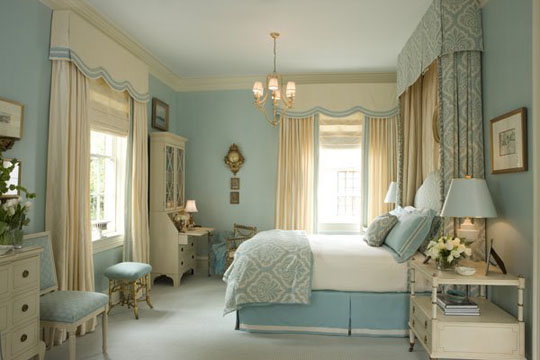
Bedroom From 2008 DC Design House

Bedroom From 2008 DC Design House

The soft blue walls and the white trim, the subtle pattern of the bedding, and the cozy canopy and draperies, create a restful and serene space where anyone would be delighted to lounge on a lazy Sunday afternoon.

Peace

Have a restful and peaceful Sunday….

Be Inspired!

Veronica Solomon

Veronica Solomon


Design Crush: Fabric Wrapped Casegoods

Kravet Furniture

Kravet Furniture

More and more I have been noticing the new trend of fabric panels on casegoods, like dressers, chests, tables and desks. I am downright obsessed with this new trend. I wasn’t able to make it to High Point Spring Market this year, but from all reports, fabric wrapped case goods were a big hit.

Kravet Furniture

Kravet Furniture

Bungalow 5

Bungalow 5


Fabric, leather or vinyl wrapped furniture is a great alternative to plain casegoods and a great idea for refreshing damaged or outdated pieces. They are perfect when a bit of softness is needed in a room full of wooden furniture. They are great for adding color and texture, and a bit of interest in a room. Fabric opens up many options for customizing each piece and adding a unique quality that will support the look, color and theme of your decor.

Can you see this piece in a chic lodge look?

Addison Design Blog

Addison Design Blog

Or this Noir Furniture piece as a casual nightstand in casual beach cottage or global influenced room?

Noir Furniture

Noir Furniture

The fabrics used to wrap these casegoods are usually fabrics, leathers or vinyls with a noticeable texture like burlap, linen, faux python prints, faux ostrich prints, and faux croc prints. Of course the sky is the limit as to what fabrics are used, but lighter delicate fabrics like silks and satin should be avoided, and a bit of visual or physical texture is very desireable

Here are a few pieces that have my head spinning in a good way :-)

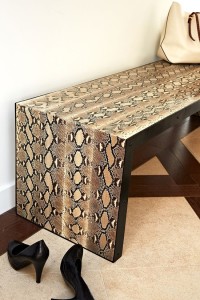
This python print wrapped bench definitely makes a wonderful statement in a room. This one is providing me with some inspiration for a hall bench in my new home

Pinterest

Pinterest

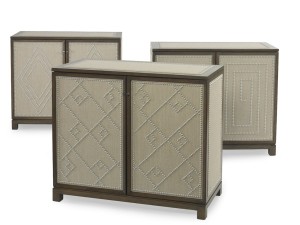
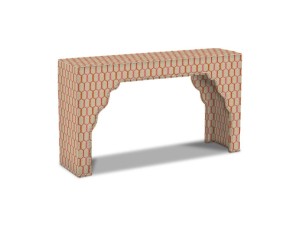
This handsome geometric print fabric wrapped console from Drexel Heritage is quite a conversation piece. You can actually choose from hundreds of fabric choices on their website and customize your very own console, cocktail or end table. Click here to see the many options

Drexel Heritage

Drexel Heritage

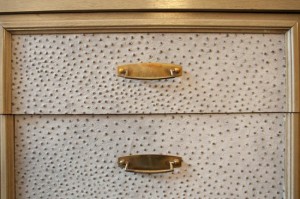
Notice the beautiful faux ostrich texture of this chest. The cream color works so well with the light gold wood accent and hardware. Simply scrumptuous! :-)

Ryan Korban via Pinterest

Ryan Korban via Pinterest

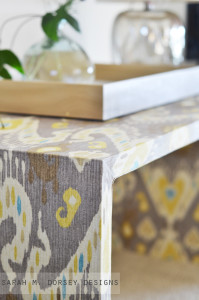
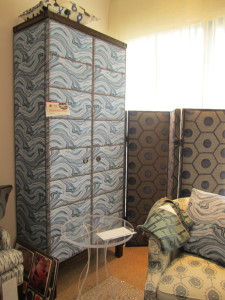
If a global inspired pattern is more your thing, this ikat patterned fabric adds a very unique touch

Sarah M. Dorsey

Sarah M. Dorsey

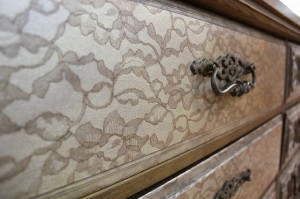
This lace wrapped beauty from Recaptured Charm, adds a soft, subtle feminine charm and elegance to this room

old teak dresser 034a_thumb[7]

Check out this one! What a fun, unexpected way to use lace.

276830708314657662jGewPrnSc

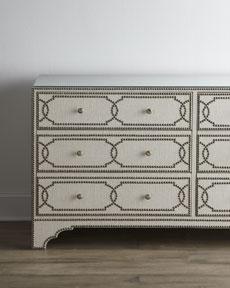
The wonderful nailhead detailing always adds luxury and richness to each piece

Bernhardt Furniture

Bernhardt Furniture


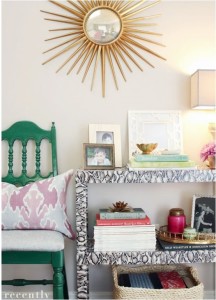
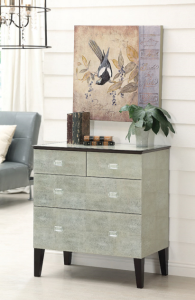
Here’s another snakeskin wrapped piece shown as the anchor piece in this beautiful vignette.

snakeskin wrapped consoleOr if you prefer a more subtle approach to this trend

Studio A

Studio A

The Window Scene Website

The Window Scene Website

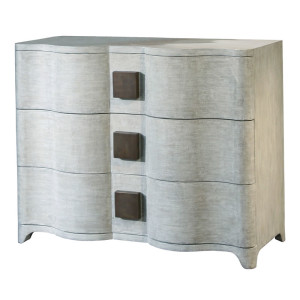
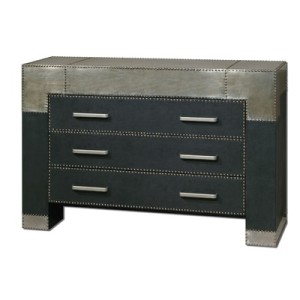
Here a few more I just had to include. This masculine chest from Uttermost is perfect for an industrial chic look with its faux leather fabric

Uttermost

Uttermost

Style Beat Blog

Style Beat Blog

Sterling Industries

Sterling Industries

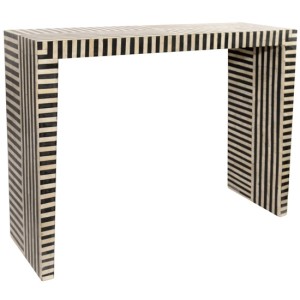
This one isn’t fabric, but can be an easy DIY project using a black and white stripe fabric

Pinterest

Pinterest

Speaking of DIY, Centsational Girl blog has a step-by-step guide to taking a plain Ikea dresser and adding fabric for a fabulous seaside inspired piece.

So if you own a tired piece of furniture that you were getting ready to put out on the curb, think again. This fabric wrapped furniture trend may be just the right touch to take it from drab to fab.

Is fabric wrapped furniture for you? Please leave me a comment below, I’m dying to know :-).

Be Inspired!

Veronica Solomon

Veronica Solomon


My 5 Biggest Decorating Pet Peeves

Let me start out by saying that I am not here to judge, but merely to point out some of the decorating blunders I have seen throughout my decorating career, and to help you find better  and  more stylish solutions. After all, my job as a Decorator is to solve design problems and gently guide my clients to finding their design style and achieving beauty and comfort in their homes. So if you are guilty of any of the decorating faux pas on the proceeding list, please know that my constructive criticisms are coming from a good place – a heart of design love, so please – no hate mail :-)

So without further ado, here goes my list of decorating pet peeves.

  • Toilet Rugs and matching lid covers - I am referring to those rugs that are used in the bathroom, that are contoured to match the base of the toilet. In most cases they come as a set with a matching lid cover. I guess I can understand why people would like them – they keep your feet warm when you need to spend some time on the “throne”. But toilet rugs and lid covers are germy little things and usually aren’t that attractive anyway. Definitely every designers’ decorating pet peeve.

58255B83cropped

Solution: Go for a small rectangular area rug or a runner instead, and keep them at a safe distance from the toilet. If you have to keep the little piggies warm when you go, just wear slippers! :-)

c38450236cf5dde8a3aadf1cb29573ac

big_sq-2-slippers9

  • Drapery panels that are too short – My next decorating pet peeve is store bought drapery panels that are often too short for a standard height window. Most big box stores stock them in lengths up to 84″; way too short!

946773_653743291309143_616269116_n

Solution: You can shop for custom drapery panels starting at just $269 per pair through my online store. If you already own the short curtains you can visit your local fabric store and purchase a small yardage or remnant of a fabric that coordinates well with your short drapery panels. You can even use an old dust ruffle for this. Sew or use iron-on tape to add the fabric to the top or bottom of the panels, and voila, they look like they were designed that way. Beaux R’eves Blog has a step-by-step guide to doing this. Click here to see.

image_thumb

  • Art hung too high – This is one decorating pet peeve that I’ve seen more than my fair share of. Art should be hung at “eye level”, but whose eye level? What if you are 6’4″? Then clearly it would be too high for me, who is 5’2″ to comfortably view.

high_art_trio_flicr-400x256

Solution: A simple rule of thumb for hanging art is to place the centerpoint of the art at 60″ to 63″ above the floor.  From there you can adjust accordingly for the overall height of the ceiling or height of the furniture over which the art will hang.  This measurement provides a great base-line starting point and a good foundation for staying away from the too-high syndrome. To find the centerpoint of the art piece measure the full height of the piece (if framed include the frame in the measurement) and divide by 2.  Then measure the full width of the piece and divide by 2.  The point at which these measurements intersect is the centerpoint of the art piece.

Art2


  • Room in a bag sets- You know the ones, found in department stores where the bedding matches the curtains that match the pillows that match the shower curtain. I understand where the designers of those sets were going with that concept – they want to make it easy for homeowners by doing the matching for them. Well the problem is just that, they lack personality and way too matchy, matchy. The one shown below is a 24 piece set! Yikes! :-)

7526825211p

Solution: You can opt for custom bedding, where it’s all designed just for you with your choice of fabrics and trimmings. Custom bedding can be quite pricey, but another alternative is purchasing a comforter set and then choose pillows, bedskirt and shams in fabrics that coordinate with the comforter set rather than matching exactly. Our online store has a great selection of comforter sets. Click here to take a look. Also, try to avoid matching your draperies exactly to your bedding. A wonderful mix of fabric patterns, fabric types and textures is so much more interesting than fabric matching.

554928_558457927520530_455489489_n

  •  Wallpaper borders – I’m sure there was a time when wallpaper borders would make a wonderful statement in a room (can’t think of that time right of the top of my head :-)), but these days they make a room look very outdated.

imagesCA227VFC

Solution: Run the opposite direction! :-). On a serious note try doing an interesting paint treatment instead, like bold horizontal stripes, tastefully done faux painting, or a full wallpaper treatment on all the walls. Here are some examples

1659ac4fcb5af891d3d8e3ccc519f908

OLYMPUS DIGITAL CAMERA

d42762635f15761feff9bf2a1c0c8954

fff865f62b6596259fe4cf5631380204

So there you have it, my list of decorating pet peeves. I am sure you all have a few that you could add to this list as well. In fact, go ahead and leave a comment with a list of your decorating pet peeves. Don’t hold back, I’d love a good laugh :-).

Of course I am here to help you find solutions to those pesky decorating pet peeves. I am just an email or phone call away ;-)

Be Inspired!

Veronica Solomon

Veronica Solomon

My Inspiring Celebrity Encounters

As a designer, I jump at the chance to check out new and innovative products, spot new and exciting design trends, and glean knowledge and inspiration from my peers and other designers whom I admire. Every chance I get, I attend design panel discussions, and speaking events – especially when the designers are well known nationally and even globally. What these designers usually have in common is that they are a brand, with several projects and products in their portfolio. Branding has become the goal that most designers have set for themselves. Getting published in a shelter magazine is usually the first step, followed by product design (furniture, upholstery, lighting, textiles and accessories). Since this is my ultimate goal, I seek every opportunity to meet these designers in person, ask questions of them, or just a brief chat to pick their brains a bit.

As I looked through old photos, I realized just how many of these designers I have actually met and what kept ringing in my head is “TIME TO TAKE ACTION”.

Action for me will be one step at a time. After all, no one becomes a global brand overnight. My first action step is hiring a great photographer to take photos of my completed projects. You simply cannot get published without great photographs. Publishers and editors are looking for photos of rooms with the wow factor! I am so guilty of finishing a project, the room is gorgeous, the client is happy and I’m either too tired to take proper photos, or I forgot to take my camera along. It is alot more difficult to go back to take photos (sometimes I do), but it’s better done right at installation. So this is what I’ll be working on in the next few weeks and hopefully get some new projects that will give me the creative freedom I need to get world-class photos.

I thought I’d share some of these “celebrity encounter” photos, to show where some of my inspiration comes from. They are all taken with an iPhone, so again, not great photos, but you get the point :-)

309326_455735157792808_658465825_n


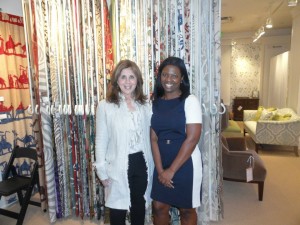
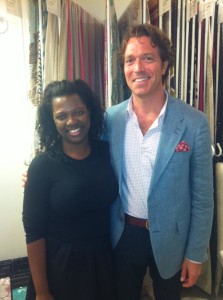
Here I am with Marty Lawrence Bullard at the Houston Design Center. Martyn is a published author and is among the cast of Bravo’s Million Dollar Decorator. He has fabric lines with F. Schumacher and  designs for a celebrity clientele such as Cher and Ellen Pompeo, to name a couple.


526934_511603448872645_835619784_n


Here I am with Thom Filicia. He is a published author and hosted many TV shows including “Queer Eye For The Straight Guy” and “Dress My Nest”. He has upholstery and casegoods collections with Vanguard Furniture and Kravet, as well as fabric lines with Kravet and a rug collection with Safavieh

386910_287873284578997_175387161_n


Here I am with Suzanne Kasler at Decorative Center Houston. Suzanne is also a published author and has fabric collections with Lee Jofa, an upholstery and casegoods collection with Hickory Chair and a rug line with Safavieh. She also has a lifestyle collection with Ballard Designs.

317572_287871761245816_1984365526_n


Here I am with Charlotte Moss. She is the author of several books, has been featured in numerous publications, and has a fabric collection with Fabricut

940933_584479274918395_2099222866_n


(This one is very blurry) but pictured here is Mary McDonald who is also among the cast of Bravo’s Million Dollar Decorator. She is a published author with a fabric collection with F.Schumacher

934923_584476148252041_1296609806_n


Here I am with Bill Stubbs, Houston’s most famous designer and a guy with a big personality. He was honored as one of Architectural Digest’s top 100 and has published many books. He hosts a TV show on PBS called “A Moment of Luxury“. He has completed many great projects throughout his 30 year career including a large corporate jet.

935046_584479008251755_20959820_n


Here I am with Charles Pavarini III; the grandson of Charles Pavarini Sr., who is  known for creating historic landmarks including the Seagram Tower, the United Nations, the State Theater at Lincoln Center, and numerous other landmark buildings in New York City and throughout the world. Charles is a very accomplished designer who has been published several times and in the process of developing a lighting collection and writing a new book.

375112_584471978252458_1374026156_n


Here I am with John Robshaw who is very well known in the design world for his beautiful, globally inspired textiles. He is a very well published designer and author and has a fabulous fabric line with Duralee Fabrics…and he is very dreamy :-)

So you can see that I have big shoes to fill. Being a successful designer in today’s market means that you have to market yourself as a brand. The best advice I got from these wonderful designers is to focus on the niche that I love and enjoy more than anything else, have a genuine desire to share it with the world, and the rest will follow. For me, that is textiles. I just love fabrics with a wonderful hand, beautiful patterns and have visual appeal. The goal is to design and develop a collection inspired by my Caribbean heritage, some Florida influences (lived there for many years) and of course Texas chic!

Other designers that I would love to meet are Candice Olsen, Tobi Fairley, Alexa Hampton and Jonathan Adler. Soon I hope :-)


Be Inspired!

Veronica Solomon

Veronica Solomon