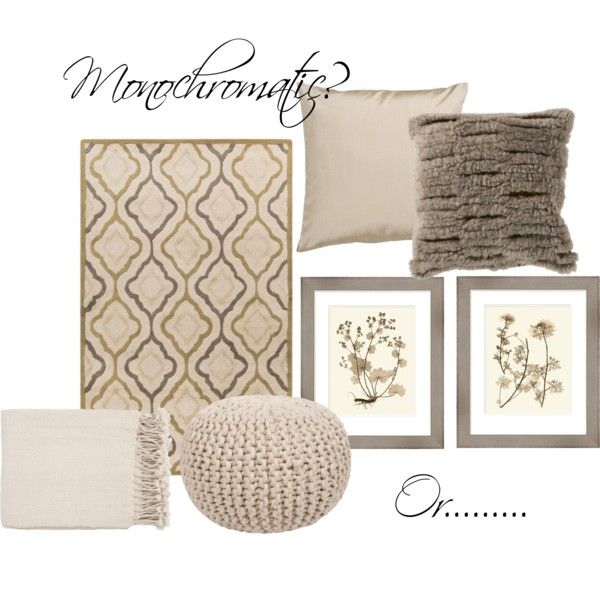
Tips for working with a Monochromatic color scheme in your home
Use various shades and tints of the same color
Avoid mixing cool and warm. Keep the colors in the same color family
Add subtle pattern and lots of texture to add interest and a good balance
Maximize lighting
Mix slick, shiny surfaces with rustic surfaces for maximum impact
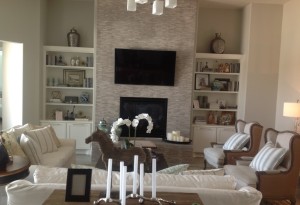
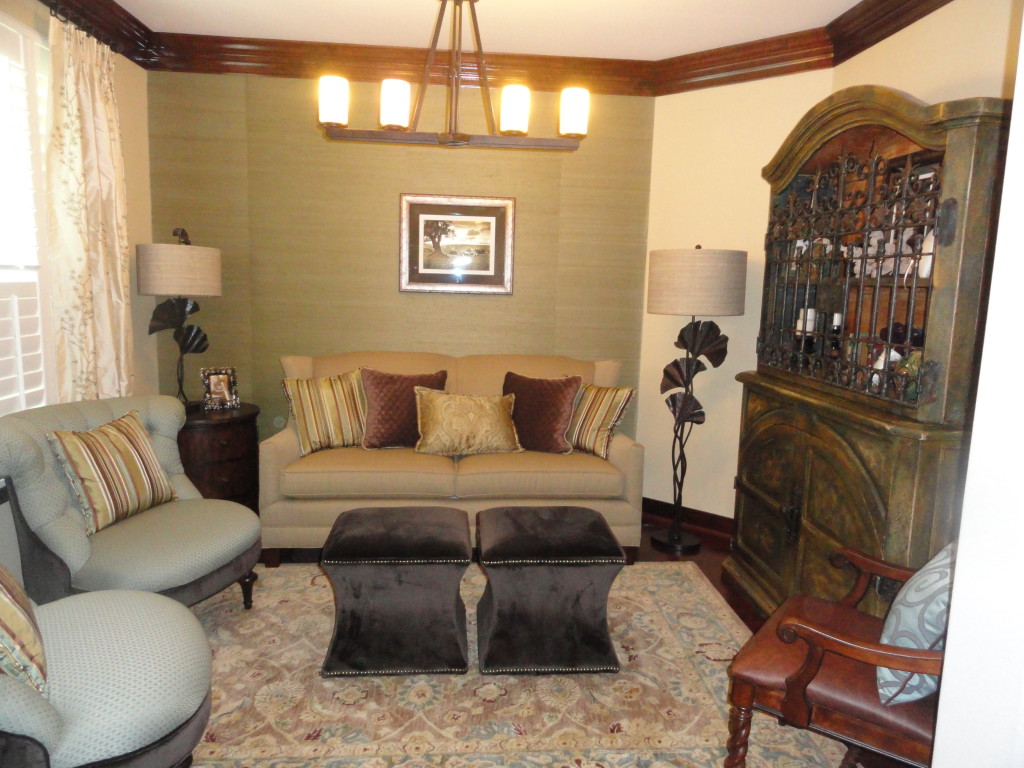
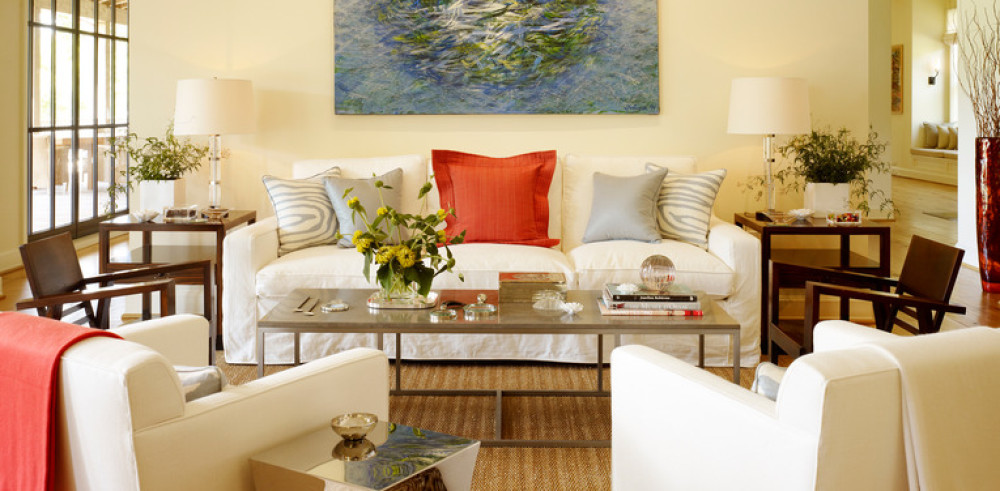
Here’s a monochromatic room I recently completed
Family Room by Casa Vilora Interiors
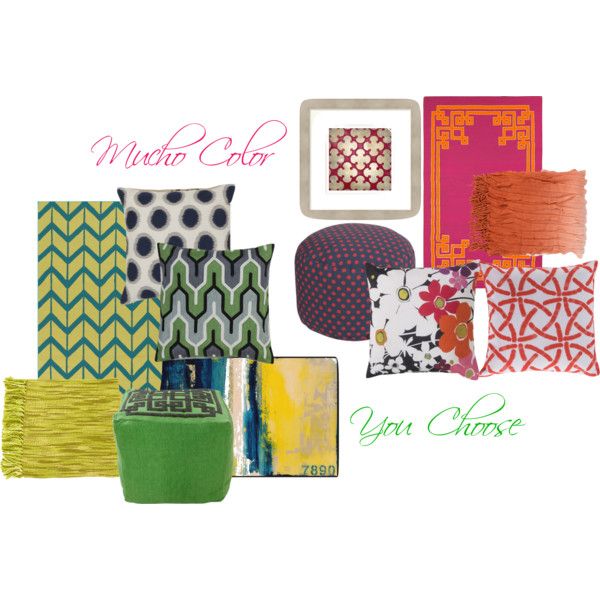
Tips for working with color in your home
Keep the backgrounds like wall color and larger upholstery pieces neutral and add color in accessories
Spread color around the room for balance. The 60,30,10 rule is a good place to start: 60% of a dominant color (example - wall color), 30% of a secondary color (example - upholstery) and 10% of an accent color (example - accents or floral arrangement)
Add a touch of black (example – in picture frames, or a lampshade)
Keep color value (color lightness or darkness) in mind for balance. Darker values work best on the floor which helps to anchor the room.
Use a fabric or rug from the room as inspiration for your color choices
Make sure colors flow from one room to the next.
Look to nature for color clues
Remember color affects your mood, so choose carefully
Live with color before committing if it scares you – ask for samples and view at different times of the day….especially for wall color.
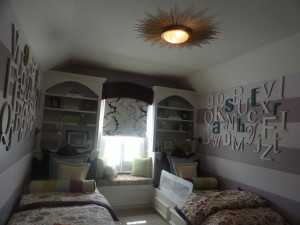
Here’s one of the more colorful rooms I’ve done recently.
Toddler Room by Casa Vilora Interiors
We added “Alphabet Soup” to the walls with the kids’ names highlighted
Whether you like the calming effect of a monochromatic color scheme or lots of color, the most important thing is that your home represents you. If you need help with color, contact me here. You can view more of my work here
Please subscribe to our blog for more gift ideas, and interior design tips and ideas.
You can also subscribe to our monthly Newsletter “Pocket Decorator” by filling out the form below. Be sure to confirm your subscription in the email that will be sent to you after sign-up
I regularly receive emails from folks asking about budget decorating, especially how to take an inexpensive piece of furniture and making it look fabulous. To address those questions, I decided to do a little segment every once in a while on my blog called “Budget Decorating” where I will highlight some projects done on a tight budget.
I have to admit that Ikea was never a place that I have shopped in the past for my clients, but I have found that one or two pieces placed in the context of a well designed room works just as well as a pricier piece.
I myself, have used a couple of their pieces to fill some space and add some function in my new work-in-progress design studio.
The office area (formerly the only bedroom in this old Victorian) is currently set up as a place to sit with my clients and discuss the numbers part of their design projects, review and sign contracts etc, and where I will be doing paperwork. I wanted it to be comfortable, light and airy and a clutter-free zone. I will be showing the finished space in a future blog post, but for now I wanted to focus on how I addressed a dead space that is the walkway to the other rooms in the space.
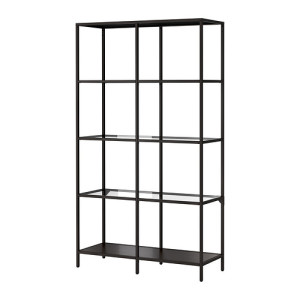
Since I am on a really tight budget I decided to bring in an inexpensive Ikea etagere to fill the area without visually or physically taking up space. I chose the etagere because it was open, with very clean lines and had glass shelves that helped to give it a less obtrusive appearance.
Ikea Vittsjo Shelving
The etagere started out as a box of parts, and I am eternally grateful to my friend Courtney for helping me put it together. He was able to assemble it in about half an hour. The cost for this run of the mill metal shelving was $70.00
Here’s what it looks like now
After Styling of teh Ikea Vittsjo Shelving
I now call it an etagere because that sounds a bit more fancy than shelving.
For about $120.00 I was able to solve the issue of the dead space in the walkway with something beautiful and functional. Most of the tcotchkes you see here, are just left overs from long ago projects or things laying around my garage from my recent move. I did purchase the new picture frames (pictures of the kids will be added ) and rosette candle holders from ZGallerie. The etagere provided a great place to display a few of my design books and magazines.
The key to styling a bookcase, etagere or shelving is to mix up the textures, layering, adding various heights and levels, adding softness with florals, keeping the colors fairly consistent or complementary, and using things that have special meaning to you. I displayed a few of my favorite design books & magazines, and my 1920′s peacocks are a favorite treasure – I love peacocks and birds in general
Other items that you can use are baskets or storage boxes on the bottom shelves to add some visual weight and ground the whole unit. I chose not to because I wanted to keep it open and airy.
This etagere can be used in any room of your home really – In a kitchen as extra storage for cook books, wine bottles or dishes. In a bedroom closet as a place for shoes or sweaters. In a game room or kids’ play area for storing games and toys. In a laundry room for storing detergent and cleaning supplies. In a garage to get things up off the floor (if you’re anything like me ), and even in the pantry for storing cereal boxes and canned goods. You can even ”bunch” two or three or more side by side to fill a large wall space and add tons of storage in a room.
Where would you use this Ikea etagere and what are some favorite items you would display? Leave me a comment below
One more thing before I go. If you like Ikea prices but not necessarily the look of some of their pieces, this website has tons of products and ideas that you can use to add some fabulousness to a plain piece. Check out O’Verlays Decorative Fretwork Panels to see what I mean
I hope you have been inspired by my budget decorating! Now go forth and decorate!
Please share this post and contact me here if you have any questions about my design services. You can also connect with me on social media through the same link.
Visit my online store to purchase designer bedding, pillows, rugs and the recently added doggy styles (dog fashion, beds and carriers).
Have a very blessed Monday!
Be Inspired!
Check out the new DOGGY STYLES category on our online store
As an Interior Decorator, I find design inspiration everywhere – nature, food, architecture, the fashion runway, designer showrooms and market events, and definitely from my travels. I don’t get to travel as much as I would like, especially as a business owner, but when I do, I am always inspired by the beautiful surroundings and discovering new places and things.
My last trip to England and France was very inspiring. The beautiful countryside of England was a great stress reliever just driving through and seeing the beautiful rolling hills and pastures. Then there’s the wonderful architecture in Paris; definitely wonderful to see in person.
Here are a few pictures from my trip
The town of Marlborough in England.
That’s me in Stonehenge England
I’ve always wanted to ride a double decker bus!
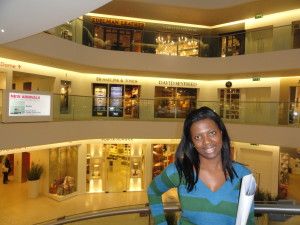
Chelsea Harbour Design Center in London
The beautiful Salisbury Chapel, England
Salisbury Chapel
London Eye
London
London
Me and Big Ben, London
Buckingham Palace, England
Windsor Castle, England
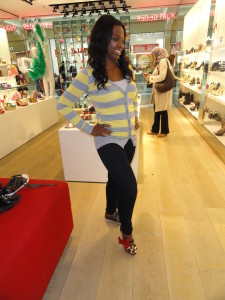
Shoe shopping in Manchester, England
The Eiffel Tower, Paris
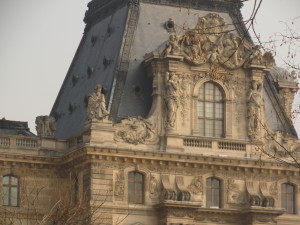
Beautiful building in Paris
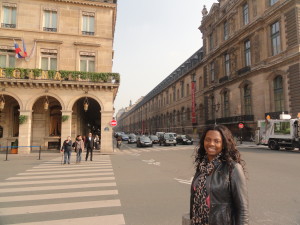
The Louvre, Paris
Paris
Looking at these pictures from this trip definitely is putting me in the mood for another trip really soon. I’ve already started my “Europe Fund”, where I am saving for a trip to London and Paris next summer with the kiddos. This time I will be visiting some of the famous flea markets of Paris, and Versailles, I can’t wait! That’s what I call inspiration!
What inspires you? Leave me a comment and tell me all about it.
Please contact me here for more information about my decorating services, and visit my online store to purchase custom drapery panels, pillows and bedding.
Recently I found myself humming to a song that I used to listen to over and over but hadn’t heard in a while. My 11 year old son Joshua, was a bit curious and asked what song I was “attempting” to sing. I replied “BackStreet Boys – Shape of My Heart”. His first response - ”Who are the BackStreet Boys?”. Of course I had to give him a bit of education on one of my all time favorite boy bands. That education of course started on YouTube, and from there we were rocking out to a bunch of their older and newer songs. He was hooked! Seriously! I think he is now the biggest BackStreet Boys fan! :-).
Why did I tell you about that story? Well it got me thinking about Interior Design (like everything else seems to. Inspiration comes from any and everywhere :-)) What always amazes me is how what’s old can become new again, and appreciated by a whole new generation. The BackStreet Boys’ careers may be extinct, but a brand new appreciation for their true talent has developed in my home, and will certainly be shared with friends at school and through social media. Who knows? Maybe there’s hope for the BackStreet Boys being the number one boy band again!
Case in point – the watercolor trend for 2013. You can find watercolor patterns everywhere from the fashion runway, high end interior fabrics and furnishings to accessories. Click here to see a guest article I wrote recently for Refined Life Luxury Lifestyle Magazine about this trend.
Watercolor pattern was really big in the 80′s! I recall as a young girl seeing the floral chintz fabrics in all their “beauty”. Sure, when an old trend is back en vogue, it is usually with some improvements and definitely more updated. These days, those watercolor patterns are done on some of the most beautiful linens and silks; not so much chintz anymore.
Another new trend is grasscloth wallcoverings, (and wallpaper itself). These were pretty popular back in the 70′s. These days, grasscloth is back and bigger than ever!
A Project I Completed 2 years Ago – Grasscloth Wallpaper on Main Wall
Grasscloth is one of my favorite wallpaper treatments. In fact, it will be on a few walls in my new home. I just love the wonderful natural and rich texture. The picture above is a project I completed about 2 years ago with grasscloth wallpaper on the main focal wall. It definitely adds depth and warmth to this space.
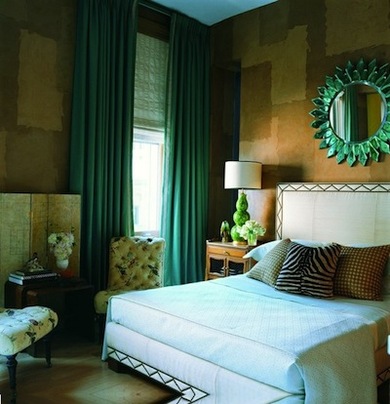
Another trend from a few years ago that is really hot these days is jewel tones, especially in fashion. Jewel tones are rich saturated colors inspired by gemstones like sapphire, emerald, ruby and amethyst.
Photo: Zillow Blog
These days, emerald green is the new color trend. In fact, it was named by Pantone as the color of the year for 2013 and can be seen in everything from fashion to furnishings to home accessories.
What was old is new again is certainly true for fashion. My daughter, who is a budding fashion designer has been very curious about what my style was like as a teenager and what the fashion was like back then. I am quite certain I will be the inspiration for a future runway collection from her
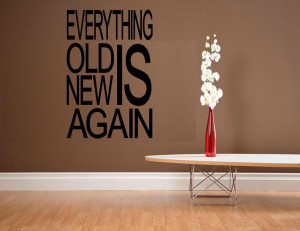
Well the Back Street Boys have nothing to do with interior design, but they are certainly a great example of something that was great in the past providing inspiration for the present. True art form never really dies – “everything old is new again”
What “old” idea or thing have you noticed is new again?
Now for the moment you’ve all been waiting for - announcing the WINNER from my blog post contest than I posted over the long weekend “What’s Wrong With This Picture?”where you, my wonderful readers were asked to guess what’s wrong with this picture? The prize, of course, is a beautiful pair of 18×18 decorative throw pillows.
Before I get to the winner, I’ll tell you what was wrong with the picture: A few of you got it right – What was wrong is I had moving containers from two competing moving/storage companies! PODS and PackRat. Both were 12′ containers (although one looked slightly smaller to me). It is Quite a bit unusual, but believe me there is a long story behind it. Notice also that one container was even sitting at the curb instead of the driveway, which is deep enough to accommodate both. Moving is fun! NOT!
Ok, time for our WINNER: Three…Two….One…..
Debbie Conner come on down!!!! You are the lucky winner of the fabulous pair of pillows!! Congratulations!!!! Please click here to send me a private message on Facebook to claim your prizeI am positive that you will enjoy them!
I recently saw this quote on one of the blogs that I follow, and it made me smile. I thought it was very cute, and admittedly, very true to my life
But it also provoked some much deeper thoughts; of what is home to me and my family.
These days, our home is a bit crazy with it being on the market for sale and having strangers walk through constantly - 4 a day at times! This is on top of our normal routines of kids and homework and dog and work……and the list goes on! My kids and I have had to leave the house several times at the most inconvenient times when a potential buyer wants to view the house – right at dinner time, or kids just getting home from school and I’m away at work. I sometimes get annoyed when this happens. “Don’t these potential buyers know that a family still calls this home?” I often whine. But it forces me to really put things into perspective. We are selling it, so really it’s not ours anymore. Is it that it’s hard to let go of something that you’ve poured your heart and hard work into for seven years? But I have realized that home is not the structure that we live in, neither is it the stuff that we’ve filled it up with. Home to me is wherever my kids are, where my dog is, and anywhere that we get to express ourselves and be who we are, and were created by God to be.
As an Interior Designer, I’ve had the privilege of consulting with several clients in their homes, and I have seen that while everyone desires a beautiful home and beautiful things, it’s ultimately their families that matter most. It almost sounds cliche, but really, think about it. In this memorable scene from the 2010 Amy Adams movie “Leap Year”, where she’s asked ”If there was a fire in your home and you could only grab one thing, what would it be?”. For most of us, there isn’t a thought first, instinctively and naturally it would be our families; the one thing that can’t be replaced.
I love to make homes beautiful, that’s what I am wired to do, and for each project I work on, my goal is to keep the family’s needs, lifestyle and personalities in mind. At the end of each day they need to come home to their escape from the crazy big world out there, let their hair down, be themeselves and create fond memories. We all have the natural, God-given desire to nest and make a house a home, just like birds and animals in nature. That’s why it is a great idea to enlist the help of a design professional like the ones at Casa Vilora Interiors and No Naked Windows. We create an overall plan for you based on your needs and goals, and save you valuable time and money. It’s our job to help you make your home functional, beautiful and comfortable and a true representation of your unique lifestyle and taste. So enjoy your home, make it your own and create those wonderful memories that you can take with you wherever life takes you.
The decision to downsizing your home for most people usually comes into play at the empty-nest stage – When the kids have all gone off to start their own lives and you just don’t need the big house anymore. I am not nearly an empty-nester (my oldest is 15), but I have been tossing around the idea of downsizing for a while now. Maybe as an Interior Designer, my heart longs for a brand new home to decorate with all the special pieces that I have collected over the years, or maybe the maintenance and upkeep involved in a 4300sf home gets to be too much when you are a single mom, a busy store owner, and sought-after Interior Designer, or maybe the thought of using only about 50% of your home regularly seems like such a waste. Maybe it’s a combination of all those things plus the deep desire to simplify my life and shift focus to a bigger and better career in Interior Design. But I have been pursuing this idea and I have to say, I am pretty excited!! ”The mansion” is ready for a new, much bigger family to love it as much as we have. It’s been a great place to raise my two children for the past seven years, but soon we will be saying goodbye and move on to the next chapter of our lives.
“The Mansion”
.
I have to admit though, that the kids weren’t quite as excited as I was in the beginning, but they are slowly getting there.
New Digs
Ok, I know, it doesn’t look like much now
In the weeks to come, I will be blogging about the progress of construction and eventually the process to decorating my new digs……all 2600sf of it! Yayy!!! I will be offering advice and tips to help you in your own decorating projects on a budget, I will be highlighting the use of inexpensive window treatments and custom drapery panels, which by the way are available through my online store.
I will also be talking about decorating in stages, how to choose paint colors and other wall finishes, furniture layouts, how to develop and execute a great design to be beautiful yet comfortable, and lots of other tips and ideas.So please come along with me on this adventure! Looking forward to it.
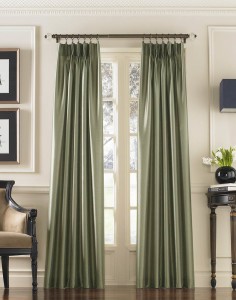
How many of you out there still have naked windows? Ready for a change? Purchasing custom drapery panels doesn’t have to be difficult or expensive, and will add the finishing touch to your decor. Drapery panels is one of the least expensive ways to dress your windows and add the finishing touch to your space. Sure you can run out to the big box stores and purchase a pair of the ready-made panels, but they usually aren’t long enough to fit most windows or they just look like they are missing something. You may already have blinds, shutters or shades on your windows and wonder why you still need additional window treatments. A well-dressed window typically has a couple of layers of window treatments. The first layer, or functional layer is usually hard treatments such as shutters, blinds, natural woven shades, roller shades etc. This is necessary of course to maintain privacy and for light control. Adding a second layer will visually “soften” the windows. This could be a sheer treatment, light curtains or even beautiful silk panels. They can either be functional or fixed. Of course there are other styles like swags and jabots, but those are usually reserved for more formal or traditional decor. Adding a layer of fixed or non-functional drapery panels is a great way to add a custom, elegant look to your windows. It is also great for grounding your color scheme or decorating style. Fixed panels simply means that the draperies do not completely cover the windows, but are decorative side panels mounted to the edges of your windows, that are not meant to open and close.
As an Interior Designer, I have consulted with many do-it-yourself clients, who just need a little professional direction from an expert like myself. In a lot of cases, they desire the look of custom drapery panels, but would rather not wait 8-10 weeks or more, or pay the high costs. This is why I decided to launch an online store making it easier, quicker and inexpensive to order while maintaining the highest quality, fine tailoring and vast selection, and they start at just $269! Here are the simple steps to ordering new custom drapery panels.
Start by clicking our Ecwid storefront and clicking the custom drapery panels tab
This will open the menu of fabric types you can choose from. Click the fabric type you desire – whether it is silk, linen, cotton, patterned chevron etc
Now you can choose your custom features such as color, type of lining, interlining option, header style option, finished length, color block option
Header style option refers to the very top of the panels where pleats or grommets are added. You have a choice of goblet pleat, french pleat, cartridge pleat, pinch pleat and grommets. The photo gallery shows examples of each
Finished length refers to actual length of your finished panels. the menu has 4 options 84″, 96″, 108″ and 120″ which is standard lengths, but we understand your finished length could be somewhere in between. With that in mind we have included a “special requests” text box where you can type your finished length (72″ to 120″) or any other special requests
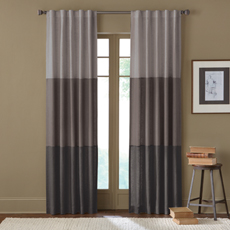
Color Block Option refers to panels where you can choose to use up to three different color fabrics. This option definitely adds a more custom look!
So there you have it! It is that simple! Your drapery panels arrive with drapery pins and ready to hang in 4-6 weeks
Swatches are available for purchase and of course we are available via phone or email to answer any questions you have.
Now there’s no reason to have naked windows!
Color Block Panels
Burlap Panels
These are just a couple of examples of drapery panels. We also have ready-made pillows and bedding available.
In today’s economy where consumers are trying to get the most for their money, decorating a living space is no exception. There is a great hesitation, however when it comes to taking on a decorating project. The common misconception is that it all needs to be done at once, and it will cost a small fortune. Enhancing a room can be easy and cost conscious if it is carefully planned and evolves as time and budget allows.There are great benefits to decorating in stages: (1) by taking the time to get to know the space and how you want it to function will leave no doubt in your mind about what pieces of funiture the space needs. (2) by assembling a room in stages you have more time to do research, comparison shop and take advantage of seasonal sales and markdowns.
While the end result can be beautiful, the process can be a bit haphazard. Here are a few ways to simplify the process and still end up with the same great results.
Stage One
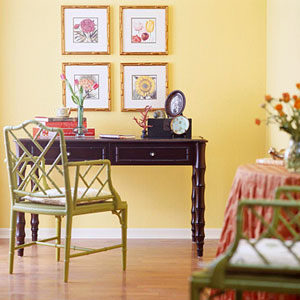
Painting the room will give you instant gratification and the biggest impact in the space. Paint is a very inexpensive way to change the look and mood of a room. If you are handy with a roller and paint brush, then it is a great do-it-yourselfer project which will save you the expense of hiring a paint contractor.
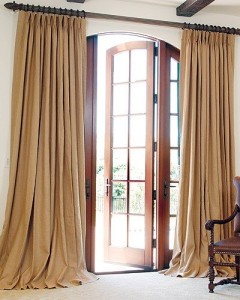
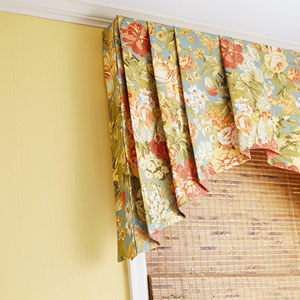
Adding window treatments is also a great way to give a big impact right away. Most drapery workrooms can customize simple drapery panels for not a lot of money. If a custom workroom is still beyond your budget, try purchasing ready-made panels at any home decor store. The draw back to this is that you have to work around the color schemes they have available, and they are usually a bit shorter than most standard windows require. If choosing a color becomes an issue, then stick to something neutral that will work with any color scheme. If the panels are shorter than what you need, you may be able to attach a coordinating fabric to the top or bottom for a custom look. If you are handy with a sewing machine, then the sky is the limit!
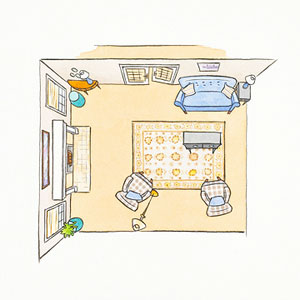
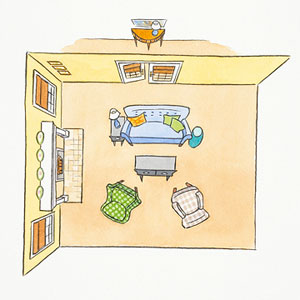
Arranging the existing furniture you have is the next step in stage one. If you only have a few pieces of furniture, it’s best to arrange them in one main conversation area for the biggest impact, instead of lined up against walls. Later as you acquire new pieces, you can arrange secondary seating areas throughout the room. It is best to always start with a scaled floorplan. It doesn’t have to be a professional floorplan; all that is needed is a piece of graph paper and a tape measure. Play with different arrangements to find the one that’s right for the room.
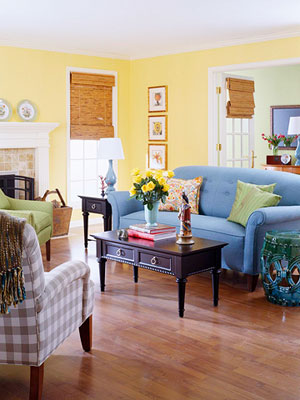
Finally in stage one, arranging your existing accessories in a pleasing way. Remember that sometimes less is more, so resist the temptation to bring too many small scaled pieces back into the room. Adding pillows to a sofa is a very inexpensive way to make a big impact and enhance your color scheme.
Stage two
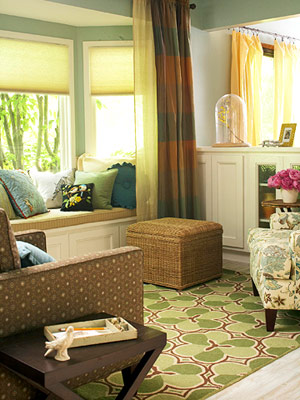
Bringing in an area rug at this stage is a great way to define the conversation area and anchor the furniture arrangement. It is important not to skimp on quality when it comes to area rugs, but with some good research you can find great quality rugs for under $1000 and have money in your budget for some more accessories or even an accent chair or two. Keep in mind you are always tweaking your floorplan for each new piece of furniture you add.
Stage three
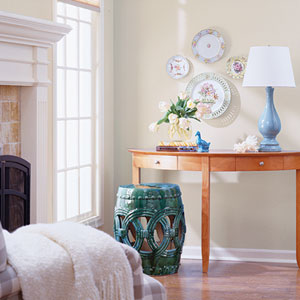
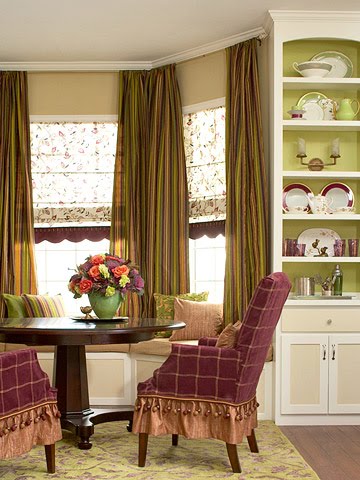
Bringing in some art work at this stage will get the room to the “fiinished” look. Also adding a secondary seating area complete with an occasional table will finish off the room. This is the stage where you can consider reupholstering the sofa if it was a bit more worn than you would like. Maybe replacing the ceiling fan with a fun new light fixture or adding another layer to your window treatment.
Each stage should be an improvement and should take you one step closer to a full makeover. At the end of these stages, you will have a beautiful and well pulled together room. Here are some tips to keep in mind:
1. Be systematic and organized. Start by arranging the furniture you have. Evaluate it to see where the holes are, then make a shopping list and prioritize it. When shopping, always carry a list of measurements (doorways, windows, etc.), samples of fabric or carpet, and paint or wood chips.
2. Give furniture a test drive. Take furniture out on approval when possible. The best way to see if it really fits in a room is to try it there.
3. Watch for bargains. Showroom sample sales are great places to pick up designer furniture at good prices. To find out when these sales happen, call your local design center or check the website of a showroom you like. Add your name to the mailing lists of favorite retail stores to be notified of big sales.
4. Don’t settle. It’s tempting to buy furniture as a quick fix to fill a room, but such purchases often are unsuccessful long-term solutions. Only buy furniture you really love.
5. Consider using a designer. Interior designer fees vary, but you can usually count on their time costing 10 to 15 percent of your budget. Although that means around $300 of a $3,000 budget, a designer’s recommendations could help you make sound choices that save money in the long run.
Photos Source: BHG.com
Please click here to contact me for questions about my design services
 All products shown are from Surya.com and available through our online store or email me at [email protected]