Eclectic Room Inspiration

Are you considering a room redo? Maybe you are struggling with the direction you want to go as far as the style and feel of the room? One way to overcome this design style block, is to call in a design professional. A good designer knows what questions to ask to help you uncover your design style and aesthetic, and of course take care of all the planning and implementation of your new space. But if you’d rather take the DIY approach, the next best thing is to browse design blogs and websites, and shelter magazines for style ideas. It may be quite possible that you already own some of the pieces you need to create a brand new room makeover, and it may be a great adventure shopping flea markets, estate sales, and auctions.

By going with an eclectic look you have the ability to mix and match pieces from different design periods and design styles and still achieve a very well thought out, cohesive and beautiful result. Imagination goes a long way when creating an eclectic space that seemed to have evolved over time. It does require a steady hand and some editing and restraint. Eclectic can easily head in the direction of “cluttered” if not carefully done. The key to achieving that cohesive, pulled-together look is by observing certain principles of design

  • Scale – Basically, this refers to size, or grandness of the main pieces in the room. They should all have similar scale.
  • Balance – Refers to how these pieces relate to each other. Balance should be a prime consideration when combining disparate items
  • Color – Don’t go for pieces that are all red or all blue or all yellow, but instead, look for similar color schemes, a common color that runs through each style, or simply a common “temperature” — for instance, red and orange are warm, while blue and purple are cool.

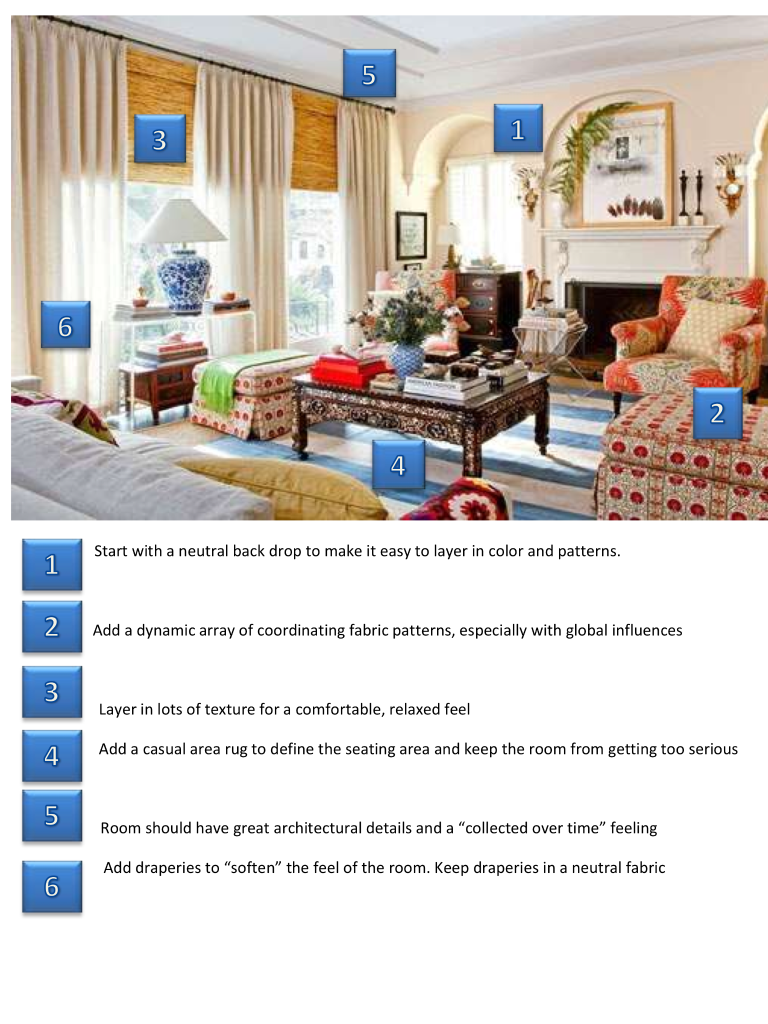
The room shown below is an eclectic space with some ethnic or global influences, that is very relaxing. Take a look at the 6 tips that you can take away to inspire your own eclectic room makeover.

photo (4)


Photo: Dwell Studio Face Book Page

Eclectic rooms are really never finished rooms. There’s always room for your next favorite piece.

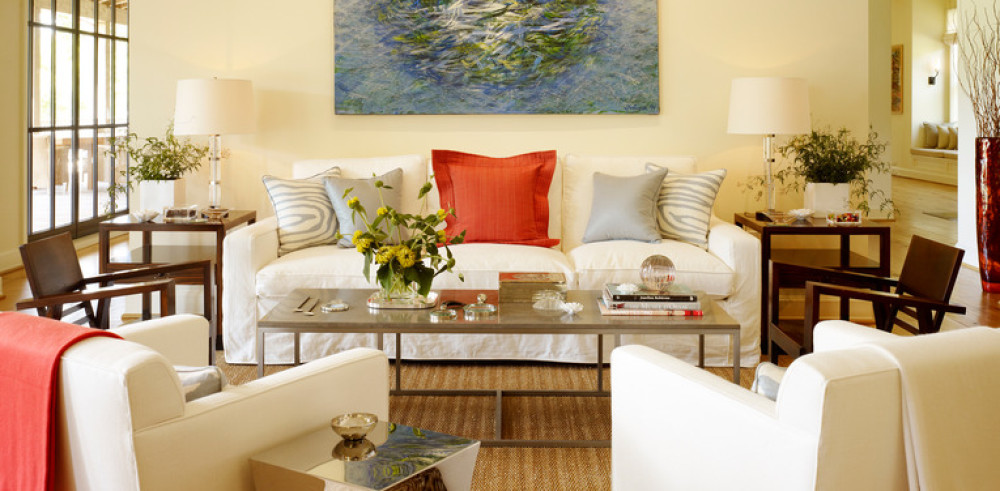
Here are a couple other eclectic spaces for your viewing pleasure

Photo: Dwell Studio

Photo: Dwell Studio


Photo: decorandyouhr.com

Photo: decorandyouhr.com


neutral-colors-living-room-interior-design-eclectic-home-decor-ideas


So if you want a space that speaks to your personality, and a perfect showcase of all your collections and favorite things, eclectic just might be the style for you. Could you see yourself in any of the spaces above? What is your favorite design style if eclectic doesn’t do it for you? Please leave me a comment below and let me know.

Contact me if you need help uncovering your design style.

Be Inspired!

197313_10150147243155629_734385628_6440473_3223277_n


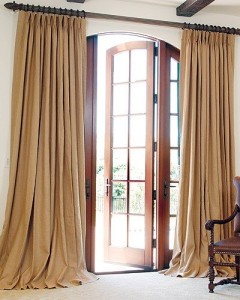
How To Hang Drapery Panels

Purchasing and hanging drapery panels can be very overwhelming. There are a lot of little details that need to be considered, which we will talk about briefly in just a second. Most big box stores that offer curtain panels usually have them stocked at 84″ lengths or shorter, and if you are lucky, you may be able to order from their online stores up to 95″ lengths. But what if you have taller windows?

I have seen this happen so often on my in-home consultations. People usually move into a new home and are anxious to cover their windows whether for privacy or decorative reasons, so they run out to the big box store down the street to find an inexpensive solution. But is it really a solution if it is not addressing the problem? Store bought curtain panels rarely fit the windows properly. As I mentioned earlier, they are usually too short,  not many choices available, usually unlined or inadequately lined, and little or no consideration given to aesthetic and your energy savings needs. As I always say, you are going to spend the money anyway, why not spend it right. Custom drapery panels are made to fit your windows, and are a beautiful and timeless solution when done right.

Here at No Naked Windows, we have made it easy to order custom drapery panels through our online store. You get to choose your fabric type (silk, faux silk, linen, cotton, burlap etc), your choice of solid or patterned fabric, your choice of header (the pleating at the top of the drapery panels), the finished length, type of lining, or even the choice of using two or three different fabrics for a color blocking effect. Visit our online store to see your options. They start at just $269 per pair!

Once you have determined that custom drapery panels are the way to go, you now need to know how to measure for them and how to hang them, which directly impacts the finished length to order. Measuring is simple – just measure from the floor to your desired height

Some additional tips for measuring:

The finished length is the actual length of the finished panels. To measure for the finished length of your custom drapery panels, simply measure from the floor to the desired height from where you want the panels to hang. A good rule of thumb is: If the space above your window is 8″ or less, it is usually more aesthetically pleasing to hang your drapery panels right at the ceiling. If the height is more than 8″ then you can determine how high above the window you would like to hang the panels. Please note if you have low ceilings hanging the panels closer to the ceiling gives the illusion of more height. One more thing to keep in mind is the hardware you will be using to hang your panels. The hardware will add approximately 1″-2″ to the overall length when hung. If you desire some puddling in your drapery panels, you can add 2-3″ for a trouser break look or 6-8″ for a formal puddled look. 

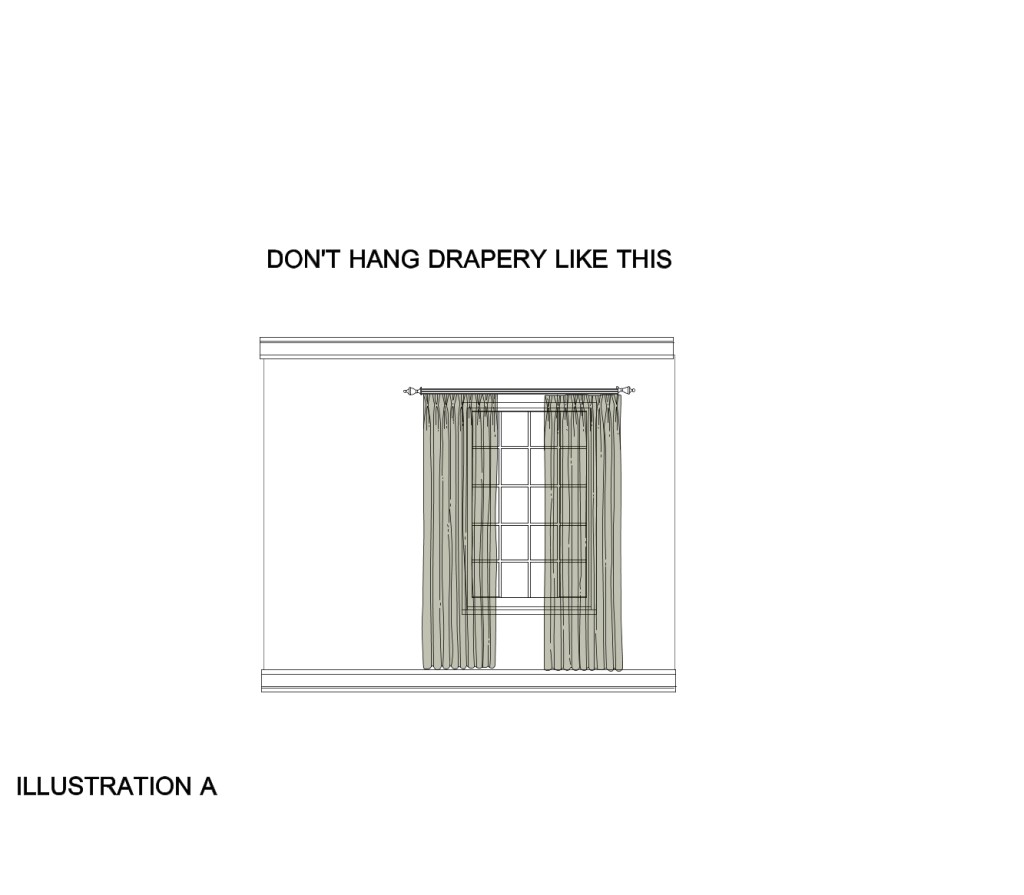
Here are a few illustrations of the Do’s and Don’ts of how to hang drapery panels
how to hang drapery panels


In this example there are  few don’ts:

  • Don’t hang the drapery panels right above the window. Hang drapery panels closer to the ceiling or crown molding to give he illusion of a higher ceiling
  • Don’t hang drapery panels so far above the floor. The minimum floor break is 1″. otherwise your drapery panels will look like high water pants
  • Don’t hang your drapery panels so far into the window. Hanging drapery panels starting at the edge of the window outward, helps to visually widen the window. Be careful that the edges of the window aren’t visible. Drapery panels should cover about 3-4″ of the window edges on either side. This applies to decorative drapery panels. If privacy is desired with your drapery panels, then you will need much more fabric for fullness, and room on either side of the window for stack-back ( The stacking back of the fabric when the drapery panels are in open position)
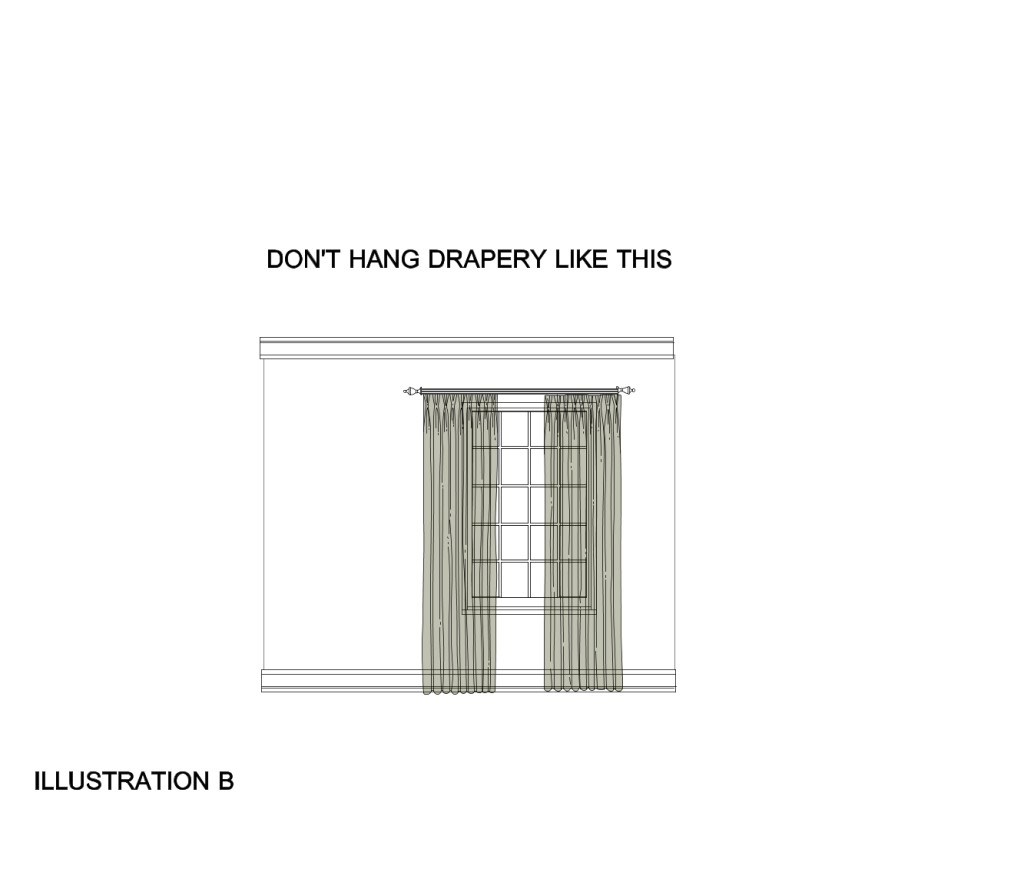
ILLUSTRATION B


In this example, at least the drapery panels are touching the floor, but notice that they are still hung too close to the top of the window and the drapery panels are too far inside the window.
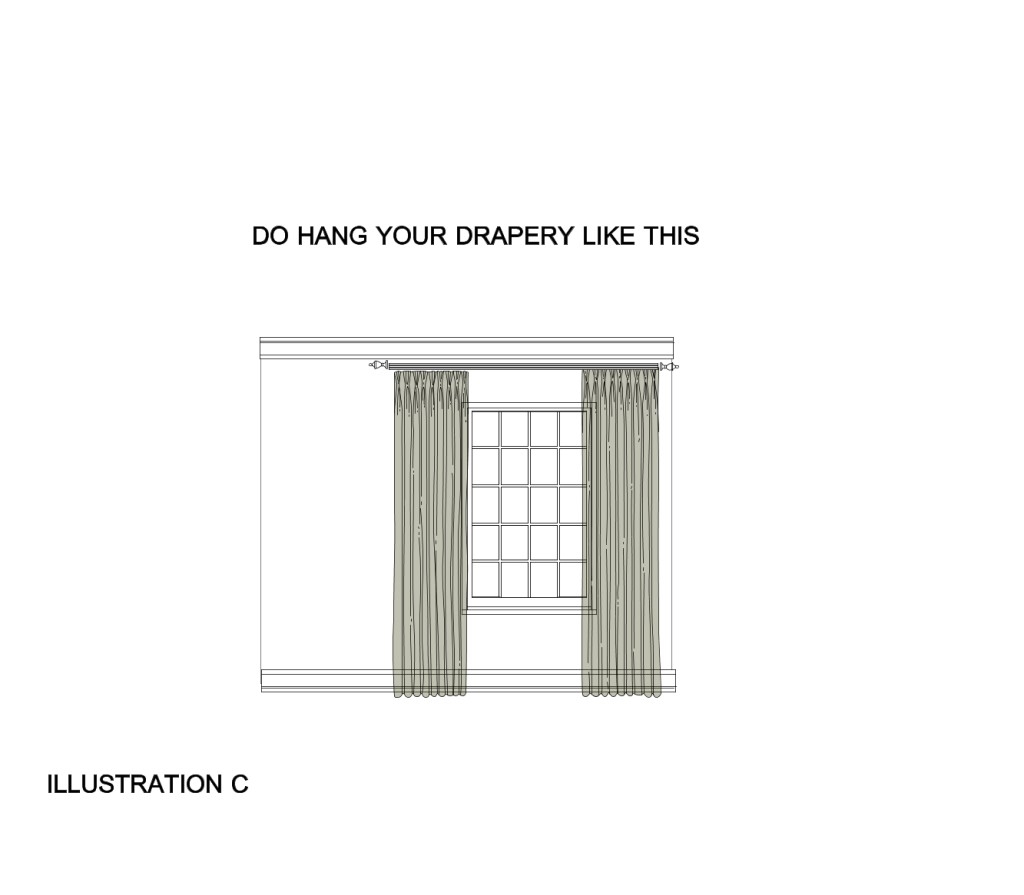
ILLUSTRATION C


In this example, it’s finally done right:

  • The drapery panels are at a 1″ floor break
  • The drapery panels are hung closer to the ceiling
  • The drapery panels are hung at the window’s edges and outwards

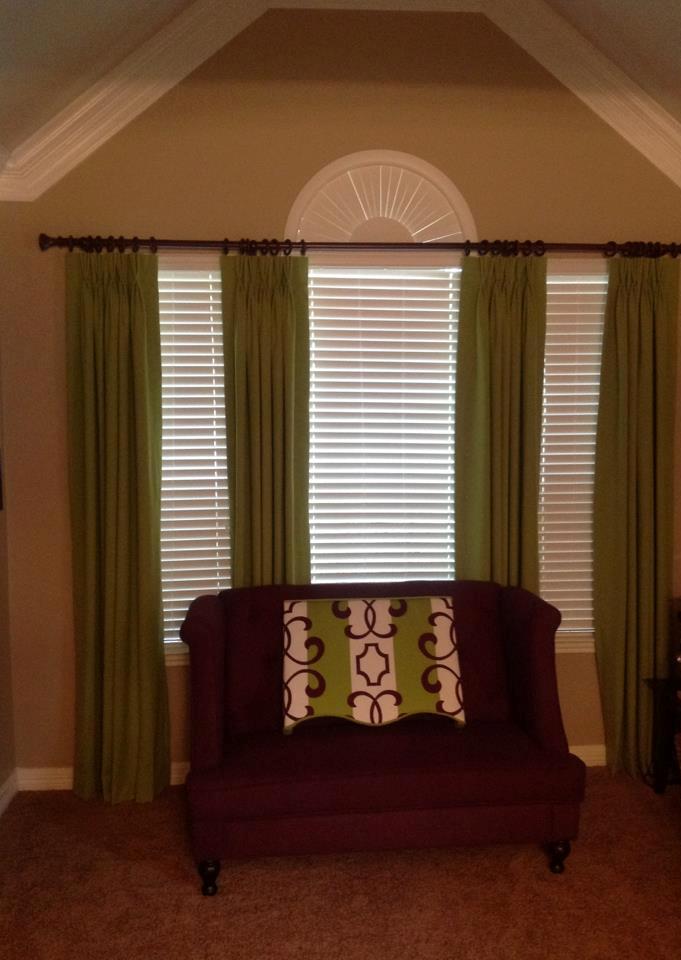
I get this question a lot: What if I have double windows with drywall or trim in between both windows? Here’s the answer:
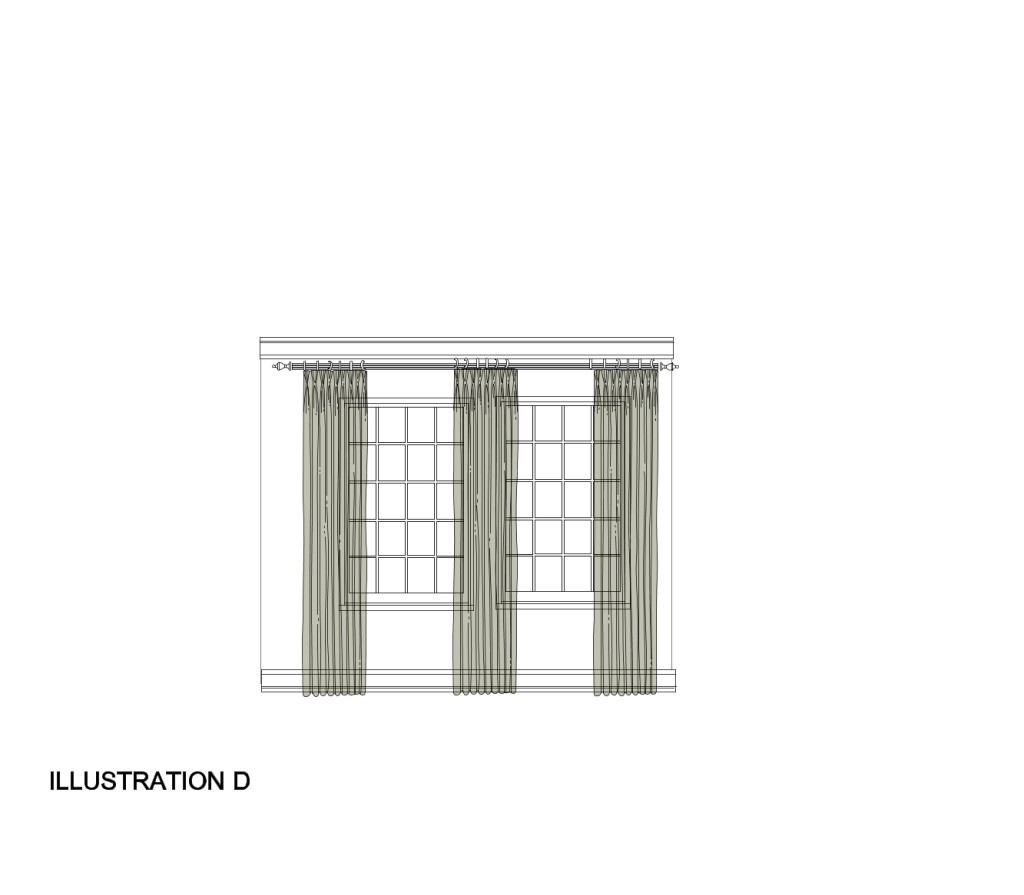
ILLUSTRATION  D


1813_553453858020937_2090014473_n


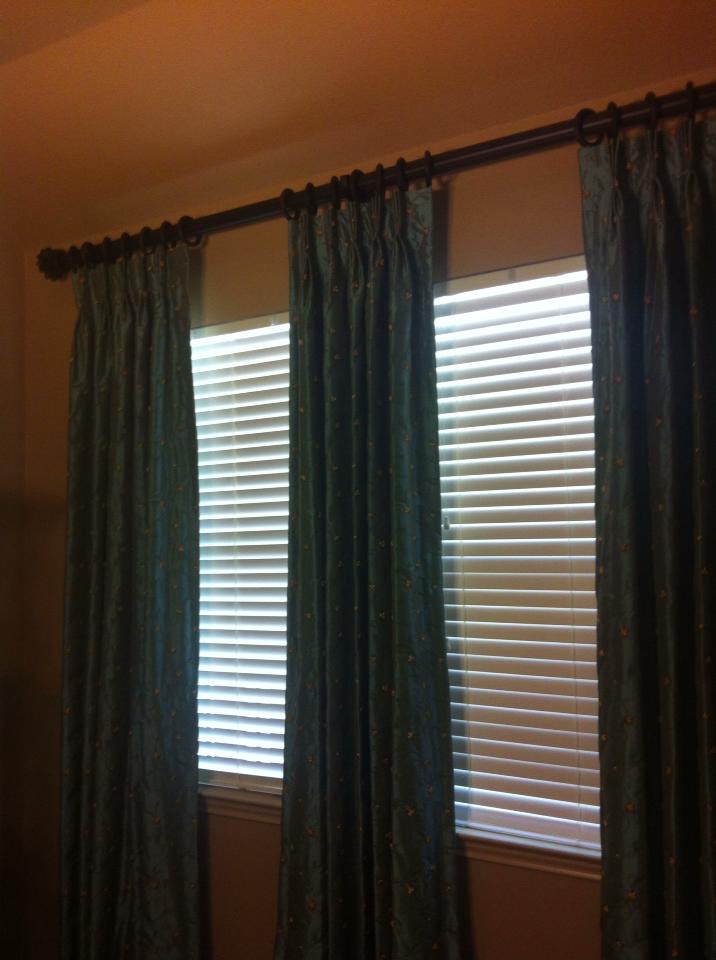
I recommend ordering a third drapery panel to cover the drywall between the two windows….especially if over 6″ wide. This helps the overall window treatment to flow better and look like one unit and be more cohesive. If you have beautiful wood trim casings around your windows that you wish to show off, then no need for the third panel, as long as there isn’t more than about 18″ between the two windows with casing included, in which case you may need to treat them as two separate windows with two drapery panels each.

Here’s an example of drapery panels I designed and had installed for my client about two years ago. Notice that there wasn’t a lot of room above the window, so we took it all the way to the crown molding.
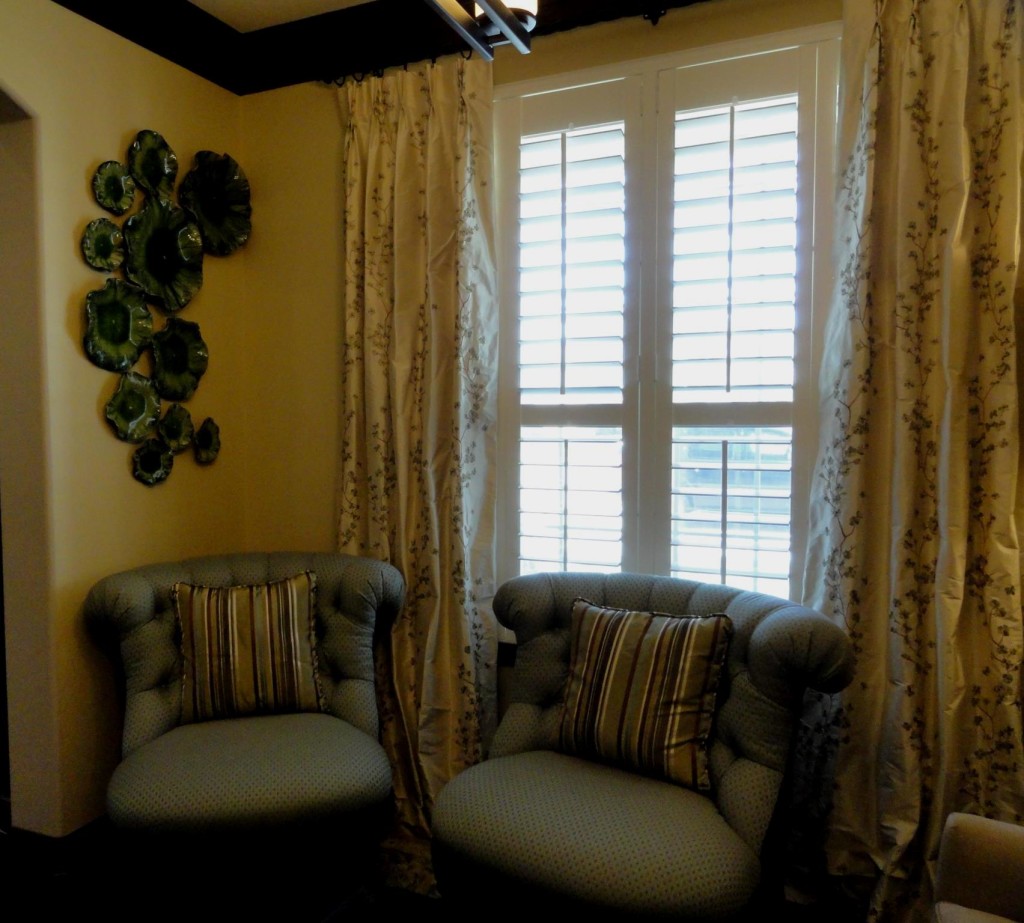
463358_378092702223721_110730298959964_1227720_1284562932_o

A couple more examples:

579086_631355073547965_65530747_n cropped


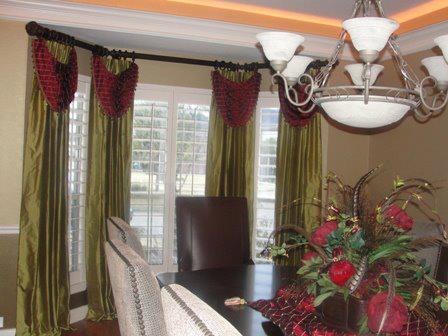
These are actually drapery panels with handkerchief swags. I included this picture to illustrate what happens when we are working with a bay window. You still want the windows to be one unit and have a cohesive flow. Here we used three different rods, but added a special hardware called an “elbow” to join them together at each 45 degree angle. The elbow is quite flexible and works much like our elbows do. The drapery panels are then installed to wrap around the angles for a better flow and cleaner look.
577978_627295687287237_534564411_n


So today you’ve learned how to measure your windows, where to order your custom drapery panels, and how to hang them. We will be running our summer special on custom drapery panels and all other window treatments starting June 1st through the entire summer – up to 20% off! You can use coupon code SUMMER20 at checkout beginning June1. If you are in the Houston area, lucky you! We can install your custom drapery panels for you at an additional charge, and even order your hardware for you! :-)

maybe you have some questions before ordering. You can contact me here and connect with me on all my social media channels.

Please don’t forget to comment and share! :-)

Be Inspired!

Veronica Solomon

Veronica Solomon


Throw Back Thursday: A Wide Open Family Room

A Family Room Done Over 8 Years Ago

A Family Room Done Over 8 Years Ago

Hello All! Happy Throw Back Thursday! Well that would only make sense if you use Instagram. I do, and you can follow me here! :-)

Throw Back Thursday or #TBT is an Instagram community hashtag where users post older pictures of themselves or something that’s dear to them – A blast from the past if you will.

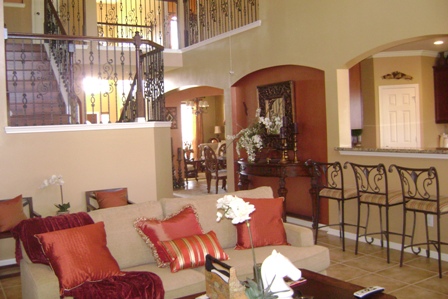
Ok, so here’s my throw back aka blast from the past! :-) The room pictured above is a family room that I did over 8 years ago. This client is very near and dear to my heart…..well actually that client is ME :-)

This is actually the family room in my current home (The 4300sf one that I am downsizing from, if you’ve been following my recent posts). Most of the furniture pieces here are from a previous smaller home I owned and I had to make them work in this home with wide open spaces and volumnous ceilings. Everything seemed so small in the room, so I got creative and brought in color! First I painted the room in a warm neutral from Behr Paints. I decided to use red as the accent color to cozy up and ground the space a bit. I brought in a beautiful large area rug and added pillows and accessories repeating the red throughout the space. The formal living room, formal dining, study, kitchen and breakfast room are all basically somewhat open to each other, so I repeated the red in smaller doses in the adjoining rooms.

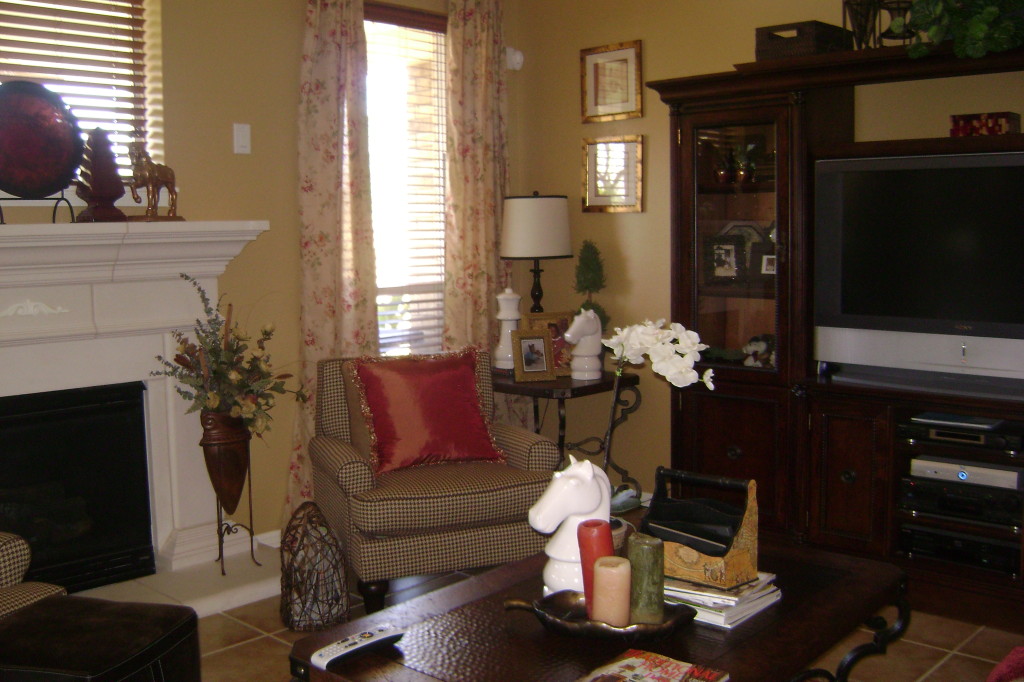
Here is another view of the room

Family Room


This picture was taken right after we moved in and alot changed in this room over the years…. a sleeker TV set for one, taller (20′) drapery panels, larger area rug and taller wing back occasional chairs. I was just starting out in my business, money was tight and I had to make do with what I had and be creative. For example, the drapery panels were actually oversized rectangular tablecloths that I simply hung unlined. You know I don’t like naked windows :-). I needed a larger area rug and so I saved up and purchased a beautiful oriental rug (not shown), that pulled together all the colors in the room.

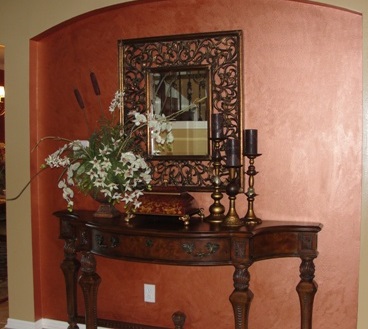
Website Pics 005I created this vignette to break up the long hallway from the foyer to the family room. I did that red accent wall myself using a Behr metallic paint.

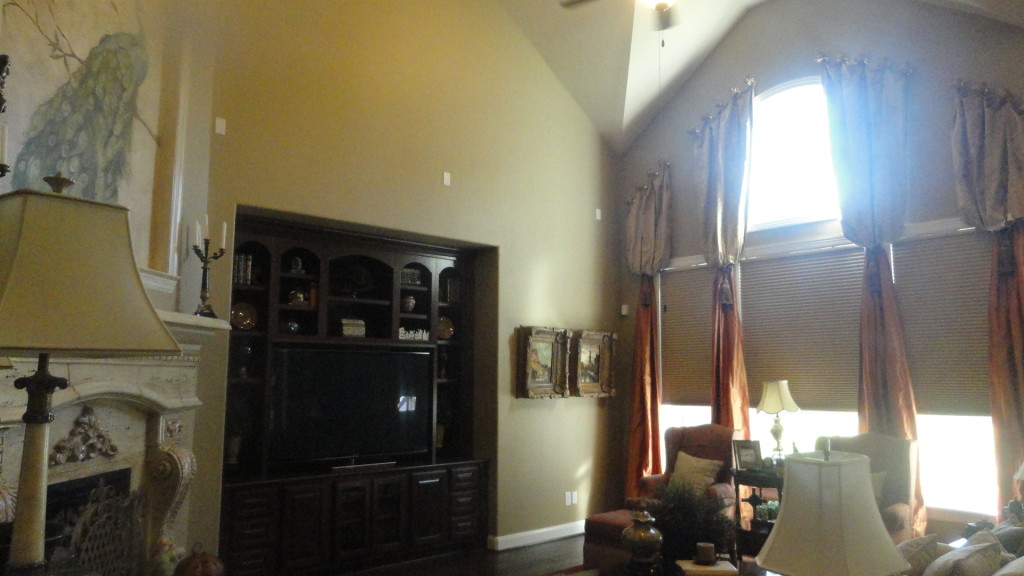
As you can see, my style back then leaned heavily towards traditional. With all the trends I follow, design magazines I read, courses I take, market events, and showrooms that I visit frequently, my taste has definitely changed and developed over the years. You will get to see much of my new design aesthetic in future blogs and videos about the new home. Stay tuned for that.

Ok, that’s all I have for you today! It was great going through old photos and seeing just how my design style has developed over the years.

What about you? what is your throw back memory for today?

Please don’t forget to comment and share, and of course, if you need help with your decor, contact me here

Be Inspired!

Veronica Solomon, Circa 2008?

Veronica Solomon, Circa 2008?

What A Difference Draperies Make!

Custom Drapery

Hello friends!  Lots of packing remains on the agenda for this week, but as promised from yesterday’s post, here is the other side of the room where the mural was done above the fireplace.

These pictures were taken using my iPhone, so the lighting is not great :-(

Custom Drapery

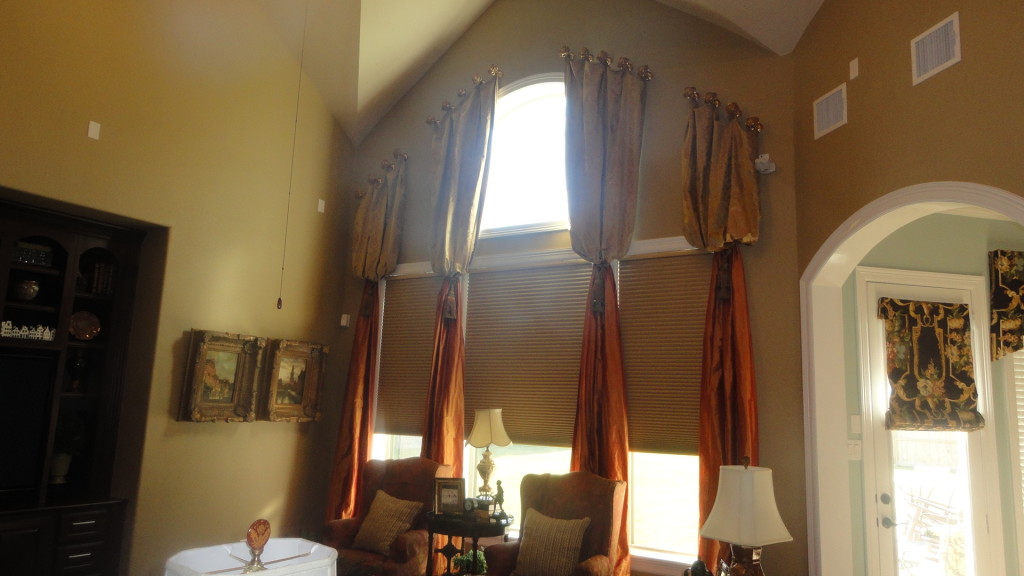
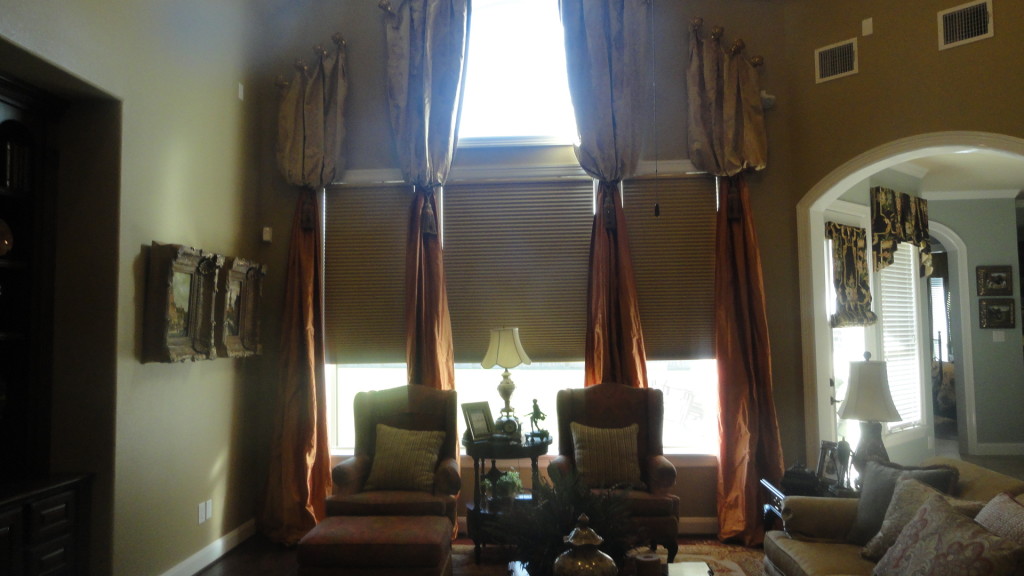
We started out with a plain room. The walls were builder beige flat paint and standard white 2″ faux wood blinds for window treatments. My client already owned most of the furniture pieces and art, and just needed help pulling it all together. In her previous home, gold was the dominant color, and although the accents of her furniture were mostly gold, she wanted to try some color this time. She was also very concerned about the high ceilings and wanted to cozy up the room just a bit.

Her beautiful aubusson area rug (hard to see from this picture) became the inspiration for our color scheme. Her rug had beautiful golds, corals, greens, creams and blues, so we had plenty of options for the new color scheme.

For the wall color, I chose a beautiful green from Benjamin Moore called Huntington Beige (HC-21), and that completely warmed up the space. For the windows, I chose battery operated honeycomb shades in a soft gold fabric for the rectangular windows, and for the arched window, I custom designed a motorized arched roman shade in a gold fabric matching the honeycomb shades, that fit perfectly inside the window opening. (Roman shade not shown here). I also designed these lush silk drapery panels  in two beautiful high-end silk fabrics and mounted them on medallions instead of a rod and rings. The Medallions are a beautiful hand painted gold finish, and are like jewelry in the room. I also added plenty of cozy throw pillows  and accessories to tie it all together.

Fabrics Used Throughout The Room

Fabrics Used Throughout The Room

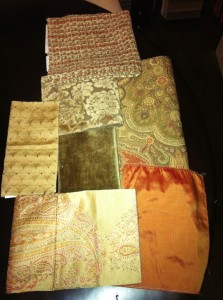
These are the beautiful fabrics that were used in the room – A beautiful solid silk in coral – a paisley silk in gold, green and coral – silk velvet – tweed – cut velvet damask, another rich paisley pattern and a diamond mini print. Notice that the fabrics are various textures and the patterns are a different scale, but they all work together using a complementary color scheme

Custom Drapery

One last view of the room. Notice the breakfast area beyond? The kitchen and breakfast room also got a makeover, the dining room, foyer, study, master bedroom, master bathroom, and upstairs loft all got the Casa Vilora Interiors treatment :-D. Who knows, you may see some of those rooms in future posts :-)

This was indeed a fun project! I must add, that my client and her wonderful family were so great to work with. She has a wonderful sense of style and very hands-on (she hung all the art herself!). Just a beautiful person inside and out.

If you have questions about our design services, you can reach me here

Please don’t forget to comment and share :-)

Be Inspired!

Veronica Solomon

Veronica Solomon

Have A Restful Sunday.

Bedroom From 2008 DC Design House

Bedroom From 2008 DC Design House

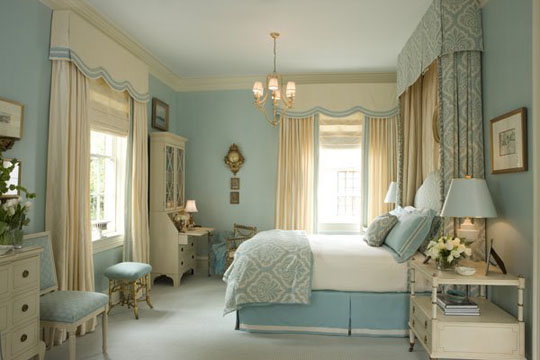
The soft blue walls and the white trim, the subtle pattern of the bedding, and the cozy canopy and draperies, create a restful and serene space where anyone would be delighted to lounge on a lazy Sunday afternoon.

Peace

Have a restful and peaceful Sunday….

Be Inspired!

Veronica Solomon

Veronica Solomon


My 5 Biggest Decorating Pet Peeves

Let me start out by saying that I am not here to judge, but merely to point out some of the decorating blunders I have seen throughout my decorating career, and to help you find better  and  more stylish solutions. After all, my job as a Decorator is to solve design problems and gently guide my clients to finding their design style and achieving beauty and comfort in their homes. So if you are guilty of any of the decorating faux pas on the proceeding list, please know that my constructive criticisms are coming from a good place – a heart of design love, so please – no hate mail :-)

So without further ado, here goes my list of decorating pet peeves.

  • Toilet Rugs and matching lid covers - I am referring to those rugs that are used in the bathroom, that are contoured to match the base of the toilet. In most cases they come as a set with a matching lid cover. I guess I can understand why people would like them – they keep your feet warm when you need to spend some time on the “throne”. But toilet rugs and lid covers are germy little things and usually aren’t that attractive anyway. Definitely every designers’ decorating pet peeve.

58255B83cropped

Solution: Go for a small rectangular area rug or a runner instead, and keep them at a safe distance from the toilet. If you have to keep the little piggies warm when you go, just wear slippers! :-)

c38450236cf5dde8a3aadf1cb29573ac

big_sq-2-slippers9

  • Drapery panels that are too short – My next decorating pet peeve is store bought drapery panels that are often too short for a standard height window. Most big box stores stock them in lengths up to 84″; way too short!

946773_653743291309143_616269116_n

Solution: You can shop for custom drapery panels starting at just $269 per pair through my online store. If you already own the short curtains you can visit your local fabric store and purchase a small yardage or remnant of a fabric that coordinates well with your short drapery panels. You can even use an old dust ruffle for this. Sew or use iron-on tape to add the fabric to the top or bottom of the panels, and voila, they look like they were designed that way. Beaux R’eves Blog has a step-by-step guide to doing this. Click here to see.

image_thumb

  • Art hung too high – This is one decorating pet peeve that I’ve seen more than my fair share of. Art should be hung at “eye level”, but whose eye level? What if you are 6’4″? Then clearly it would be too high for me, who is 5’2″ to comfortably view.

high_art_trio_flicr-400x256

Solution: A simple rule of thumb for hanging art is to place the centerpoint of the art at 60″ to 63″ above the floor.  From there you can adjust accordingly for the overall height of the ceiling or height of the furniture over which the art will hang.  This measurement provides a great base-line starting point and a good foundation for staying away from the too-high syndrome. To find the centerpoint of the art piece measure the full height of the piece (if framed include the frame in the measurement) and divide by 2.  Then measure the full width of the piece and divide by 2.  The point at which these measurements intersect is the centerpoint of the art piece.

Art2


  • Room in a bag sets- You know the ones, found in department stores where the bedding matches the curtains that match the pillows that match the shower curtain. I understand where the designers of those sets were going with that concept – they want to make it easy for homeowners by doing the matching for them. Well the problem is just that, they lack personality and way too matchy, matchy. The one shown below is a 24 piece set! Yikes! :-)

7526825211p

Solution: You can opt for custom bedding, where it’s all designed just for you with your choice of fabrics and trimmings. Custom bedding can be quite pricey, but another alternative is purchasing a comforter set and then choose pillows, bedskirt and shams in fabrics that coordinate with the comforter set rather than matching exactly. Our online store has a great selection of comforter sets. Click here to take a look. Also, try to avoid matching your draperies exactly to your bedding. A wonderful mix of fabric patterns, fabric types and textures is so much more interesting than fabric matching.

554928_558457927520530_455489489_n

  •  Wallpaper borders – I’m sure there was a time when wallpaper borders would make a wonderful statement in a room (can’t think of that time right of the top of my head :-)), but these days they make a room look very outdated.

imagesCA227VFC

Solution: Run the opposite direction! :-). On a serious note try doing an interesting paint treatment instead, like bold horizontal stripes, tastefully done faux painting, or a full wallpaper treatment on all the walls. Here are some examples

1659ac4fcb5af891d3d8e3ccc519f908

OLYMPUS DIGITAL CAMERA

d42762635f15761feff9bf2a1c0c8954

fff865f62b6596259fe4cf5631380204

So there you have it, my list of decorating pet peeves. I am sure you all have a few that you could add to this list as well. In fact, go ahead and leave a comment with a list of your decorating pet peeves. Don’t hold back, I’d love a good laugh :-).

Of course I am here to help you find solutions to those pesky decorating pet peeves. I am just an email or phone call away ;-)

Be Inspired!

Veronica Solomon

Veronica Solomon

Update On the New Digs!

The usual Sunday ritual – attend Sunday school at 9:45 followed by Worship Service at 11:00, lunch with the kiddos at 12:30 and recently the addition of visitng the new house currently under construction.

It’s hard for me to call it “home” at this point. Not because it is still a few weeks from being finished, but because there are so many things that are out of my control that need to happen to make this a reality. The biggest one obviously is finalizing the sale on our current home and getting the buyers to the closing table. Nonetheless, it is still very exciting and the designer in me is definitely already planning the interior design of the space.

As promised, here are the newest pics of the new digs.

photo (17)


It’s starting to look more like a real house. Over the past week brick and stone were added. The brick is from Hanson and is called Las Cruces and the stone is called Chocolate Flagstone (not sure who the vendor is). In the next week or so they will power wash and seal the brick and stone to bring out the true colors. Stucco will also be added in the coming week.

photo (19)


photo (20)


The interior is also starting to take shape. Drywall was done, and they will be adding the texture and paint in the coming week as well. Of course with any new construction project, I noticed a problem right away. I specifically requested and paid for the breakfast bar to be lowered, and of course because it is not a typical request, it got overlooked. That, will hopefully be resloved in the coming week as well.

So that’s it for now. Can’t wait to get to the interior design portion where I plan to possibly do a video and step-by-step guide of the planning and implementing of a room design. I will pick one room in the new house as our project room. Who knows?….We may do more! I promise it will be fun and inspirational, and of course beautiful. Hopefully this all works out. Fingers….and toes crossed :-)

Be Inspired!

Veronica Solomon

Veronica Solomon


Custom Drapery Panels Made Easy


How many of you out there still have naked windows? Ready for a change? Purchasing custom drapery panels doesn’t have to be difficult or expensive, and will add the finishing touch to your decor. Drapery panels is one of the least expensive ways to dress your windows and add the finishing touch to your space. Sure you can run out to the big box stores and purchase a pair of the ready-made panels, but they usually aren’t long enough to fit most windows or they just look like they are missing something. You may already have blinds, shutters or shades on your windows and wonder why you still need additional window treatments. A well-dressed window typically has a couple of layers of window treatments. The first layer, or functional layer is usually hard treatments such as shutters, blinds, natural woven shades, roller shades etc. This is necessary of course to maintain privacy and for light control. Adding a second layer will visually “soften” the windows. This could be a sheer treatment, light curtains or even beautiful silk panels. They can either be functional or fixed. Of course there are other styles like swags and jabots, but those are usually reserved for more formal or traditional decor. Adding a layer of fixed or non-functional drapery panels is a great way to add a custom, elegant look to your windows. It is also great for grounding your color scheme or decorating style. Fixed panels simply means that the draperies do not completely cover the windows, but are decorative side panels mounted to the edges of your windows, that are not meant to open and close.

As an Interior Designer, I have consulted with many do-it-yourself clients, who just need a little professional direction from an expert like myself. In a lot of cases, they desire the look of custom drapery panels, but would rather not wait 8-10 weeks or more, or pay the high costs. This is why I decided to launch an online store making it easier, quicker and inexpensive to order while maintaining the highest quality, fine tailoring and vast selection, and they start at just $269! Here are the simple steps to ordering new custom drapery panels.

Start by clicking our Ecwid storefront and clicking the custom drapery panels tab
This will open the menu of fabric types you can choose from. Click the fabric type you desire – whether it is silk, linen, cotton, patterned chevron etc

Now you can choose your custom features such as color, type of lining, interlining option, header style option, finished length, color block option

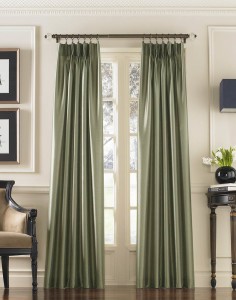
Header style option refers to the very top of the panels where pleats or grommets are added. You have a choice of goblet pleat, french pleat, cartridge pleat, pinch pleat and grommets. The photo gallery shows examples of each

Finished length refers to actual length of your finished panels. the menu has 4 options 84″, 96″, 108″ and 120″ which is standard lengths, but we understand your finished length could be somewhere in between. With that in mind we have included a “special requests” text box where you can type your finished length (72″ to 120″) or any other special requests

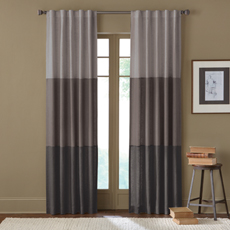
Color Block Option refers to panels where you can choose to use up to three different color fabrics. This option definitely adds a more custom look!

So there you have it! It is that simple! Your drapery panels arrive with drapery pins and ready to hang in 4-6 weeks
Swatches are available for purchase and of course we are available via phone or email to answer any questions you have.
Now there’s no reason to have naked windows!

Color Block Panels

Color Block Panels

deca_choc

Burlap Panels

Burlap Panels

These are just a couple of examples of drapery panels. We also have ready-made pillows and bedding available.

Be Inspired,

Veronica Solomon

Veronica Solomon