One Room Challenge: Studio Dining Room Week 4


I simply cannot believe that we are already on week # 4 of the One Room Challenge!!

It has been an exciting, and challenging journey so far – finishing a room in 6 weeks, and documenting each step along the way through this blog. If you have missed the progress so far, you can visit the posts for week 1, week 2 and week 3 to get up to speed

One Room Challenge
The past week’s progress has been somewhat slow. I honestly didn’t get as much done as I had hoped. I had planned on a few DIY craft projects that I just never got around to. Of course it didn’t help much that my laptop got a virus and basically quit on me yesterday. (Read about my melt down here :-) ). Thankfully, it is now up and running with no data lost! Wheeewwww! Crisis averted!!  :-)

As I mentioned, the craft project that I was hoping to get finished but never got around to, is making a small preserved boxwood wreath and 2 topiaries. I have found some good options online, but they are all a bit more expensive than I wanted to pay. With time running out, I may just have to suck it up and just buy the darned things instead of trying to make them myself. These will definitely complete the vignette against the main wall nicely, so they are a must-have.

one room challenge

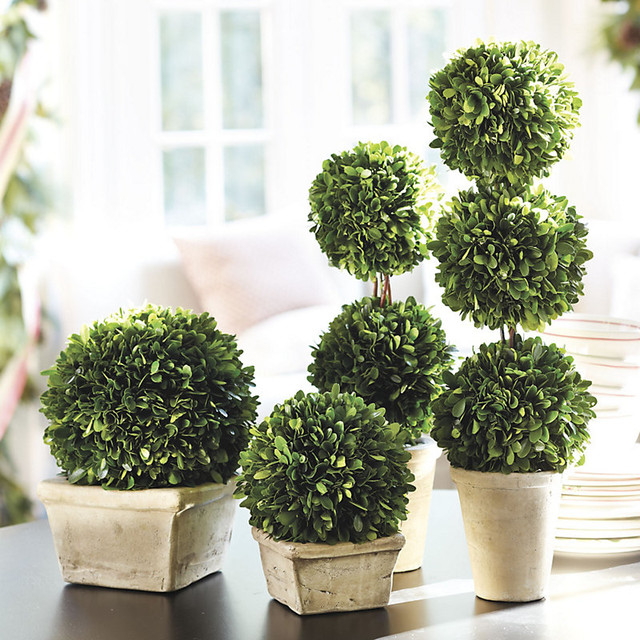
Preserved Boxwood Topiaries

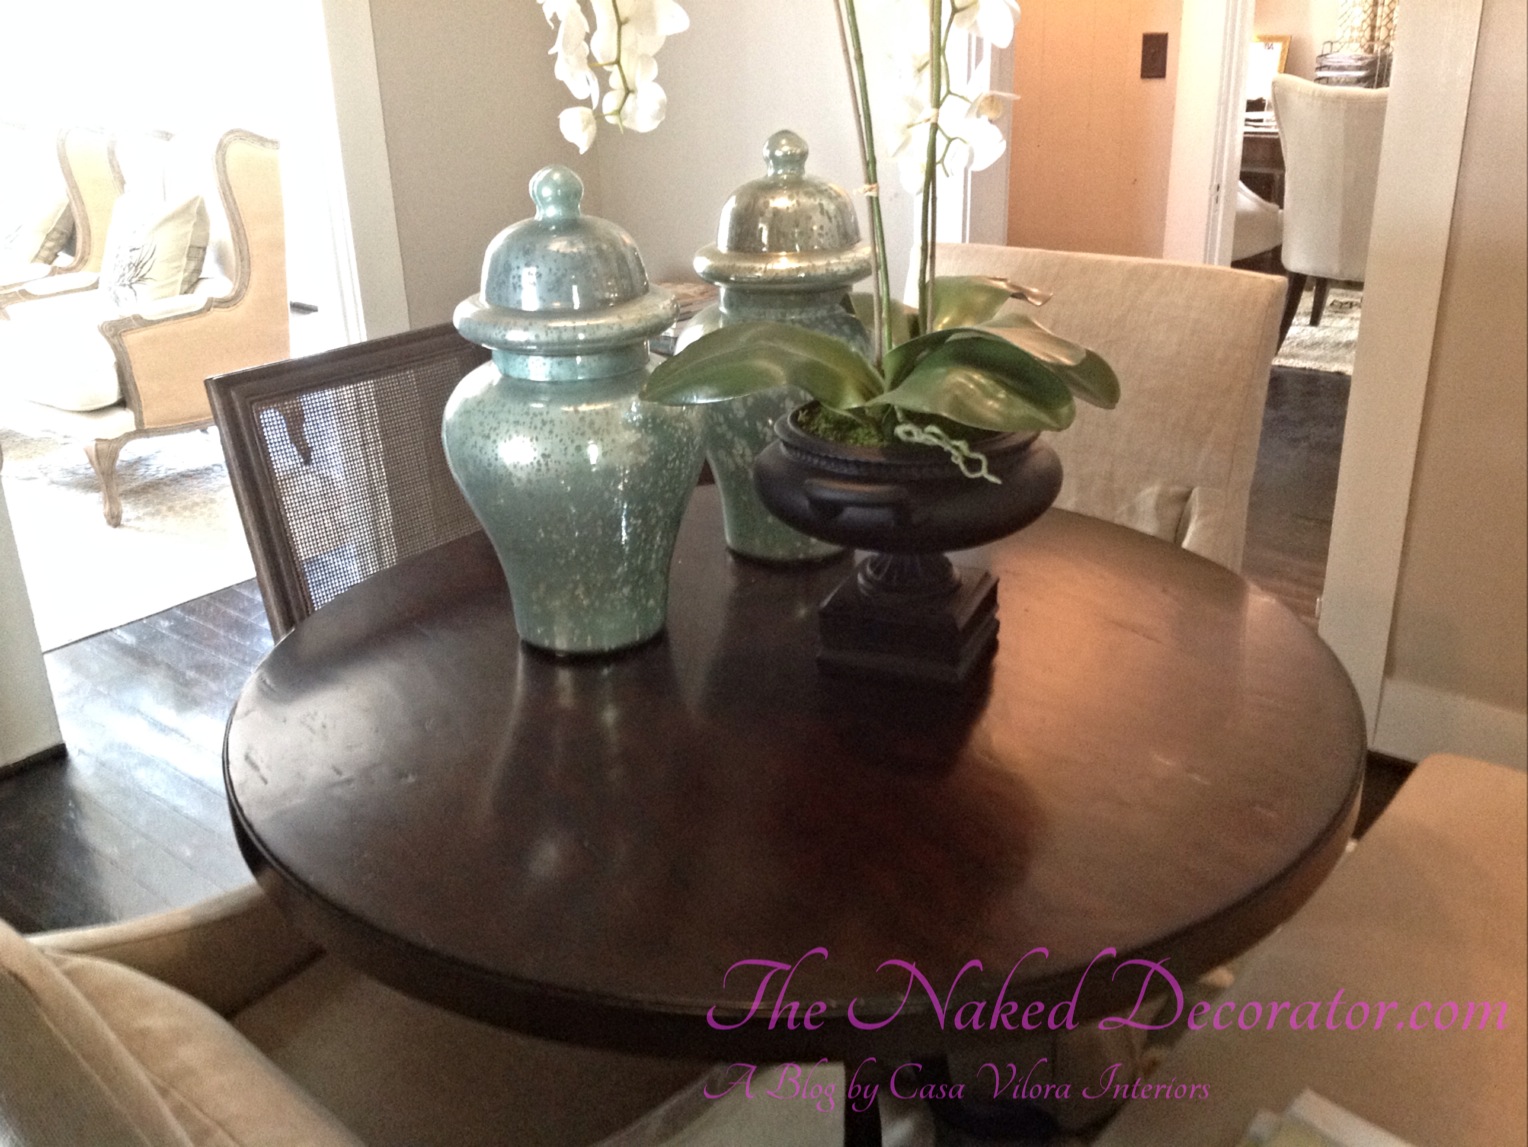
I also need to get some tall white ginger jars for the vignette on my sideboard. I seriously have a weakness for ginger jars – usually the blue and white chinoiserie ones, but for the dining room, white will be perfect.
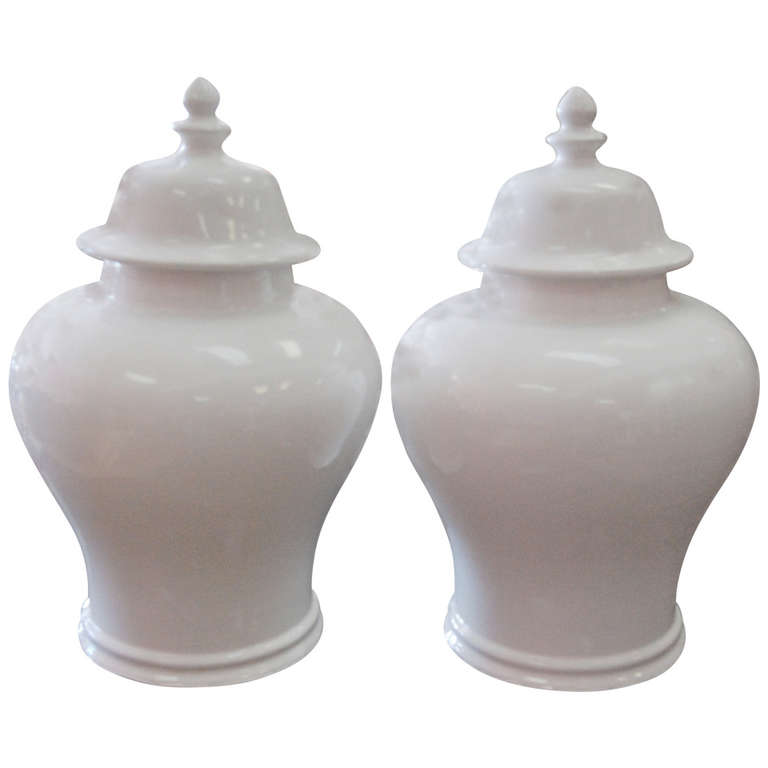
one room challenge

White Ginger Jars

This is the lamp I will be getting soon to add some extra light in the dining room, and to complete the look of an awkward corner.

one room challenge

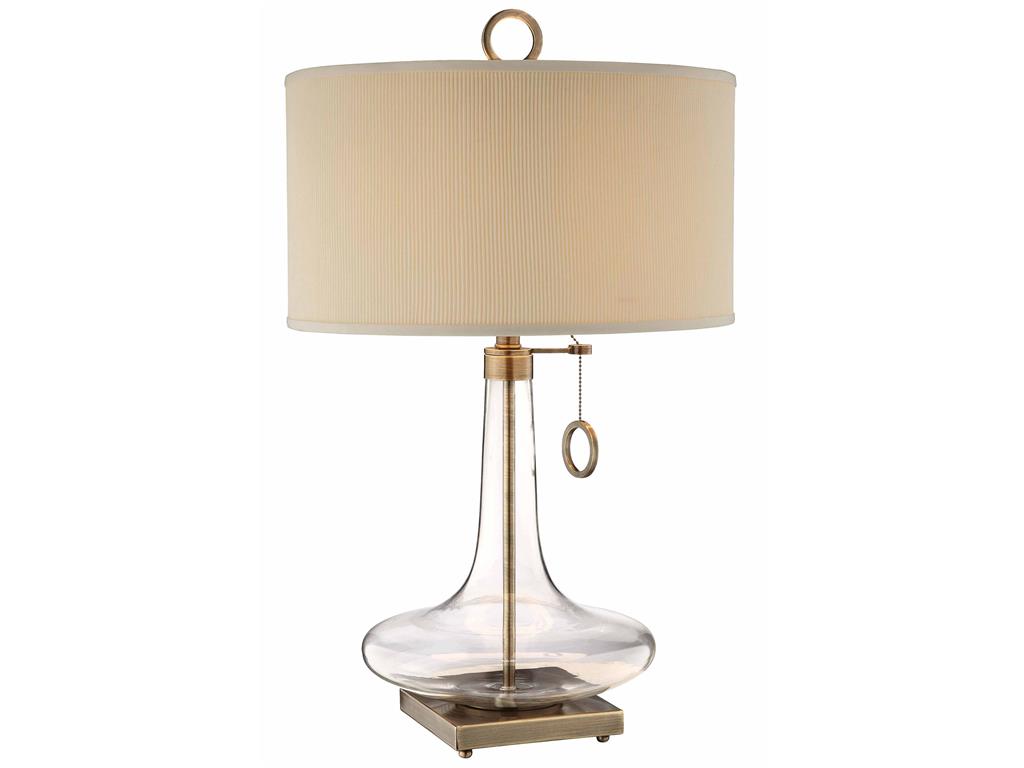
Lamp for Dining Room at Casa Vilora Interiors

The beautiful pinched pleat draperies have been installed and they came out just as I expected. I am so in love with this beautiful fabric! Here’s a sneak peek. I don’t want to give it all away just yet :-)

one room challenge

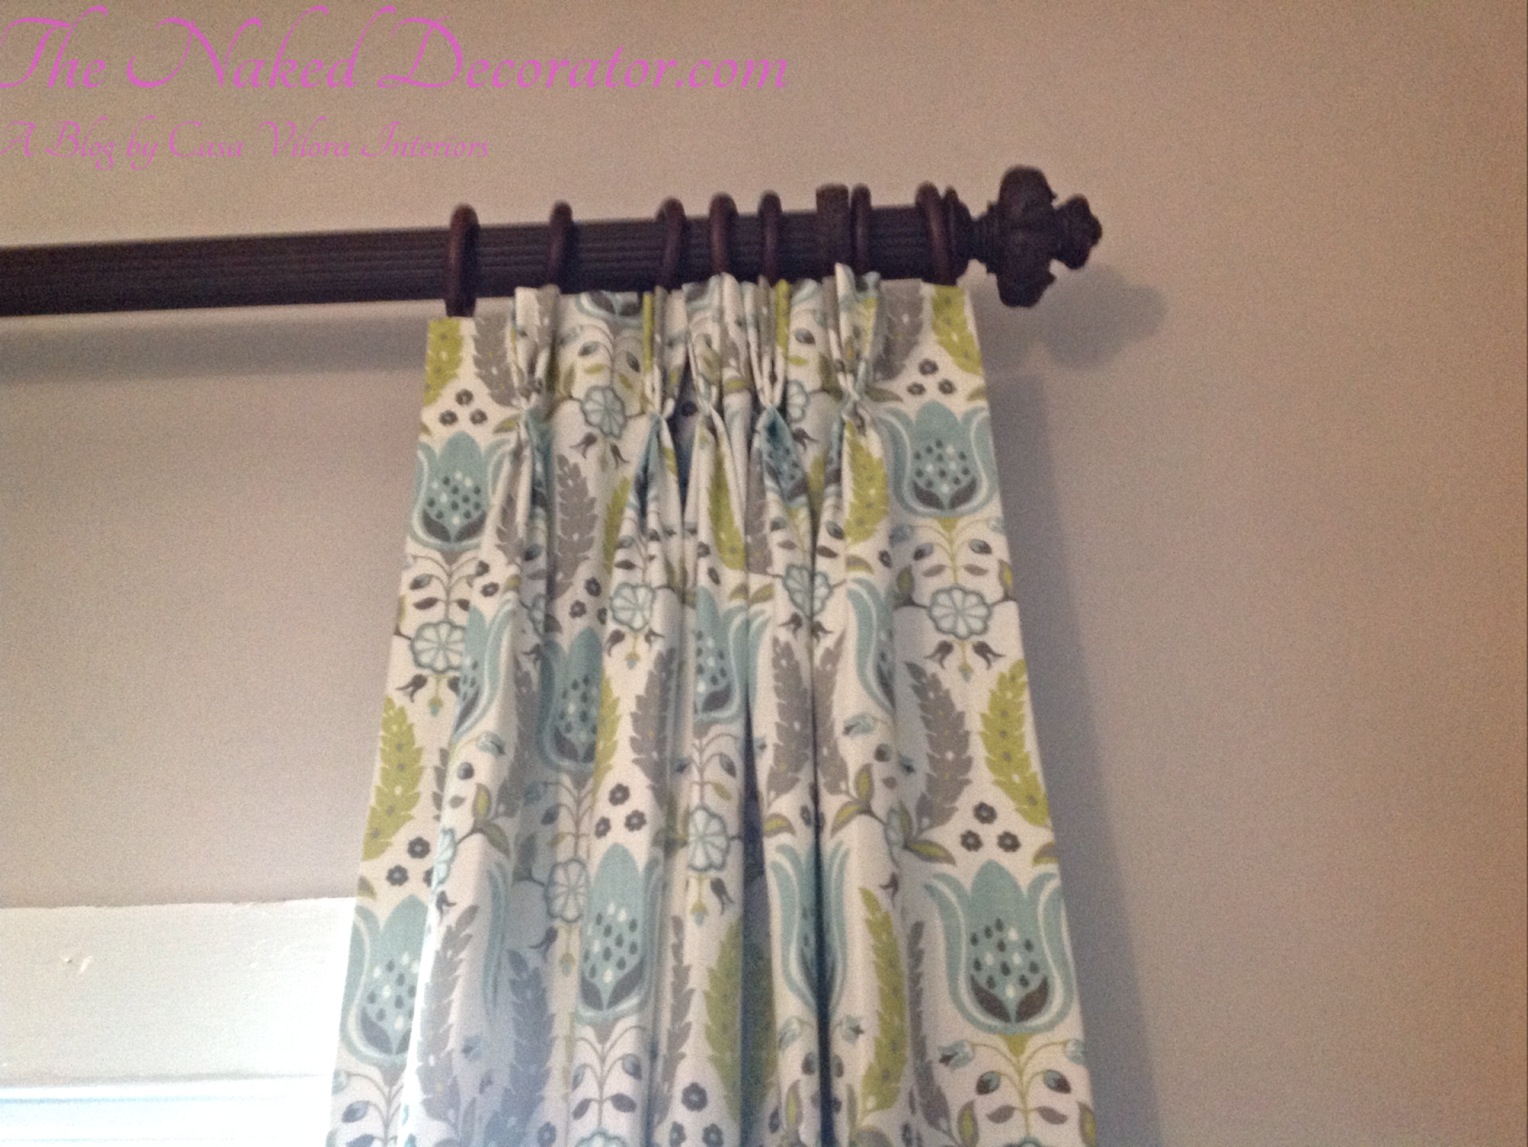
Pinch Pleat Drapery Panels In Dining Room at Casa Vilora Interiors

I also got a few art pieces hung, as well as some more plates on the walls. These framed abstracts were extras from a project I completed a while ago, and they go very well with the dining room.

one room challenge

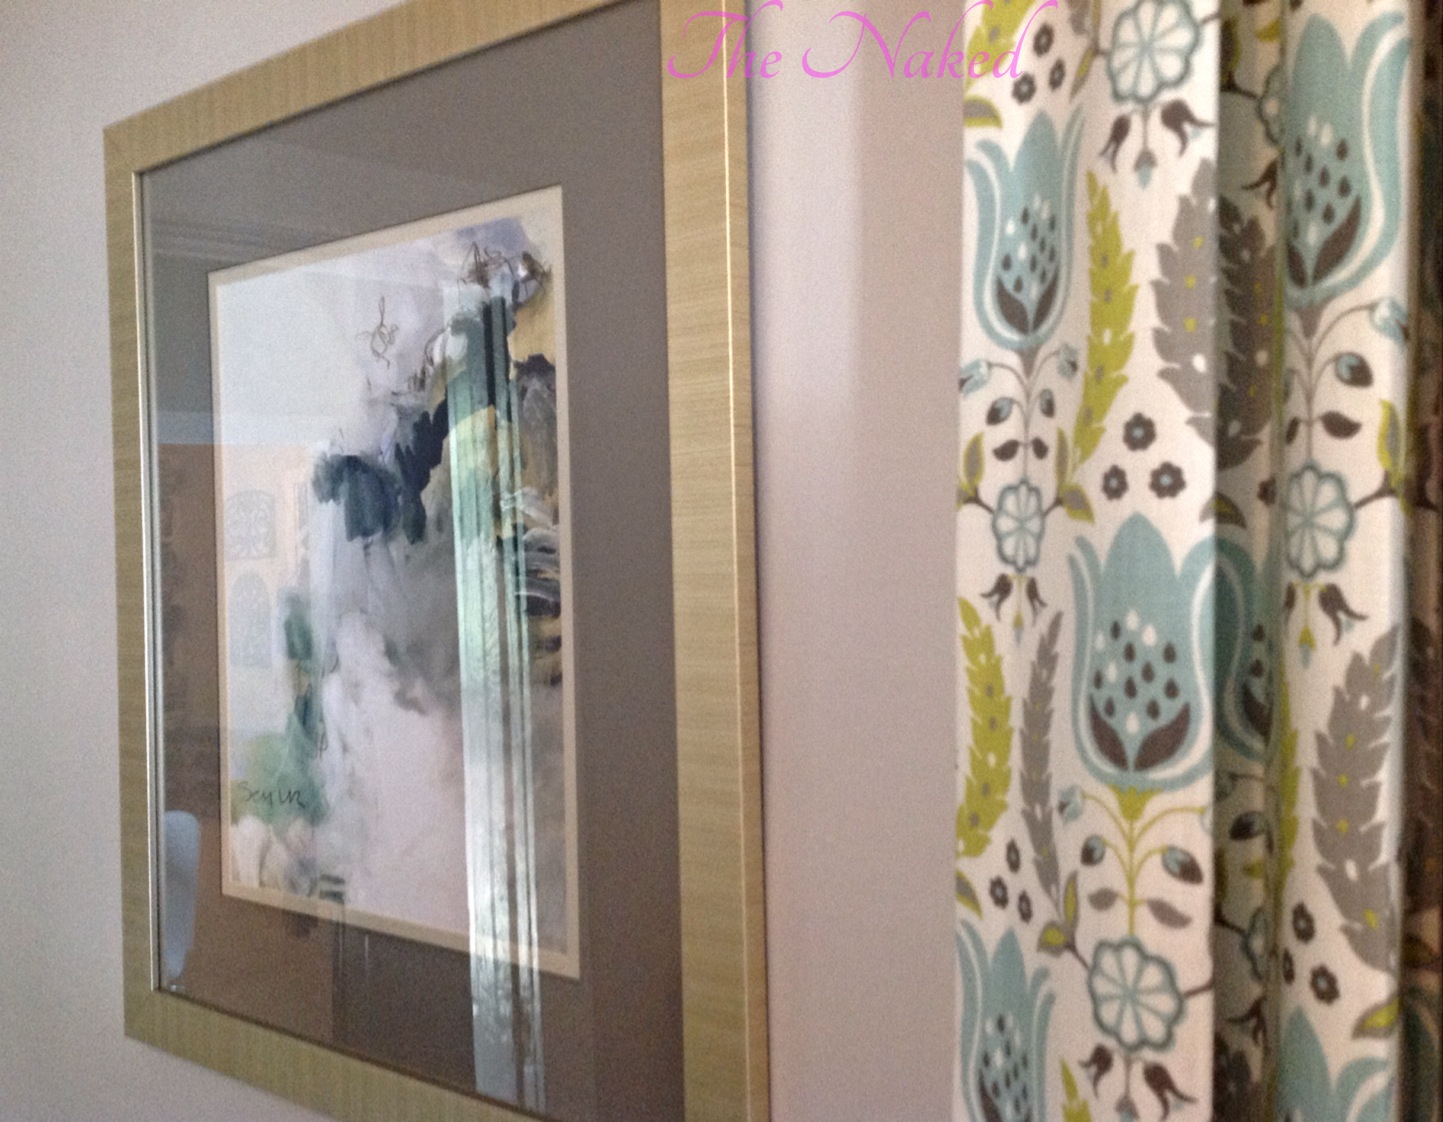
Abstract Art in Dining Room at Casa Vilora Interiors

one room challenge

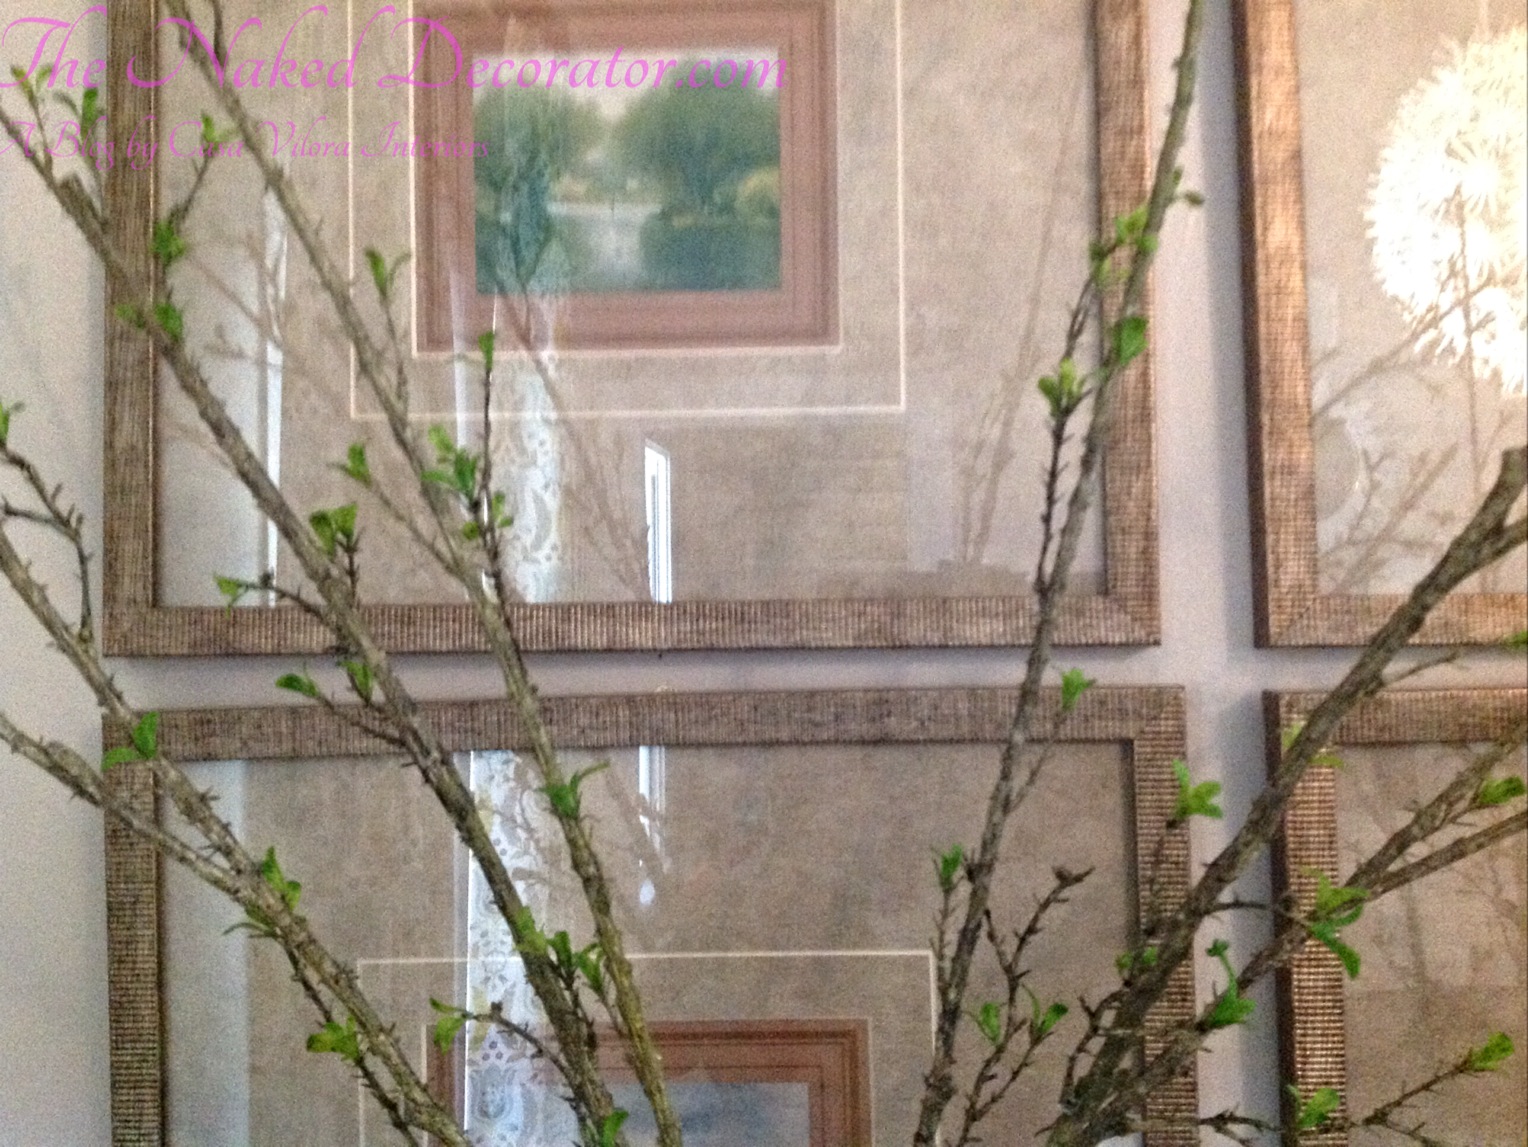
Landscape Art in Dining Room at Casa Vilora Interiors


one room challenge

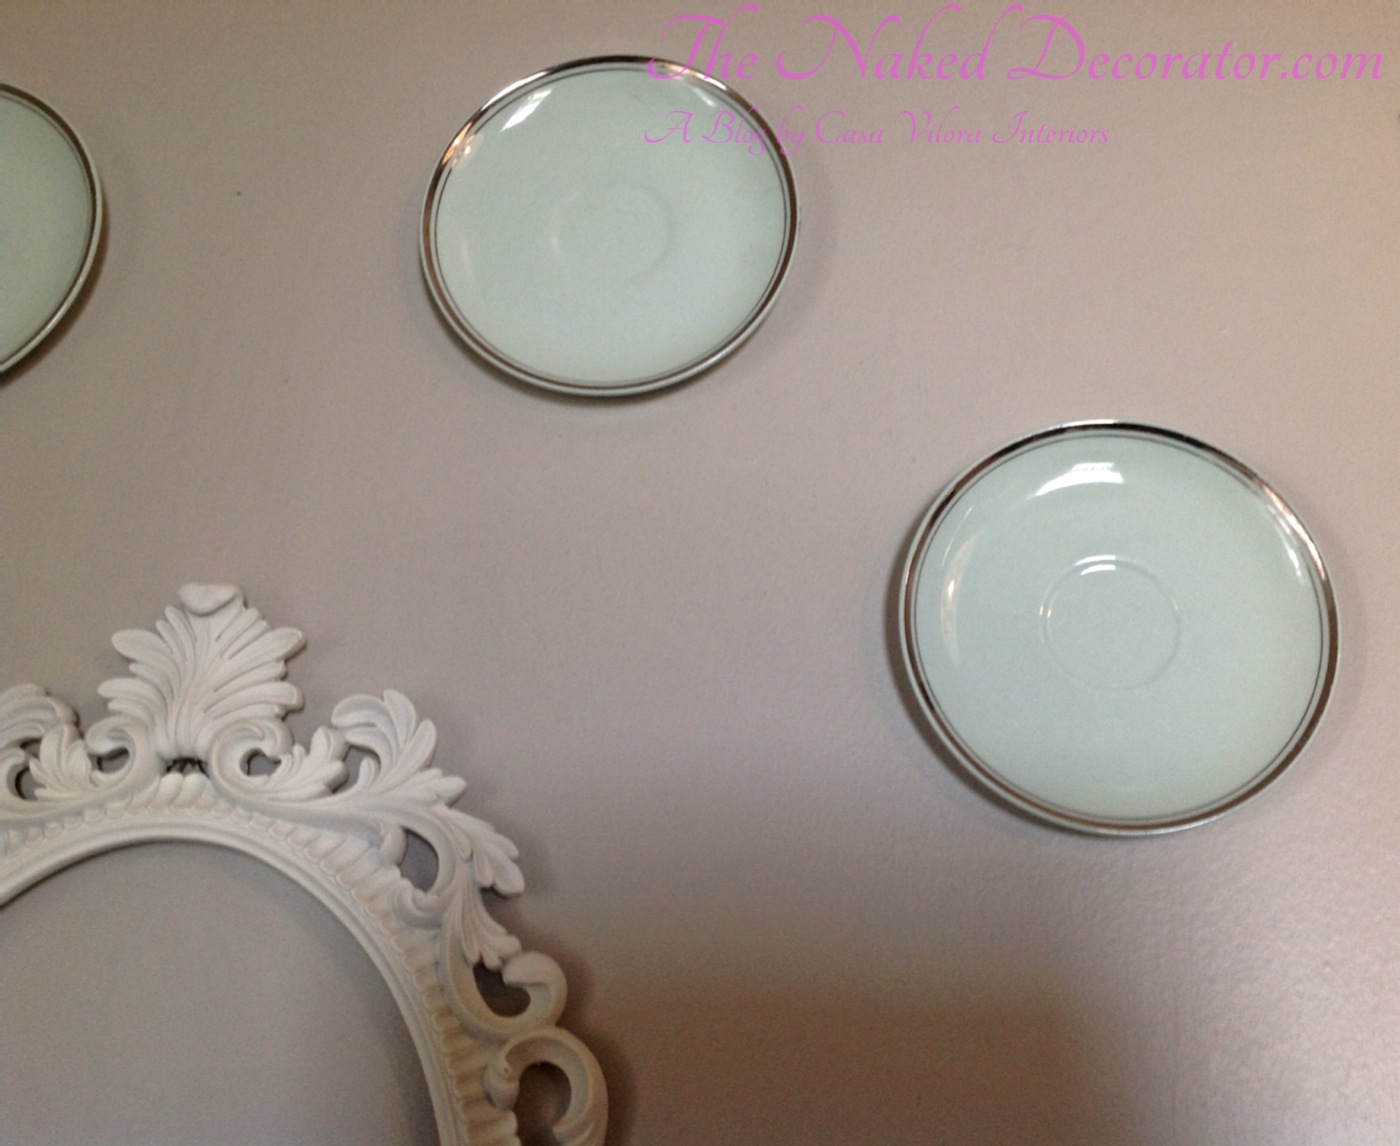
Plates on Wall in Dining Room at Casa Vilora Interiors

These plates were purchased at Goodwill for next to nothing, and the empty frame came from Hobby Lobby. I will be adding either a monogram decal with the letters “CVI” (Casa Vilora Interiors), or a small 6″ round boxwood wreath inside the frame. Which option should I go with?

Of course the main wall with my wonderful carousel horse is coming together as well :-)

one room challenge

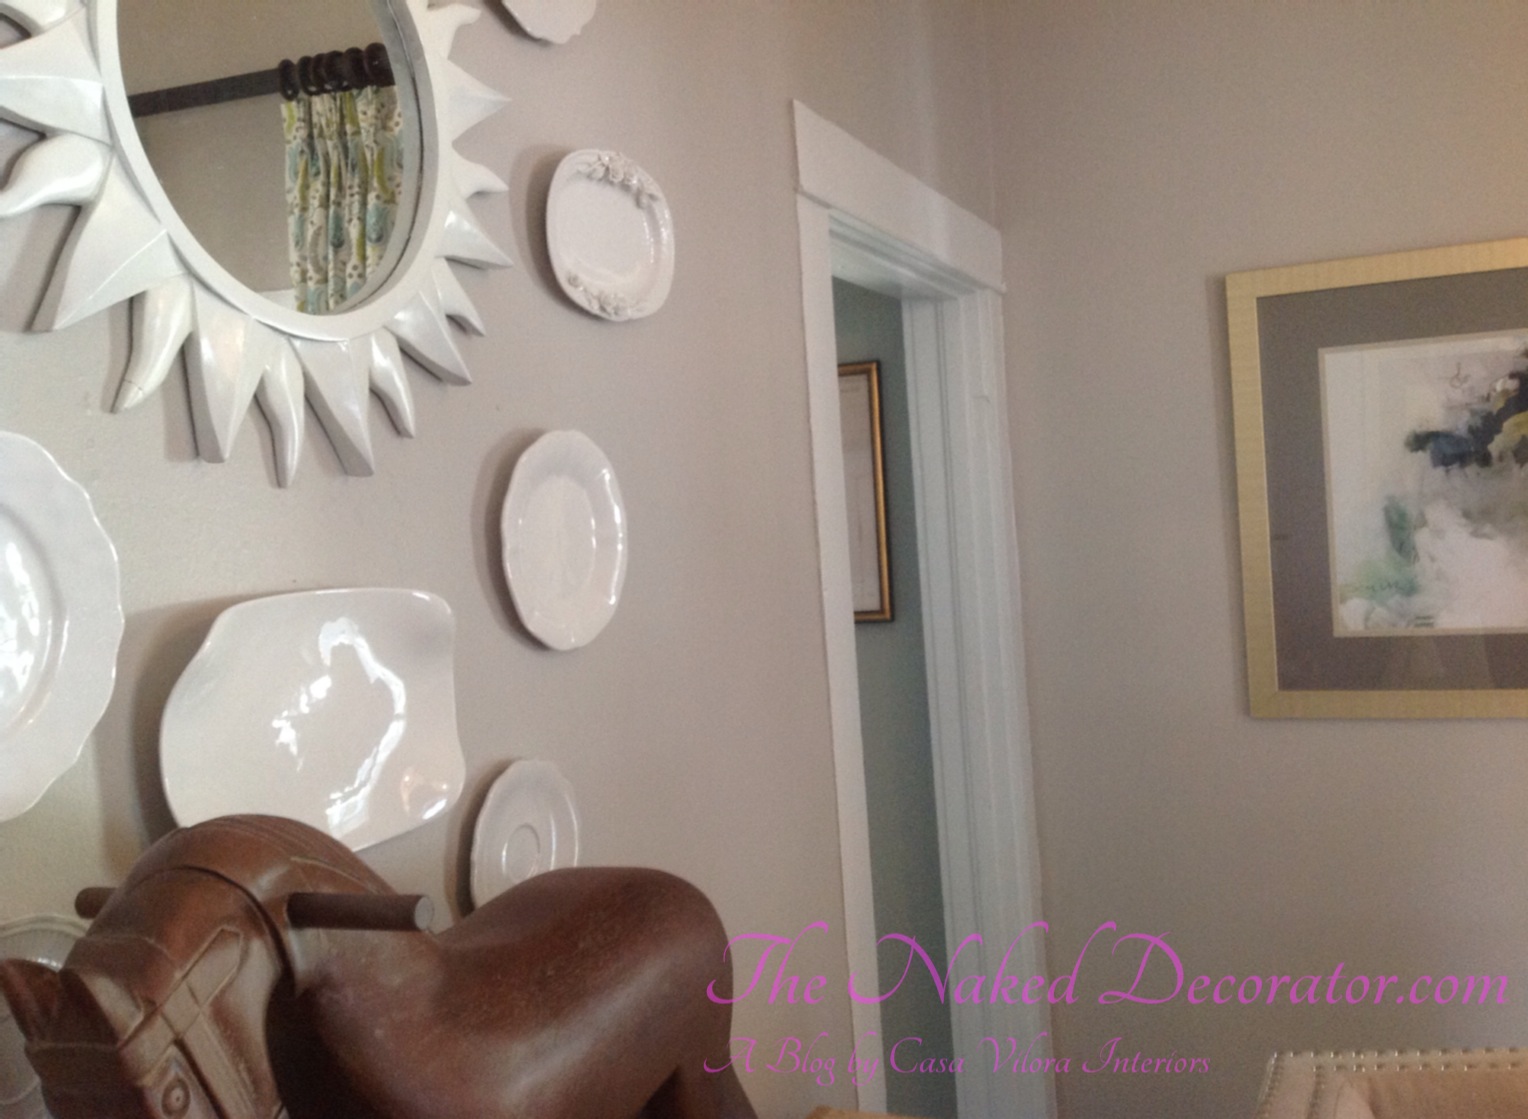
Main Wall in Dining Room at Casa Vilora Interiors

one room challenge

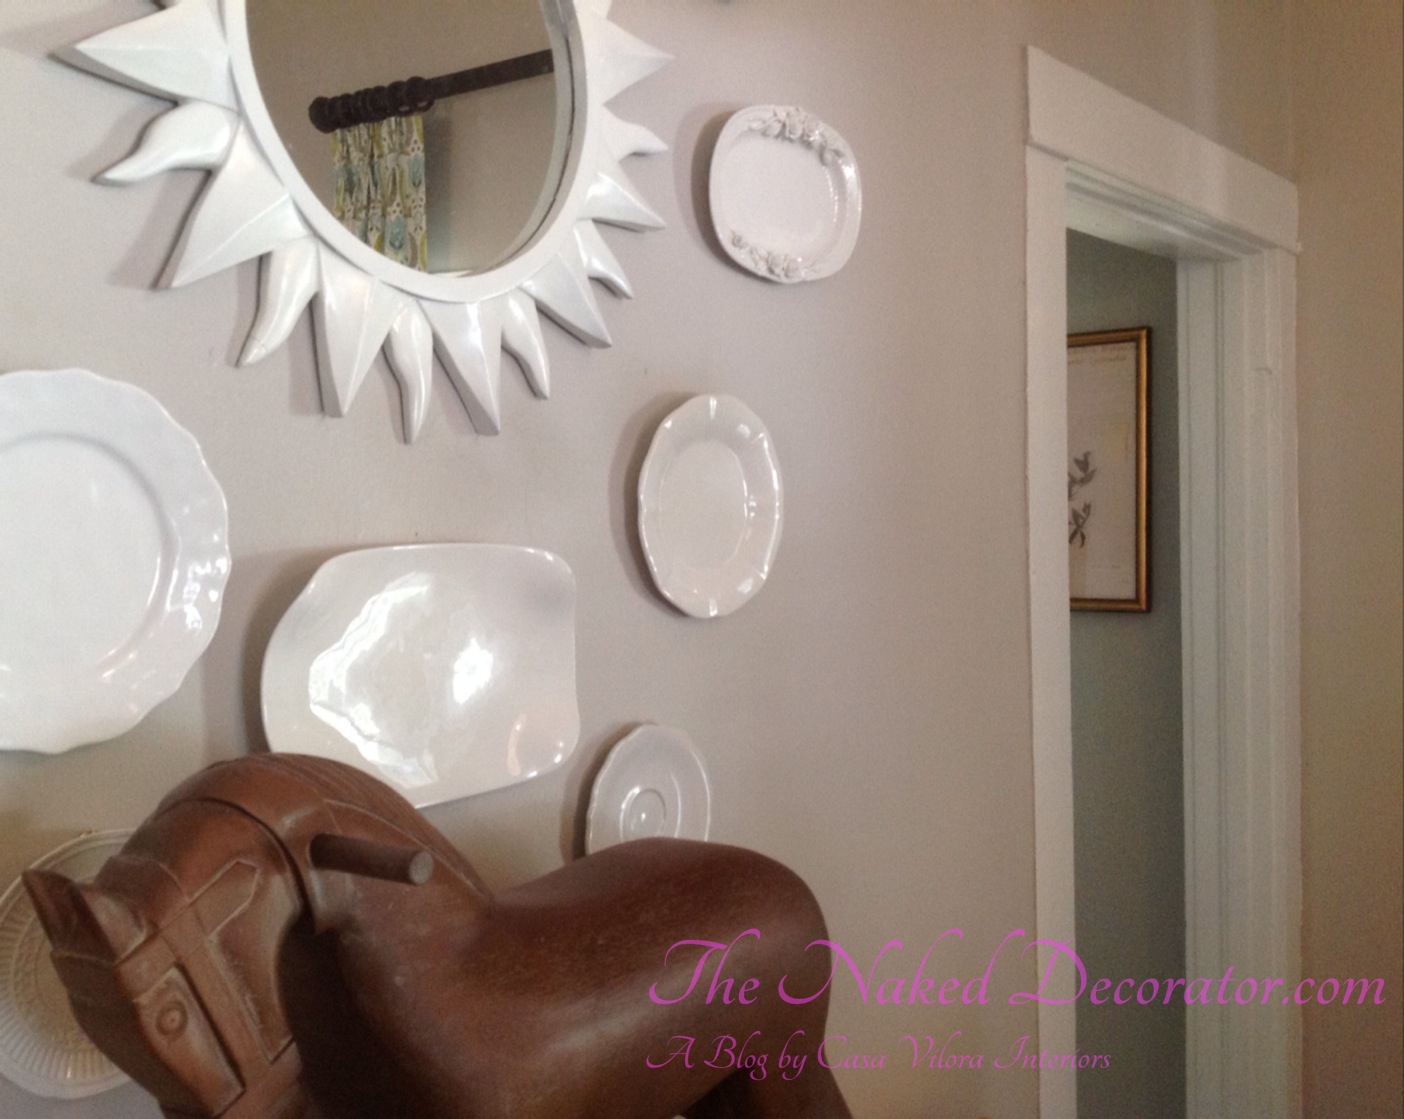
Main Wall with Carousel Horse in Dining Room at Casa Vilora Interiors

The area rug is one of my favorite additions to the room (after the carousel horse that is :-) )

one room challenge

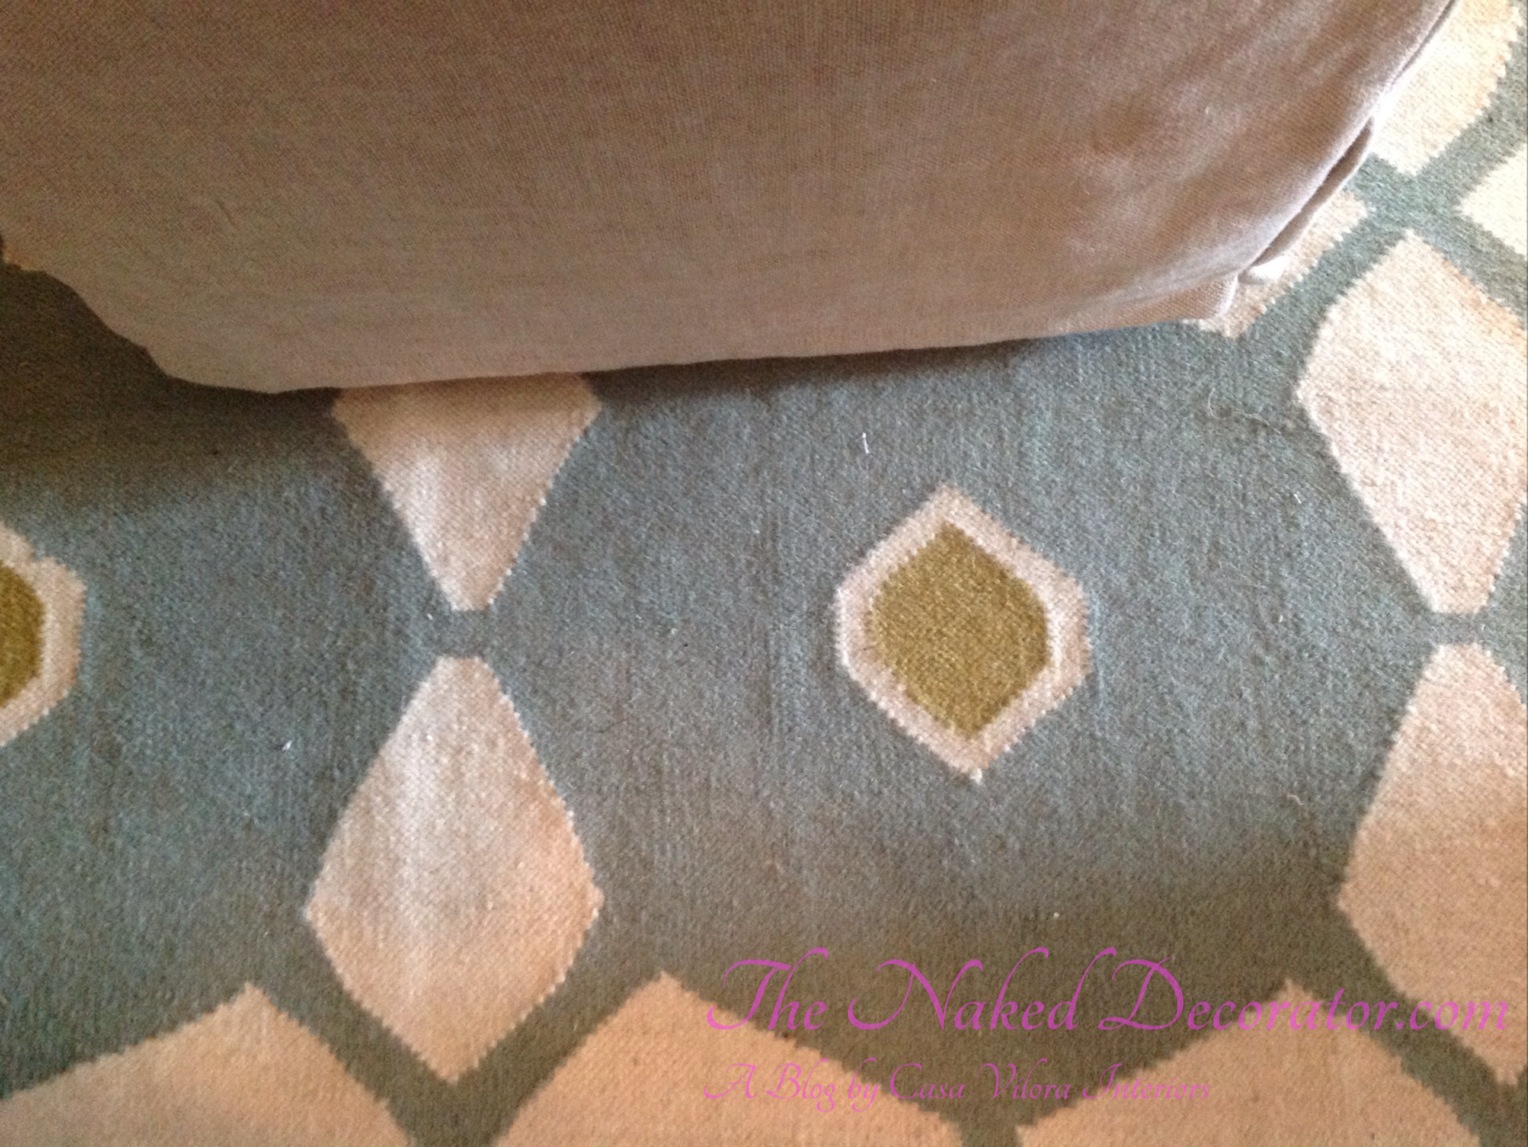
Flat Weave Area Rug in Dining Room at Casa Vilora Interiors

So as you can see, there are a bunch of unfinished vignettes in progress, but I have to say that the dining room is coming along nicely. What do y’all think so far?

Still waiting on the box pleat skirt for the console table, and throw pillows for the banquette and armchairs that my workroom is so lovingly customizing for me. I also need place settings for the table to dress it up a bit. I cannot wait!!

one room challenge

Dining Room at Casa Vilora Interiors

I know these are just tiny snippets of the room, but like I said, I don’t want to give it all away until reveal day! So please come back next week for more. You can check out my dining room makeover progress anytime by clicking the ORC icon in my side bar, that looks a little somethin’ like this :-)

ORClinkingparticipantCIH

And while you’re at it, check out some of the other rooms in the link party and the main participants below

Thanks for stopping by today! Hope you all have a terrific Thursday!
Be Inspired!
Casa Vilora Interiors

Veronica Solomon, Casa Vilora Interiors
VeronicaSolomon.com

One Room Challenge: Studio Dining Room – Week 1

So I am very excited to announce that I will be linking into this year’s One Room Challenge (ORC).

What is One Room Challenge you ask?…… Great question!…….

ORC is a semi-annual event where 20 bloggers, made up of Professional Designers, DIY-ers, and Interior Designer Bloggers, transform a room from start to finish. For the next six Wednesdays, they will be giving updates on the progress of their rooms.

Here are the participants One Room Challenge

 Abby M. Interiors

They have graciously opened the challenge to other bloggers like myself who would like to participate by linking in on Thursdays to show the progress of a space they are working on.

This is a great opportunity for me to meet and get to know fellow bloggers, and maybe even gain some new followers. This challenge is sure to keep me accountable, on track and motivated to finish one of my personal projects. Too often my personal projects take the back seat due to time constraints. I think it’s a win-win, and I am super excited to participate!

Basically I have chosen a room that I will be working on for the next six weeks, and each Thursday I will share with you the progress of this room through to completion! How exciting is that? You will see a little bit of the behind the scenes of how a project comes together.

I was quite torn about which room to choose for ORC, so I had the kids take a vote.

Here were the choices:

  • The Study of my Design Studio
  • The Living Room of my Design Studio
  • The Dining Room of my Design Studio
  • The Kitchen of my Design Studio
  • The Master Bedroom of a wonderful client who I know would be ok with that

Well, it’s right there in the title……we ended up choosing the Dining Room/Conference Room of my Design Studio. Can’t wait to get this baby going!! :-)

Some of you may recall that my Studio is an historical 1905 Victorian cottage that I am leasing. The home needed a lot of TLC when I first saw it and I have been slowly working on each room as budget allows. Since it is a lease, I am very careful about the improvements I make. I do not want to put too much money into something I don’t own. I plan to buy it in the next year or so, but until then, I am penny pinching.

Here’s a Waterlogue image of the exterior. Isn’t it cute?! I loved it from the very first moment I saw it….despite the mess that it was.

Casa Vilora Interiors Design Studio located at 5602 Franz Rd Katy TX 77493

Casa Vilora Interiors Design Studio located at 5602 Franz Rd Katy TX 77493

About the Dining Room

When I first saw the dining room, I couldn’t believe how small it was and I couldn’t understand why someone would paint such a small space (ceiling included) in dark puke green. The room has just one window and doesn’t get much natural light, especially since there is a carport right by the window. The dining room has three doorways which makes it feel more like a pass through and not one to stop and linger in. The layout was going to be very difficult because traffic pattern was working against it.

Another challenge in the room is the thermostat which is smack dab in the middle of the main wall The room does have a few great features: High ceilings, wonderful casings around the window and doorways and the original hardwood floor stained a dark ebony.

The Floorplan

dining room floor olan

The Floorplan for Dining Room/Conference Room at Casa Vilora Interiors Design Studio

As you can see the traffic pattern is a bit weird so a traditional dining room layout would not work well. Besides, the space will not be used for dining, but as a conference room for meetings with clients.

The Goal for The Dining Room

  • For guests and clients to feel welcomed and at home
  • To complete it on a very limited budget utilizing items that I already own
  • No construction and only manageable DIY projects
  • Respecting the architecture and history of the home

The Feeling I want to Create

  • Light and airy with great traffic flow
  • casual feeling in keeping with the cottage feel of the home
  • comfortable and welcoming and feel more like a home than a business office

The Color Scheme

  • Cool grays, yellows, light turquoise, light jade, white

The Before

One Room Challenge Dining Room

Dining Room BEFORE

This was right after painting. Unfortunately I cannot find the picture of the puke green walls. I chose a nice cool gray (Benjamin Moore Silver Chain) for the walls, and a bright white for the ceiling to bring in as much natural light as possible.

one room challenge

Dining Room BEFORE

This shows the view to the kitchen. Notice the thermostat in the center of the wall? I decided not to move it, so I will have to decorate around it :-(

I really didn’t search for inspiration because I knew exactly what I wanted the room to look like, but here are a few pictures that will help you visualize my goal for the space

one room challenge

Source: Melissa G Moore Blog

One Room Challenge Dining Room

Source: Haltik.net

One room challenge - dining room

Source: The Decoist

Ok, that is it for now! I hope you come along each week and follow the progress of the Studio Dining Room makeover.

Please feel free to leave me your thoughts and comments!

You can look for this badge in my side bar to follow along anytime!

ORClinkingparticipantCIH
Click here to visit the link party going on now!

Have a terrific Thursday!

Be Inspired!

Casa Vilora Interiors

Veronica Solomon, Casa Vilora Interiors
VeronicaSolomon.com

Tips For A Quick And Inexpensive Kitchen Makeover

109_21

Are you in the market for a major kitchen remodel? Maybe after some research and even getting a few quotes you realize that it may be out of your budget for the moment. A mini kitchen makeover might be all you need to freshen up and update your kitchen.

Here are a few easy and inexpensive things you can do to breathe new life into your kitchen:

  1. Paint cabinetry instead of replacing them. Cabinets are undoubtedly the big ticket item in a kitchen. Instead of replacing them altogether, painting them might be a much easier and less expensive solution…especially if they are good quality hardword. Perhaps they are the shorter 30″ or 36″ cabinets? A good finish carpenter can add cabinetry above the existing ones and tie them in with glass inserts or another decorative insert to look like they’ve always been there. Of course you have to have the space above your existing cabinets. Even if there is a bulk head, there may be hidden space above, so be sure to check.
  2. Add an island if you have room. It doesn’t have to be a large one; A 28″x48″ island is just the right size to add some extra storage and convenience in your kitchen. A good finish carpenter can add one for you very inexpensively or you can purchase a ready made one. It’s also very visually appealing to paint or stain the island a different color than the other cabinets and adding a different type of surface.
  3. Upgrade countertops to granite, quartz, corian or concrete. These can be very pricey, but sometimes you can find great deals if you shop around.
  4. Update light fixtures and add more lighting if at all possible. Undercabinet lighting strips that plug in are quick and easy to install and make a huge difference
  5. Adding hardware to cabinets. This may seem like a simple idea that won’t make a difference, but I am here to tell you that adding the right hardware to cabinets makes a huge difference! Hardware dress your cabinetry like jewelry does a little black dress
  6. Consider replacing appliances with quality commercial grade appliances. These can be very expensive but may be worth shopping around for a bargain. There are scratch and dent stores in some cities where you can purchase gently used or store display appliances for alot less. Good quality appliances will last a very long time, so when you are finally ready for the big renovation, you already have them and won’t need to purchase them again!
  7. Consider Open Shelving in place of some cabinets. Open shelving is not for the feint of heart – it has its downside. You have to stay organized and dust regularly, but they are beautiful to look at it. They are great for visually “breaking up” a long bank of cabinetry. Consider putting a great looking, colorful or textural wallpaper or even paint behind the shelves to add interest or a focal point in the kitchen. This is a great place to highlight and group a collection like ginger jars or china
  8. Consider replacing some cabinet doors with glass inserts. Much like open shelving, they “break up” the look of a long bank of cabinets. You can also add wrought iron, chicken wire or even fabric inserts instead of glass.
  9. Hang a pot rack above the island or backsplash as a convenient way to get to your favorite cooking utensils. The better looking the pots are, the better
  10. Add window treatment. Kitchens have so may hard surfaces and hard lines. A great way to introduce some softness and color is to add a window topper or panels if you have large windows. Layering window treatments is also a great idea in a kitchen. For example, you can add a natural woven shade for privacy and a pair of drapery panels as a decorative layer.
  11. Update the backsplash. One of my pet peeves is walking into a kitchen with no backsplash (drywall for a backsplash). There are so many products available that can be used for this purpose…the sky is the limit! The most common backsplashes you will find are ceramic tiles, travertine tiles, porcelain tiles, slate tiles and mosaic tiles. Anyone of these options is fine, just be sure to make sure it coordinates well with your countertop.

5883ffe4d8dc


So there you have it, 11 things you can do to freshen up your kitchen. Doing them all might be just as overwhelming as a full remodel, so pick a few from the list and go forth and decorate!

Be Inspired!

Veronica Solomon

Veronica Solomon


Taking Your Dorm Room From Drab to Fab

It can be a proud but scarey moment when you leave the comforts of your parents’ home – most likely the only home you’ve known all your life, and go off to college. You finally have that independence that you’ve been craving for so long…..until you see your new accommodations for the first time.
A cold sterile room with two beds, boring furniture, plain walls and cold floors will probably come as a shock. Adjusting to new surroundings and challenging class schedules will be hard enough, so here are a few tips to get you started on making your dorm room a warm, cozy and inviting space where you’ll want to hang out and study.

Parents take note. Making a small investment in helping your freshman create a beautiful, functional amd livable space, may be the best thing you can do to help them adjust to life away from home.

  • If you are lucky enough to be in a dorm where it’s ok to paint the walls, then go for it! Avoid usig the school colors – that’s cliche. Go for a cool neutral to give a more airy and fresh feel. Cool colors tend to make a small room look bigger unlike warm colors that advance in a space. If painting is not an option, go with the color scheme already defined for you and take it to the next level with your bedding and accessories. You may also consider using removable wallpaper or wall decals for a unique look. Deco Mates sells peel and stick wallpaper and wall decals inexpensively.
  • Use modular furniture instead of fixed pieces. Modular furniture are designed to be moved around and used in various configurations, so you are not locked in to any one layout. Always keep scale in mind when purchasing furniture. Most likely you will not have room for a sofa, but a small chair may be ideal to give you additional seating
  • Build a loft to basically double your space. Adding a sleeping loft using inexpensive materials like plywood, frees up floor space that you can use for a desk area or seating area. You may want to call a professional in for this one, because it has to be fully secured to the walls
  • Lighting will be your best friend in a small dorm room. Most don’t come with an over head fixture, and even if they do, they are not the best looking. You can pick up an inexpensive chandelier and replace the ceiling fixture or buy a plug-in pendant and ’swag’ the cord into the wall. Attach the chain or wire to a hook in the ceiling, swag it into a corner and use the outlet. This overhead lighting will make the space a lot more inviting and add more task lighting for study time.
  • Plastic crates are a staple item in dorm rooms when it comes to storage, but not the most attractive. Cube ottomans look better and can be just as spacious. They look more like furniture than storage space, but serve as a good place to hold video games, books and other smaller items. Great idea for functional storage
  • Say goodbye to cold floors. There are wonderful products available that are inexpensive and will add warmth to the floors. Flor is an innovative system of carpet squares that you assemble to create area rugs or wall to wall designs of any size. . Allure Stainmaster Vinyl Flooring is a thin laminate that adheres to itself, rather than the floor. That makes it easy to put down. It’s about $25 a box, and an average dorm space might use about five-and-half boxes. All you need is a blade knife to cut the ends to size and then snap each flat vinyl piece to the others.
  • Decorate with pictures of your family and friends. For one, it helps to have your family around you even if they are just photographs. If you have a free wall, why not create a collage or a salon style design with framed pictures in various sizes or take your favorite picture and have it blown up to larger than poster size. It makes a bigger statement than just taping pictures to wall.
  • Don’t skimp on your bedding. You’ll have to sleep under it every night, so make sure it’s something that feels good to you. Choosing a solid pattern will give you more decorating options than bedding with bold patterns.
  •  Use throw pillows to accent your room and provide comfort, as well. Plus, you can get quality ones without spending a great deal of money
  • Outfit your closet with items that will make life easier, like plastic hooks for hanging towels and shoe organizers that hang on the back of the door.

Here are some pictures of dorm rooms that anyone would want to hang out in.

www.casavilorainteriors.com/products.php